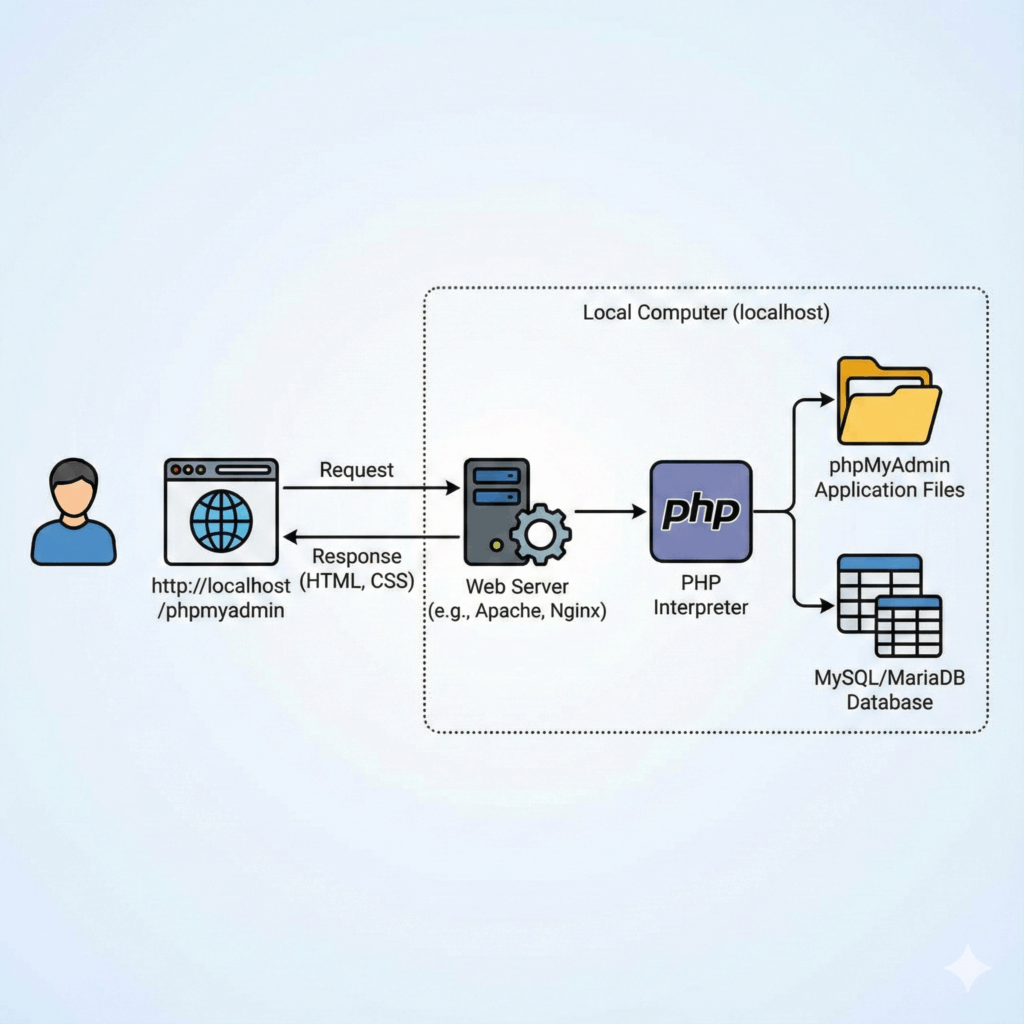
If you’re a web developer or someone who works with PHP, you’re probably familiar with XAMPP. XAMPP is a cross-platform web server solution that includes Apache, MySQL, PHP, and Perl. It lets you set up a local web server environment on your computer, allowing you to test and develop websites offline before deploying them to a live server. While XAMPP is an invaluable tool, it can be daunting to set up and configure, especially for those new to web development. Even experienced users may encounter issues with installation and configuration that can be frustrating to troubleshoot. This blog post aims to walk you through the process of installing, setting up, and fixing common problems with XAMPP on localhost. We’ll cover everything you need to know, from downloading and installing XAMPP to configuring it for your specific needs. Whether you’re a beginner or an experienced user, you’ll find helpful tips and solutions to make your XAMPP experience smoother and more productive. So
Download and install the latest version of XAMPP from the official website.
To begin setting up XAMPP on your local machine, the very first step is to download and install the latest version of XAMPP from the official website. XAMPP is an open-source web server solution that allows you to run PHP, MySQL, and Apache effectively on your PC. With XAMPP, you can easily create, work, and test web applications offline without having to connect to a remote server. To ensure everything works perfectly, download the latest version of XAMPP that corresponds with your operating system, and follow the installation wizard to install it. Make sure to carefully select and install the required components, including PHP, MySQL, and Apache, during the installation process. Once installation is complete, you’ll need to spend time configuring and troubleshooting potential issues that may arise.
Run the installer and select the components you want to install.
Welcome to the “Install, Setup and Fix Problems with XAMPP in localhost” guide. In order to install XAMPP, please follow the steps given below. Firstly, download the latest version of XAMPP from the official website. Once downloaded, locate the installer and run it. On the installer screen, you will be prompted to select the components you wish to have installed. It is strongly recommended that you consider the components required for your project to avoid unnecessary installation of software. You can also choose to install additional components at a later time.
Open the XAMPP Control Panel and start the Apache and MySQL services.
To install and set up XAMPP in localhost, it is essential to follow a series of steps. Once you have successfully installed XAMPP on your computer, the next step involves starting the Apache and MySQL services. To do this, open the XAMPP Control Panel, which can be easily accessed from the XAMPP installation directory. Once opened, locate the Apache and MySQL services and click the ‘Start’ button next to them. This will initiate the services, and you should now be ready to start working with XAMPP. If you encounter any problems while starting the services or XAMPP, it is advisable to troubleshoot the issue before proceeding further.
Create a new database and user in the phpMyAdmin interface.
Creating a new database and user in the phpMyAdmin interface is an essential step in setting up your development environment with XAMPP in localhost. This process entails accessing the phpMyAdmin interface, creating a new database, and setting up a user that will grant access to the database. By default, XAMPP sets up a root user account with no password, a security vulnerability that should be addressed before deploying your application. Creating a new user account and granting necessary permissions ensures that your database stays secure while allowing you to access and manipulate the database smoothly. This guide will walk you through the process of creating the new database and user, ensuring a smooth installation and setup of XAMPP in localhost.
Configure your web application to use the correct database settings.
One crucial step in successfully installing, setting up, and troubleshooting issues with XAMPP on localhost is configuring your web application to use the correct database settings. Without proper database settings, your application may not be able to access or manipulate data effectively. To begin configuring your database, you first need to ensure that XAMPP is running and that your preferred database server, such as MySQL or MariaDB, is up and running. Then, you can access your database management tool, such as phpMyAdmin, to create your database, tables, and user accounts. Finally, you need to update your application’s configurations or options so that it points to the correct database settings, including the hostname, port, database name, username, and password. With these steps, you can ensure that your web application interacts with your database properly, and you can avoid common issues such as SQL errors, connection timeouts, and incorrect data retrievals.
Test your application by accessing it through your web browser.
After completing the installation and setup process for XAMPP on your localhost, it is important to test your application to ensure it is functioning correctly. One way of doing this is by accessing your application through your web browser. By doing so, you can simulate user behavior and ensure that your application is able to interact with the server correctly. This process is critical for the proper functioning of your application, as it can help identify any issues or bugs that may have been missed during the development process. It is recommended that you thoroughly test your application in multiple web browsers to ensure compatibility with different operating systems and devices. By taking the time to test your application, you can ensure that your users have a positive experience and that your application is functioning smoothly.
If you encounter any issues, check the XAMPP logs for error messages.
When installing and setting up XAMPP on your local machine, encountering issues is not uncommon. However, it is good practice to first attempt to troubleshoot on your own before resorting to technical support. In such instances where you experience problems, it is advisable to start by checking the XAMPP logs for any error messages. This information can be used to understand what went wrong and how to resolve the issue. XAMPP logs can be accessed by navigating to the XAMPP installation directory and locating the “logs” folder. Inside, you will find log files that contain error messages that can give insight into the problem. By following this simple step, you can resolve issues and get XAMPP running smoothly on your local machine.
Make sure your firewall is not blocking the Apache or MySQL ports.
One common issue encountered while setting up XAMPP in localhost is the restriction of access to Apache or MySQL ports by the firewall. This can cause connectivity issues and prevent the smooth functioning of XAMPP. To resolve this problem, it is crucial to ensure that the firewall settings are properly configured to allow traffic through the Apache and MySQL ports. This can be achieved by adding exceptions in the firewall settings for Apache and MySQL or by temporarily disabling the firewall during the XAMPP installation and configuration process. It is essential to note that disabling the firewall as a permanent solution is not recommended. Therefore, it is imperative to ensure that the firewall settings are updated to allow the required traffic to pass through the relevant ports for XAMPP to function correctly.
If you need to change the default port numbers, modify the configuration files.
In order to further customize the XAMPP server setup, it may be necessary to modify certain default configurations. For instance, changing the default port numbers may be required to enable access to additional services or to resolve port conflicts. To change the default ports, it is necessary to modify the relevant configuration files. This should be done with caution as incorrectly modifying these files can result in server instability or loss of functionality. Therefore, it is important to follow best practices and make backup copies of the files before making any modifications. With the appropriate modifications, XAMPP can be configured to meet the needs of any project.
Keep XAMPP and your web applications up to date with the latest security patches.
If you’re using XAMPP to develop web applications in your localhost, it is crucial to keep the software and your web applications up to date with the latest security patches. The XAMPP software, which includes Apache, MySQL, PHP and Perl, needs regular updates to fix known security vulnerabilities and to ensure you are running the latest stable releases of its components. In addition to updating the software itself, it is equally important to update any web applications that you run using XAMPP. Outdated web applications are prone to security vulnerabilities which could be exploited by attackers. Regularly checking for updates and applying security patches will help keep your XAMPP environment secure and reduce the risk of data breaches or other security incidents. Make it a habit to regularly check for updates and install them as soon as possible to prevent security risks.
In conclusion, XAMPP is a powerful tool for anyone looking to develop and test applications locally. Installing and setting it up is relatively easy, and with some basic configuration, you can have your local development environment up and running in no time. However, as with any software, problems may arise. It is important to troubleshoot and fix these issues to ensure you can continue to use XAMPP effectively. By following the tips and suggestions outlined in this post, you can confidently install, set up, and troubleshoot any problems you encounter with XAMPP on your localhost.


