As an advanced programmer, you’re probably already familiar with the indescribable power of PHP when it comes to web development. But have you ever wondered how to take advantage of PHP’s built-in server for local development? If so, then this article is precisely what you’ve been seeking. In this comprehensive guide, we’ll dig deep into the world of PHP -S localhost and unveil its astounding potential for streamlining your coding efforts. Remember those open-source projects you wished to test out before pushing live? Yeah, that’s what we are talking about.
Keep reading to uncover the secrets of this fantastic feature and explore various tips and tricks you can employ to maximize your local development workflow, all while keeping your focus on writing impeccable code.
PHP’s Built-in Server: The Game Changer
Gone are the days of setting up a separate testing environment like XAMPP or WAMP to test out your PHP code. With the introduction of version 5.4, PHP has equipped us with a handy built-in server that lets you run your code in a smooth and efficient manner – directly from your terminal!
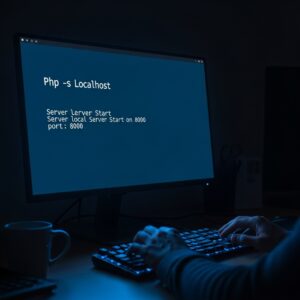
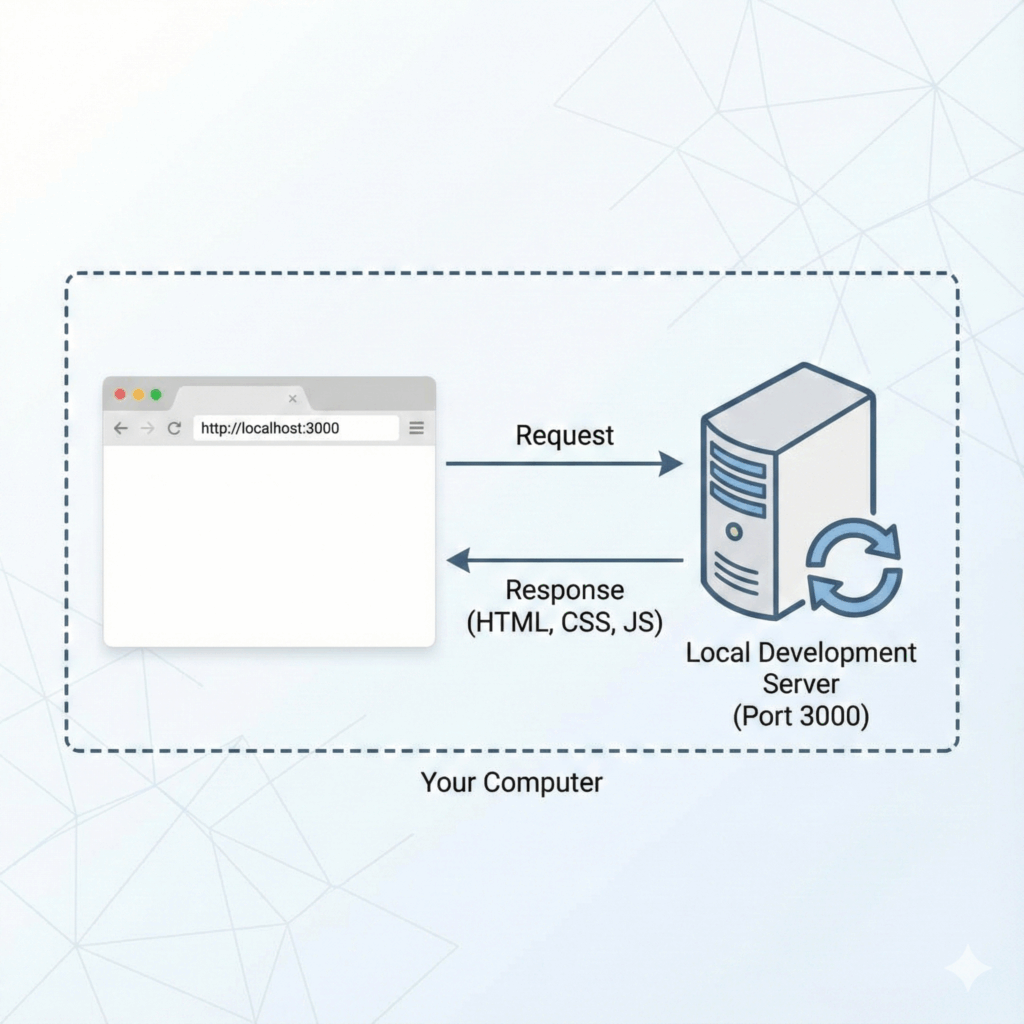
To get started with PHP’s built-in server, simply use the command `php -S localhost:port`. This command will fire up a local development server on the specified `port`. For example:
php -S localhost:8000
The moment you execute this command, you’ll notice that PHP starts serving your current working directory as the document root.
# Note: As intriguing as PHP’s built-in server may seem, it is essential to understand that it is intended solely for local development purposes. Avoid using it for production environments at all costs.
Getting Started: A Practical Walkthrough
With the basics of PHP -S localhost now firmly established, let’s dive into a practical demonstration of how to make the most of this powerful tool. The following steps will not only help you set up a local development server but also offer insight into some advanced configurations to optimize your workflow.
# Step 1: Navigate to Your Project Folder
First and foremost, open your terminal and navigate to the project folder that contains your PHP files. This can typically be done using the command:
cd path/to/your/project
# Step 2: Execute the PHP -S Localhost Command
Once you’re inside the project folder, it’s time to start the built-in server. As we mentioned earlier, use the `php -S localhost:port` command to get it up and running. Suppose you want to serve your files on port 8000, execute the following command:
```
php -S localhost:8000
As soon as you execute this command, your terminal should display something like this:
```
PHP 7.4.3 Development Server (http://localhost:8000) started
# Step 3: Configure the Router Script (Optional)
One of the lesser-known features of PHP -S localhost is its ability to handle custom router scripts. This advanced functionality enables you to process incoming HTTP requests dynamically, offering greater control over your environment.
To use a custom router script, add the `-t` flag followed by the document root and then provide the router script file. For instance:
php -S localhost:8000 -t ./public/ ./router.php
In this example, the `./public/` folder is used as the document root, and the `./router.php` file serves as the router script.
Key Tips and Tricks for Advanced Programmers
Now that you’re well-versed with the inner workings of PHP’s built-in server, here are some essential techniques to help you get the most out of your PHP -S localhost experience.
1. Efficient Logging: To create a log file that contains all server-related errors, warnings, or notices, simply append `> log.txt` at the end of your command like this:
php -S localhost:8000 > log.txt
2. Custom INI Settings: If you need to modify or set specific PHP INI settings for your project, use the `-d` flag followed by the setting and its value, as shown below:
php -S localhost:8000 -d upload_max_filesize=50M -d post_max_size=50M
3. Bind to External Interfaces: By default, PHP’s built-in server binds only to the localhost. However, if you’d like to expose it to external interfaces or networks, replace `localhost` with `0.0.0.0`, like so:
php -S 0.0.0.0:8000
Caution: It’s crucial to comprehend the associated security risks when making your development server accessible from external interfaces. Always ensure that you have proper security measures in place.
In conclusion, the PHP -S localhost command is an invaluable asset in any programmer’s toolkit. As showcased throughout this article, the built-in server offers a plethora of advanced features and configurations that can transform your local web development experience. So go ahead, fire up that terminal, and start coding with newfound efficiency!
How to generate secure SSL certificate for localhost in XAMPP and Enable HTTPS for localhost
PHP in VSCode using XAMPP
How do I run a PHP file on localhost?
To run a PHP file on localhost, follow these steps:
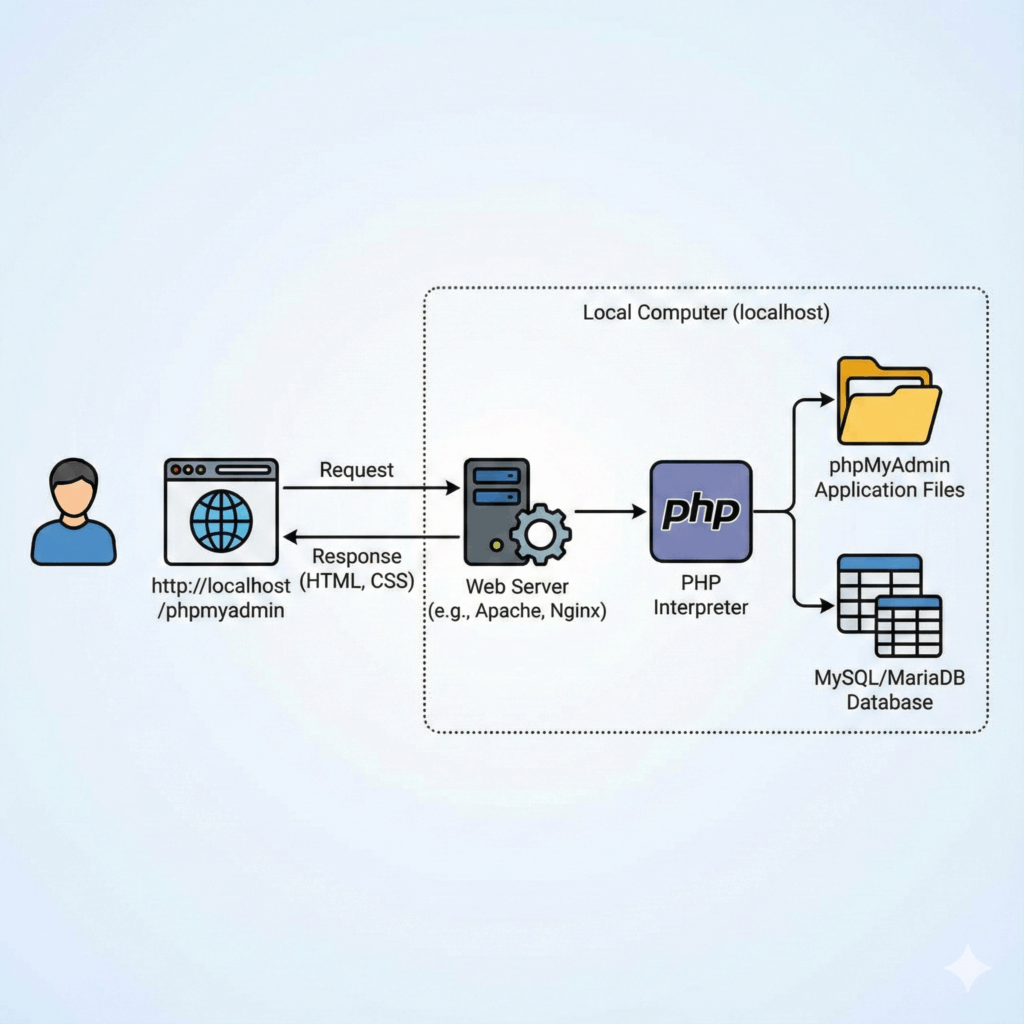
1. Install a web server: First, you need to have a web server installed on your computer. Popular options include Apache, NGINX, and for Windows users, XAMPP or WampServer.
2. Install PHP: Ensure that you have PHP installed on your computer. If you’re using XAMPP or WampServer, PHP is already included.
3. Save the PHP file: Create a new folder (e.g., “my_project”) within your web server’s document root (for example, “htdocs” in case of Apache server). Save your PHP file (e.g., “index.php”) inside this folder.
4. Start the web server: Start your web server by running the appropriate command or using its control panel. For instance, in XAMPP, open the XAMPP Control Panel and click “Start” next to “Apache.”
5. Access the PHP file: Open your web browser and navigate to your PHP file by typing http://localhost/my_project/index.php in the address bar, replacing “my_project” and “index.php” with your folder and file names.
The PHP file should now execute, and you will see the output on your browser.
How do I launch localhost?
To launch localhost, follow these steps:
1. Install a local web server: Download and install a web server such as Apache, Nginx, or a server package like XAMPP or WampServer.
2. Configure the server: Each web server has specific configuration files where you can define the document root (the folder where your website’s files will be stored) and other settings. Make sure to set up the server according to its documentation.
3. Place your project files: Copy your website’s files into the document root you specified in the previous step.
4. Start the server: Launch your web server software. This process varies depending on the server you chose. Refer to its documentation for instructions on starting it.
5. Access localhost in the browser: Open your preferred web browser and type “http://localhost” or “http://127.0.0.1” into the address bar. Press Enter, and you should see your website running on your local machine.
Remember that localhost refers to your own computer acting as a web server, allowing you to develop and test websites without publishing them to the internet.
How to run PHP locally in browser?
To run PHP locally in your browser using a localhost, follow these steps:
1. Install a local server: To execute PHP code, you’ll need to have a web server installed on your computer. Some popular web servers that support PHP include XAMPP, WampServer, and MAMP. Download and install any of these applications according to your operating system.
2. Configure the local server: Open the server application (e.g., XAMPP) and ensure that the Apache and MySQL services are running. You can use the default settings or adjust them according to your requirements.
3. Create a PHP file: Using a text editor or an Integrated Development Environment (IDE), create a new PHP file with the extension “.php” (e.g., “index.php”). Write your PHP code inside the “ tags.
4. Save the PHP file in the server’s root directory: Save your PHP file within the web server’s root folder, which is typically located in:
– XAMPP: `C:xampphtdocs`
– WampServer: `C:wampwww`
– MAMP: `/Applications/MAMP/htdocs/`
You can also create a subfolder inside the root directory to better organize your files (e.g., `C:xampphtdocsmy_project`).
5. Access the PHP file in your browser: Open your preferred web browser and type the localhost address followed by the path to your PHP file. For example, if you saved your PHP file in a subfolder named “my_project,” you would enter the following URL:
http://localhost/my_project/index.php6. The PHP code will be executed, and the output will be displayed in your browser.
Note: Keep in mind that to execute PHP code, you need to access the file through the web server (using “http://localhost/…”), not by opening the file directly with your browser (using “file:///…”).
How to run PHP in Chrome?
To run PHP in Chrome on a localhost, you need to set up a local web server like XAMPP, WAMP, or MAMP. These applications provide an environment for you to execute PHP scripts locally. Here’s a step-by-step guide on how to set up and use XAMPP:
1. Download and install XAMPP: Visit the official XAMPP website (https://www.apachefriends.org/index.html) and download the version suitable for your operating system. Run the installer and follow the installation instructions.
2. Start XAMPP: Open the XAMPP control panel and start the Apache web server by clicking the “Start” button next to “Apache.” This will enable PHP support on your localhost.
3. Create your PHP file: Open your preferred text editor or IDE and create a new file with a .php extension (e.g., “index.php”). Write your PHP code within the “” tags.
4. Save your PHP file in the htdocs folder: Locate the XAMPP installation directory (usually “C:xampp” on Windows, “/Applications/XAMPP” on macOS, or “/opt/lampp” on Linux). Inside the XAMPP directory, find the “htdocs” folder and save your PHP file there.
5. Access your PHP file in Chrome: Open Google Chrome and type “http://localhost/your-file-name.php” in the address bar, replacing “your-file-name.php” with the actual name of your PHP file. Press Enter to run your PHP script.
Your PHP file should now be executed, and you can view the output on your Chrome browser. If you have any issues, ensure that XAMPP is running and the Apache web server is started.
How to set up and run a PHP development server using ‘php -S localhost’ for local testing?
Setting up and running a PHP development server for local testing is a simple process. Here’s a step-by-step guide on how to do it using the `php -S localhost` command:
1. Install PHP: First, you need to have PHP installed on your system. You can download the latest version of PHP from the official website: https://www.php.net/downloads.php. Follow the installation instructions for your operating system.
2. Create a project folder: Create a new folder where you will store your PHP project files. For example, you can create a folder named “my-php-project” on your desktop or any other location you prefer.
3. Add PHP files: Add your PHP files to the “my-php-project” folder. For testing purposes, you can create a simple PHP file named “index.php” with the following content:
4. Open Terminal or Command Prompt: Navigate to the “my-php-project” folder using Terminal on macOS or Linux, or Command Prompt on Windows.
5. Start the PHP development server: Run the following command to start the PHP development server on localhost:
php -S localhost:8000
This command tells PHP to start a development server listening on localhost at port 8000. You can change the port number if you want. For example, you could use `php -S localhost:8080` to run the server on port 8080.
6. Open a web browser: Launch your preferred web browser and enter the following URL in the address bar:
http://localhost:8000
Replace “8000” with the port number you used when starting the PHP development server.
7. Test your PHP code: You should now see the output of your “index.php” file, which should display “Hello, World!” in the browser. You can now modify your PHP files and refresh the browser to see the changes in real-time.
8. Stop the PHP development server: When you’re done testing, you can stop the PHP development server by pressing `Ctrl + C` in the Terminal or Command Prompt window.
By following these steps, you can easily set up and run a PHP development server on localhost for local testing using the `php -S localhost` command.
What are the benefits and limitations of using ‘php -S localhost’ compared to a full LAMP/WAMP/MAMP stack in a localhost environment?
Benefits of using ‘php -S localhost’ compared to a full LAMP/WAMP/MAMP stack:
1. Lightweight and quick setup: Running ‘php -S localhost’ only needs PHP installed on your system, making it a lightweight alternative to setting up a server environment using LAMP/WAMP/MAMP.
2. Easy to use: With the built-in PHP web server, you can easily start a local development environment by running a single command.
3. Less resource-intensive: The built-in PHP server usually consumes fewer resources than a full stack solution, which can be beneficial for developers working on systems with limited resources.
Limitations of using ‘php -S localhost’ compared to a full LAMP/WAMP/MAMP stack:
1. Not suitable for production: The built-in PHP web server is not designed for production environments, and using it for such purposes can lead to performance issues and security risks.
2. Limited functionality: The built-in PHP server does not offer the same level of functionality as a full LAMP/WAMP/MAMP stack. For instance, it lacks advanced features such as virtual host configuration, SSL support, or advanced caching mechanisms.
3. No database server included: The built-in PHP server does not include a database server like MySQL or MariaDB, which are components of a full LAMP/WAMP/MAMP stack. You will need to set up and manage your database server separately.
4. Less suitable for multi-language projects: If your project requires server-side scripting or processing in languages other than PHP, a full LAMP/WAMP/MAMP stack might be more suitable since it can include additional components like Apache, Nginx, or other web servers that support multiple languages.
In summary, using ‘php -S localhost’ is a lightweight and convenient option for simple PHP development tasks in the localhost environment. However, for more complex projects or production environments, a full LAMP/WAMP/MAMP stack would provide more functionality and better performance.
How to resolve common issues and errors when running PHP scripts through ‘php -S localhost’?
When running PHP scripts through ‘php -S localhost’, you might encounter various issues and errors. Here are some common problems and their resolutions:
1. Address already in use:
This error occurs when the port you’re trying to use for your PHP server is already being used by another application or service. To resolve this issue, you can either stop the application using the port or change the port on which you want to run your PHP server.
e.g., Use a different port like 8080:
php -S localhost:80802. Missing PHP extensions:
If your PHP script relies on certain PHP extensions that are not installed or enabled, you’ll face errors. To resolve this issue, check the required extensions in your project, install them, and enable them in your php.ini file.
3. Permission issues:
If you get permission-related errors while running your PHP script, you need to ensure that the necessary folders and files have proper access permissions. You can modify the permissions using the ‘chmod’ command on Linux or macOS, or changing the properties on Windows.
4. Syntax errors in your PHP code:
Check the error messages displayed in the terminal, and fix any syntax errors found in your PHP code. If needed, use a modern IDE that can help with code completion and syntax checking.
5. Incorrect .htaccess configuration:
If you’re using URL rewrites or other Apache-specific configurations, make sure to have a properly configured .htaccess file. Double-check your rewrite rules and the syntax of the .htaccess file.
6. PHP version compatibility:
Ensure that your PHP scripts are compatible with the PHP version you are using. Updating your PHP version or making necessary changes in the code for compatibility can resolve related issues.
Remember to always check the error logs and messages in the console when diagnosing errors, as they can provide essential information for identifying the root cause of the issue.


