
How to Master Localhost API Testing with Postman: Uncover the Hidden Gems
As a seasoned programmer, you might be thinking that testing APIs on localhost is a piece of cake. It can be, but what if I told you there are hidden gems waiting to be discovered? Get ready for an in-depth guide on how to use Postman to test API on localhost like a pro.
In this article, we’ll explore advanced techniques and user-friendly approaches to work with Postman, customizing it to your advantage. Let’s dive into the deep end and unravel the untold Postman secrets together.
The Basics: Setting up Postman
Before we explore the advanced aspects, let’s go over the fundamentals of setting up Postman to interact with an API on localhost:
1. Install and run [Postman](https://www.postman.com/downloads/) on your system.
2. Create a new request by clicking the “+” button (located in the top-left corner).
3. Choose the HTTP method (GET, POST, PUT, DELETE, etc.) according to your requirements.
4. Input your localhost URL followed by the endpoint and any required parameters.
5. If necessary, add relevant headers (e.g., Content-Type, Authorization) in the Headers tab.
6. For methods needing a request body, switch to the Body tab, select the desired input type, and enter the data.
7. Hit the “Send” button to execute the request and receive the response.
Now that we’ve covered the essentials, let’s get down to business.
Advanced Techniques for Localhost API Testing
# Utilize Variables for Seamless Workflow
Using hard-coded values everywhere can be cumbersome, especially when you need to update them frequently. Make your life easier by leveraging Postman’s variables for your localhost environment. Here’s how:
1. Head to the gear icon in the top-right corner and hit “Manage Environments.”
2. Click the “Add” button to create a new environment (e.g., Localhost).
3. Add the desired key-value pairs, such as `base_url: http://localhost:3000`.
4. Save and select the created environment in Postman.
Now you can use the variable in your requests with double curly braces: `{{base_url}}/api/endpoint`.
# Master the Art of Pre-request Scripts & Tests
Postman goes beyond sending basic HTTP requests. It allows you to run JavaScript snippets before or after a request. Unleash its scripting potential by using pre-request scripts to generate data, set variables, or perform calculations. Additionally, leverage tests for validating responses and ensuring your API functions as intended.
To access these features, navigate to the “Pre-request Script” and “Tests” tabs under any request. Insert the appropriate JavaScript code and enhance your localhost testing experience.
# Automate Testing with Collection Runner & Newman
Collection Runner is a built-in Postman tool that automates the execution of a series of tests. You can even parameterize the data and run iterations with different data sets. Want to take it a step further? Integrate your Postman collections into your CI/CD pipelines using Newman, Postman’s command-line companion.
Unleash the Power of Postman Interceptor
To truly master how to use Postman to test API on localhost, don’t miss out on the fantastic Postman Interceptor extension. This unique tool enables you to capture actual API requests and sync cookies between your browser and Postman. By installing and configuring the Interceptor, you can inspect real-time requests routed through your browser, modify them if necessary, and execute them directly in Postman. Say goodbye to tedious manual updates when testing APIs on localhost!
The Future of API Testing: Postman Mock Server
As we reach the end of our journey, it’s time to glimpse into the future. What if you want to test frontend code interacting with your API on localhost, but the server-side implementation is not completed yet? The answer lies in Postman’s very own Mock Server feature.
Create a Mock Server, define your endpoints and expected responses, and voilà! You now have a fully functional mock API on localhost to integrate with your frontend code, accelerating your development process.
Wrapping It Up: Master Localhost API Testing with Postman
So there you have it – an all-encompassing guide on how to use Postman to test API on localhost like a true expert. We’ve covered everything from setting up Postman and using variables to advanced techniques like pre-request scripts, Interceptor, and Mock Servers.
Now that you’re armed with this knowledge, it’s time to put it into practice and elevate your localhost API testing game. Go ahead and uncover the hidden gems and untold secrets of Postman today!
API Testing using Postman: Part 2 ( Understanding HTTP Methods and Authentication )

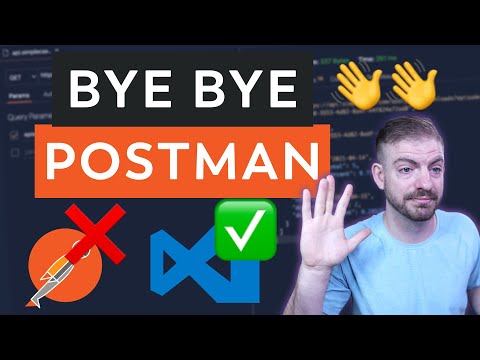
I Don’t Need Postman Anymore!! I Use VS Code Instead…
How to test API in Postman locally?
To test an API in Postman locally, follow these steps:
1. Install Postman: First, download and install the Postman application on your computer from the official website (https://www.postman.com/downloads/).
2. Open Postman: Launch the application and create an account or sign in to an existing one.
3. Create a new request: Click on the “+” icon at the top to create a new request tab.
4. Select the HTTP method: Choose the HTTP method you want to use for testing, such as GET, POST, PUT, DELETE, etc., from the drop-down menu next to the address bar.
5. Enter the API endpoint: Type the API endpoint URL you want to test in the address bar. Since you’re testing it locally, use the localhost address with your specific port number, e.g., http://localhost:3000/api/users.
6. Set up request headers and body: If your API requires headers or a request body for authentication or sending specific data, set them up using the “Headers” and “Body” tabs located below the address bar.
7. Send the request: Click on the “Send” button to send the API request to your local server.
8. Check the response: You’ll receive the response in the lower section of the window. Analyze the response status code, headers, and body to ensure your API is working as expected.
Remember to adjust any necessary settings or configurations in your local server to allow Postman to access and test your API endpoints.
Can we run localhost API in Postman?
Yes, you can definitely run a localhost API in Postman. Postman is a widely-used tool for testing APIs, and it supports working with APIs hosted on your local machine (i.e., localhost).
To use Postman with a localhost API, follow these steps:
1. First, ensure that your API is running on your local machine (localhost).
2. Open the Postman application.
3. In the top-left corner, click on the “+” button to create a new request.
4. In the new request tab, choose the appropriate HTTP method (GET, POST, PUT, DELETE, etc.) based on the API endpoint you want to test.
5. Enter the URL of your localhost API, for example: http://localhost:3000/api/endpoint
6. Add any required headers or parameters as needed by your API.
7. Click on the “Send” button to send the request.
8. You will see the response from your localhost API in the “Response” section below the request configuration.
Please note that the actual URL, headers, and parameters might vary depending on your specific API implementation.
How to test an API running on localhost?
To test an API running on localhost, follow these steps:
1. Set up the API: Make sure your API is up and running on your local machine. Usually, this involves starting the server for the application or framework you are using (e.g., Node.js, Django, Flask, etc.).
2. Choose an API testing tool: There are several tools available for testing APIs on localhost. Some popular ones include Postman, Insomnia, and cURL. You can also use browser extensions like RestClient or write your own custom code to send HTTP requests.
3. Configure the testing tool: Open your chosen testing tool and configure it to send requests to your API’s endpoints. This usually involves setting the HTTP method (GET, POST, PUT, DELETE, etc.), the base URL (e.g., http://localhost:3000), and any required headers or authentication information.
4. Send requests to the API: Using the testing tool, send different types of requests to your API. This includes various combinations of URL paths, query parameters, request bodies, and headers. Make note of the response status codes, response times, and response bodies for each request.
5. Analyze the results: Review the results of your tests to ensure that your API is behaving as expected. If you encounter any issues or unexpected behavior, debug your API code or adjust your testing parameters as needed.
6. Automate the testing process: For more extensive testing, you can use test automation frameworks like Jest, Mocha, or pytest to create a suite of test cases that can be run automatically. This will help you ensure that your API continues to work correctly as you make updates and improvements.
In conclusion, testing an API running on localhost involves setting up the API, choosing a testing tool, configuring the tool, sending requests, analyzing the results, and potentially automating the testing process. Remember to use bold text to emphasize important information in your content.
How do I use Postman locally?
To use Postman locally with localhost, follow these steps:
1. Download and install Postman: Visit the official Postman website (https://www.postman.com/downloads/) to download and install Postman for your operating system.
2. Create and run a local server: Before using Postman with localhost, you need to have a local development server running on your local machine. This can be achieved using various tools or frameworks, such as Node.js/Express, Django, or Flask, depending on your programming language and preferences.
3. Find the localhost URL: When your local server is running, it should provide you with a URL like “http://localhost:3000” or “http://127.0.0.1:8000”. The port number (e.g., 3000, 8000) may vary based on your setup. Take note of this URL, as it will be used in Postman to make requests to your local server.
4. Open Postman: Launch the Postman application installed in step 1.
5. Create a new request: Click the “+” button in the Postman interface to create a new request tab.
6. Select the appropriate HTTP method: Choose the HTTP method (GET, POST, PUT, DELETE, etc.) that corresponds to the action you want to perform on your local server.
7. Enter the localhost URL: In the address bar at the top of the Postman interface, enter the URL from step 3, along with any additional paths or query parameters that are required by your API.
8. Configure request headers and body (if necessary): Depending on the type of request you are making, you might need to set specific headers, authentication tokens, or provide a JSON or form data payload in the request body.
9. Send the request: Click the “Send” button to send the request to your local server. Postman will display the response from your server in its interface, allowing you to inspect the returned data, status codes, and headers.
By following these steps, you can effectively use Postman with localhost to test and debug your API endpoints during development.
How can I configure Postman to effectively test APIs on my localhost environment?
To configure Postman to effectively test APIs on your localhost environment, follow these steps:
1. Install Postman: Download and install Postman from their official website (https://www.postman.com/) if you haven’t already.
2. Open Postman: Launch the application after installation is complete.
3. Create a new request: Click on the “+” button or “Create New” button to create a new request in Postman.
4. Select request type: Choose the appropriate HTTP method for your API request (GET, POST, PUT, DELETE, etc.) from the dropdown menu next to the request URL field.
5. Enter localhost URL: In the request URL field, enter the endpoint of your API in the localhost environment. The URL should be in the format: `http://localhost:/`. Replace “ with the actual port number on which your local server is running, and “ with the specific route for the API you want to test.
6. Add query parameters or request body: Depending on the API request type, you may need to add query parameters or a request body. For GET requests, you can add query parameters directly in the URL or use the “Params” tab below the URL field. For POST, PUT, and PATCH requests, use the “Body” tab to include required data in JSON, form-data, x-www-form-urlencoded, or other supported formats.
7. Configure headers: If your API requires specific headers (such as authentication tokens or content type specification), add them using the “Headers” tab.
8. Send the request: Click on the “Send” button to submit your API request to the localhost server. Postman will display the response in the lower section of the window.
9. Analyze the response: Review the response status, headers, and body to ensure that your API is working as expected in the localhost environment. If there are any issues, you can debug and make necessary changes to your code.
10. Save your request: To save your request for future reference or testing, click on the “Save” button and provide a name and description for the request. You can also organize your requests into collections for better organization.
By following these steps, you can effectively configure and use Postman to test APIs on your localhost environment.
What steps are needed to set up and troubleshoot a local API testing environment in Postman?
To set up and troubleshoot a local API testing environment in Postman, follow these steps:
1. Install Postman: Download and install the Postman app from their official website (https://www.postman.com/downloads/).
2. Create a new request: After opening Postman, click “New” and then select “Request”. Give your request a name and save it to a collection.
3. Configure the request: Choose the appropriate HTTP method (GET, POST, PUT, DELETE, etc.) and enter the URL of your local API endpoint (e.g., http://localhost:3000/api/your-endpoint). Add any necessary headers, query parameters, or request body, depending on your API’s requirements.
4. Check your local API server: Make sure your local API server is running and listening for requests on the desired port. Also, ensure that it is accessible from your computer (it might be blocked by firewalls or other security settings).
5. Send the request: Click the “Send” button to send the request to your local API. Postman will show the response details, such as status code, headers, and response body.
6. Troubleshoot if necessary: If you receive an error or unexpected response, check your API’s documentation or source code to verify the expected behavior. Additionally, review your request configuration and server logs for any issues. Common problems include incorrect request formatting, missing required headers, or issues with the API server itself.
7. Organize and manage tests: Use Postman’s test features to create custom scripts for validating your API’s responses. Group related requests in collections and use environments to manage variables for different deployment stages (development, staging, production, etc.).
8. Collaborate and share: Share your Postman collections, environments, and tests with teammates to ensure consistent testing across your team. Use Postman’s collaboration tools like workspaces, comments, and version control to make team communication seamless.
By following these steps, you can effectively set up and troubleshoot a local API testing environment in Postman.
Are there specific settings or best practices to follow when using Postman for API testing on localhost?
Yes, there are specific settings and best practices to follow when using Postman for API testing on localhost. Here are some of the key points:
1. Use correct URL and port: When testing APIs on localhost, ensure you are using the correct base URL (http://localhost or http://127.0.0.1) and the appropriate port number configured for your local server.
2. Environment variables: Make use of environment variables in Postman to store commonly used values, such as the base URL, to make it easier to switch between different environments (e.g., development, production).
3. Organize requests with Collections: Group related requests together in collections based on functionality or API endpoints. This allows for better organization and sharing of requests with others.
4. Monitor network activity: Use the network tab of your browser’s Developer Tools or other debugging tools to inspect request headers, response headers, and response data. This helps identify issues with the API requests or responses.
5. Authentication: If your API requires authentication, make sure to set up the right authentication method in Postman, such as Basic Auth, Bearer Token, or OAuth 2.0.
6. Request variables: Utilize variables in your requests to avoid hardcoding values. This improves maintainability and makes it easier to modify or update values across multiple requests.
7. Testing and validation: Write test scripts in Postman’s Test tab to validate responses, status codes, response times, and more. This ensures that your API behaves as expected and meets requirements.
8. Documentation: Document your API requests and responses by adding relevant information to the Description field in Postman. This helps other developers or team members understand the purpose and usage of each request.
9. Sharing and collaboration: Utilize Postman’s built-in sharing features to share your collections, environments, and mocks with your team. This ensures that everyone has access to the most up-to-date information and can collaborate effectively.
10. Mock servers: Use Postman’s Mock Servers feature to simulate API endpoints before they are implemented. This helps in validating responses without relying on a live server or backend implementation.


