
How to Access FTP Server | Using Google Chrome
How to turn your PC into Private Branch Exchange | FreePBX | NETVN

How do I access FTP on localhost?
To access FTP on localhost, follow these steps:
1. Install an FTP server: You need to have an FTP server installed on your local machine. There are several options available, such as FileZilla Server (for Windows) and vsftpd (for Linux).
2. Configure the FTP server: After installing the FTP server, set it up by configuring the appropriate settings (such as username, password, and root directory). Make sure to provide the necessary permissions for accessing the desired files/folders.
3. Create an FTP user: Most FTP servers require user authentication. Create a user with username and password to be used while connecting to the FTP server.
4. Start the FTP server: Run the FTP server application and ensure that it is listening for connections.
5. Connect to the FTP server using an FTP client: To access the FTP server on localhost, you need an FTP client like FileZilla Client, Cyberduck or WinSCP. Open the FTP client and enter the following details:
– Host: localhost or 127.0.0.1
– Username: The username you created in step 3
– Password: The password associated with the username
– Port: The port number on which your FTP server is listening (default is usually 21)
6. Click “Connect”: After entering the connection details, click “Connect” to establish a connection between your FTP client and the FTP server on localhost. Once connected, you can upload, download, and manage files using the FTP client.
Remember, accessing FTP on localhost means that you are connecting to an FTP server running on your own computer. This is useful for testing purposes or local development environments.
How do I test FTP locally?
To test FTP locally on a localhost, follow these steps:
1. Install an FTP server on your local machine. Common options include FileZilla, XAMPP, or IIS (Internet Information Services) on Windows.
2. Create an FTP user account with a username and password. This will depend on the FTP server you installed. For example, in FileZilla, go to “Edit” > “Users” and add a new user with the necessary permissions.
3. Configure your FTP server settings as required. Set the listening port (default is usually 21), configure security options, and define the root directory for the FTP server.
4. Start your FTP server. In FileZilla or XAMPP, click the “Start” button next to the FTP server option. In IIS, start the FTP site.
5. Install an FTP client such as FileZilla Client, Cyberduck, or WinSCP.
6. Connect to your localhost FTP server using the FTP client. Enter the server address as “localhost” or “127.0.0.1”, use the FTP user account credentials you created earlier, and connect to the listening port specified in step 3.
7. Once connected, you can test FTP functions such as uploading, downloading, renaming, and deleting files or directories.
By following these steps, you can successfully set up and test FTP locally on your machine using a localhost environment.
How do I connect to localhost with FileZilla?
To connect to localhost with FileZilla, follow these steps:
1. Open FileZilla: Launch the FileZilla application on your computer.
2. Site Manager: Click on the “File” menu in the top left corner and select “Site Manager” or press “Ctrl + S” to open the Site Manager window.
3. Add a new site: Click the “New Site” button on the lower left corner. Name it “localhost” or any other name you prefer.
4. Setup connection settings: In the right panel, fill out the connection details as follows:
– Protocol: Choose “FTP – File Transfer Protocol” from the dropdown menu.
– Encryption: Select “Only use plain FTP (insecure)“.
– Host: Enter “localhost” or “127.0.0.1”.
– Port: Leave it blank or enter “21” which is the default FTP port.
– Logon Type: Choose “Normal“.
– User: Enter your localhost FTP username (e.g., “yourusername” or “root”).
– Password: Enter your localhost FTP password.
5. Connect: Click on the “Connect” button at the bottom of the Site Manager window to establish the connection.
FileZilla should now connect to your localhost and display your local files and directories. You can start transferring files between your computer and your localhost environment.
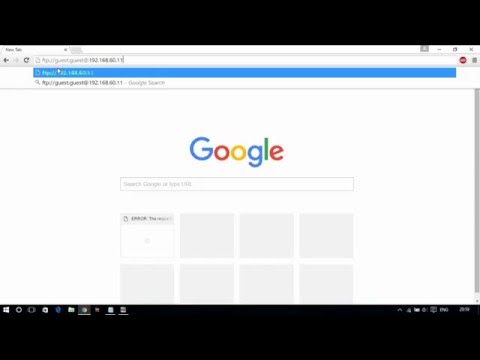
How do I open an FTP site in Chrome?
To open an FTP site in Chrome on your localhost, follow these steps:
1. Ensure that you have a running FTP server on your local machine. You can use software like FileZilla Server, XAMPP, or any other FTP server software.
2. Configure the FTP server with necessary settings like the root directory, username, and password.
3. Once your FTP server is set up, open Google Chrome.
4. In the address bar, type the following address: ftp://username:password@localhost (replace “username” and “password” with the credentials you configured for your FTP server).
5. Press Enter to access your localhost FTP site.
Note: As of Chrome Version 88, support for FTP URLs has been removed from the browser. You may need to use a different browser like Firefox or an FTP client like FileZilla to access FTP sites.
How to set up and configure an FTP server on localhost for secure file transfers?
Setting up and configuring an FTP server on localhost for secure file transfers involves several steps. In this guide, we will be using FileZilla Server as an example.
Step 1: Download and Install FileZilla Server
1. Visit the official FileZilla website (https://filezilla-project.org/) and download the FileZilla Server application.
2. Run the installer and follow the on-screen instructions to install FileZilla Server on your computer.
Step 2: Configure FileZilla Server
1. Launch the FileZilla Server Interface and connect to the server using the default settings.
2. Click on “Edit” in the toolbar, then select “Settings”.
3. In the “General Settings” section, you can customize the server’s listening port if needed. The default FTP port is 21.
4. In the “Security” section, you can enable logging, set password policies, and configure IP address restrictions.
5. In the “SSL/TLS settings” section, check the “Enable FTP over SSL/TLS support (FTPS)” option. Configure the private key and certificate files or generate a self-signed certificate.
6. Adjust other settings as required and click “OK” to save your changes.
Step 3: Create a User Account
1. In the FileZilla Server Interface, click on “Edit”, then select “Users”.
2. Click “Add” to create a new user account. Enter a username and click “OK”.
3. Check the “Password” box and set a strong password for the user account.
4. In the “Shared folders” section, click “Add” and select a folder that you want to share via FTP. Set appropriate permissions (Read, Write, Delete, etc.) for the shared folder.
Step 4: Test the FTP Server Connection
1. Download and install an FTP client, such as FileZilla Client.
2. In the FTP client, enter the following details to connect to your localhost FTP server:
– Host: 127.0.0.1 or localhost
– Port: The port you configured in Step 2 (default is 21)
– Protocol: Choose “FTP” or “FTPS” depending on your SSL/TLS configuration
– Login Type: Normal (or as configured in Step 3)
– User and Password: Enter the credentials for the user account created in Step 3.
3. Click “Connect” and confirm that you can access and transfer files securely using the FTP server on localhost.
Remember to always keep your FTP server software and operating system updated to ensure optimal security and performance.
What are the most common issues users might face when connecting to ftp://localhost, and how can they troubleshoot them?
There are several common issues that users might face when connecting to ftp://localhost. Here are the most prevalent ones, along with tips on how to troubleshoot them:
1. FTP server is not running: This is the most basic issue users can encounter. Make sure the FTP server is installed, configured correctly, and actively running on your local machine.
2. Incorrect login credentials: Ensure you’re using the correct username and password for the FTP server. If you’ve forgotten the credentials, you may need to reset them or consult the server’s documentation.
3. Firewall restrictions: Your local machine’s firewall may be preventing the connection to the FTP server. Check your firewall settings and ensure that the FTP server and ports are allowed through.
4. Anti-virus or security software interference: Some anti-virus or security software may block the FTP connections. Temporarily disable the software to see if it’s causing the issue and, if necessary, whitelist the FTP server in the software’s settings.
5. Incorrect server address: Double-check the server address (in this case, localhost) to ensure you’re trying to connect to the right location. Remember that when using ‘localhost,’ both the FTP client and server should be on the same machine.
6. Port-related issues: Make sure that the FTP server is using the default port 21 or the correct custom port specified during its configuration. If there’s a conflict, you may need to change the port in the FTP server settings.
7. File and folder permissions: You might encounter issues accessing specific files or folders due to insufficient permissions. Verify that the user account you’re using has the right level of access to perform the desired operations.
8. Connection mode issues (Active/Passive): FTP servers can operate in active or passive mode, and the connection issues might be related to this setting. Try changing the connection mode in your FTP client settings to see if it resolves the problem.
Whenever you face issues while connecting to ftp://localhost, check for these common troubleshooting steps to resolve the problem and ensure seamless access to your local FTP server.
How can one modify the default settings of FTP on localhost to enhance its performance and security?
To modify the default settings of FTP on localhost to enhance its performance and security, follow these steps:
1. Update your FTP server software: Ensure that you are using the latest version of your FTP server software, as updates typically include important security patches and performance enhancements.
2. Change the default FTP port: By default, FTP uses port 21. Change this to a non-standard port in the configuration file to reduce the risk of automated attacks targeting the default port.
3. Enable encryption with FTPS or SFTP: Use FTPS (FTP over SSL/TLS) or SFTP (SSH File Transfer Protocol) instead of plain FTP. These protocols encrypt data transfers, making it harder for attackers to intercept your files and credentials. Update your configuration file accordingly.
4. Disable anonymous access: Disable the ability for users to connect to your FTP server without a valid username and password by modifying the settings in the configuration file.
5. Use strong authentication: Ensure all user accounts have strong, unique passwords. Additionally, consider implementing two-factor authentication for added security.
6. Limit user permissions and access: Configure user permissions in the FTP server settings to limit access to specific directories and restrict the actions users can perform, such as file uploads or deletions.
7. Implement IP address restrictions: In the configuration file, set up allow and deny lists of IP addresses to control which hosts can connect to your FTP server.
8. Monitor and log activity: Enable logging in your FTP server settings to keep track of user activities and detect any suspicious behavior.
9. Use a firewall: Limit incoming connections to your FTP server by setting up firewall rules that only allow authorized connections.
10. Regularly review and update your security settings: Periodically review your FTP server’s security settings and make necessary updates to ensure optimal protection.
By implementing these measures, you can significantly enhance the performance and security of your FTP server on localhost.


