Unveiling the Secrets of MySQL Localhost Test: A Comprehensive Guide for Advanced Programmers
Are you an advanced programmer looking to dive deep into the world of MySQL localhost testing? If so, buckle up because this exclusive, in-depth exploration will unveil some powerful secrets that even the most seasoned developers may not be aware of. Intrigued yet? Keep reading to unlock these hidden gems and optimize your testing strategies like never before.
Table of Contents
1. [MySQL Localhost Test Overview](#mysql-localhost-test-overview)
2. [Setting Up a Localhost Test Environment](#setting-up-a-localhost-test-environment)
3. [Verifying the MySQL Connection](#verifying-the-mysql-connection)
4. [Testing MySQL Queries](#testing-mysql-queries)
5. [Error Handling and Troubleshooting](#error-handling-and-troubleshooting)
6. [Advanced MySQL Localhost Test Techniques](#advanced-mysql-localhost-test-techniques)
MySQL Localhost Test Overview
When it comes to mastering MySQL database management, knowing how to conduct efficient and effective MySQL localhost tests is essential. By running MySQL on your local machine (localhost), you can develop, test, and debug your code in a secure environment without impacting the production system. This hands-on approach allows you to experiment with various queries, learn from your mistakes, and refine your skills – all while minimizing potential disasters caused by untested code.
But that’s not all. In the rest of this article, we’ll go beyond the basics and delve into more advanced testing techniques that you can leverage to take your localhost test strategy to new heights. Let’s dive in!
Setting Up a Localhost Test Environment
To get started with MySQL localhost test, you’ll first need to set up a suitable environment. Here are the essential steps to follow:
1. Install MySQL Server: You can choose between the open-source MySQL Community Server or the commercial MySQL Enterprise Edition, depending on your needs. Download the appropriate version from the [official MySQL website](https://www.mysql.com/downloads/) and follow the installation instructions.
2. Configure MySQL Server: After installation, you may need to configure certain settings such as the port number (default is 3306), username, and password. Consult the [MySQL documentation](https://dev.mysql.com/doc/refman/8.0/en/server-configuration.html) for detailed guidance on configuration options.
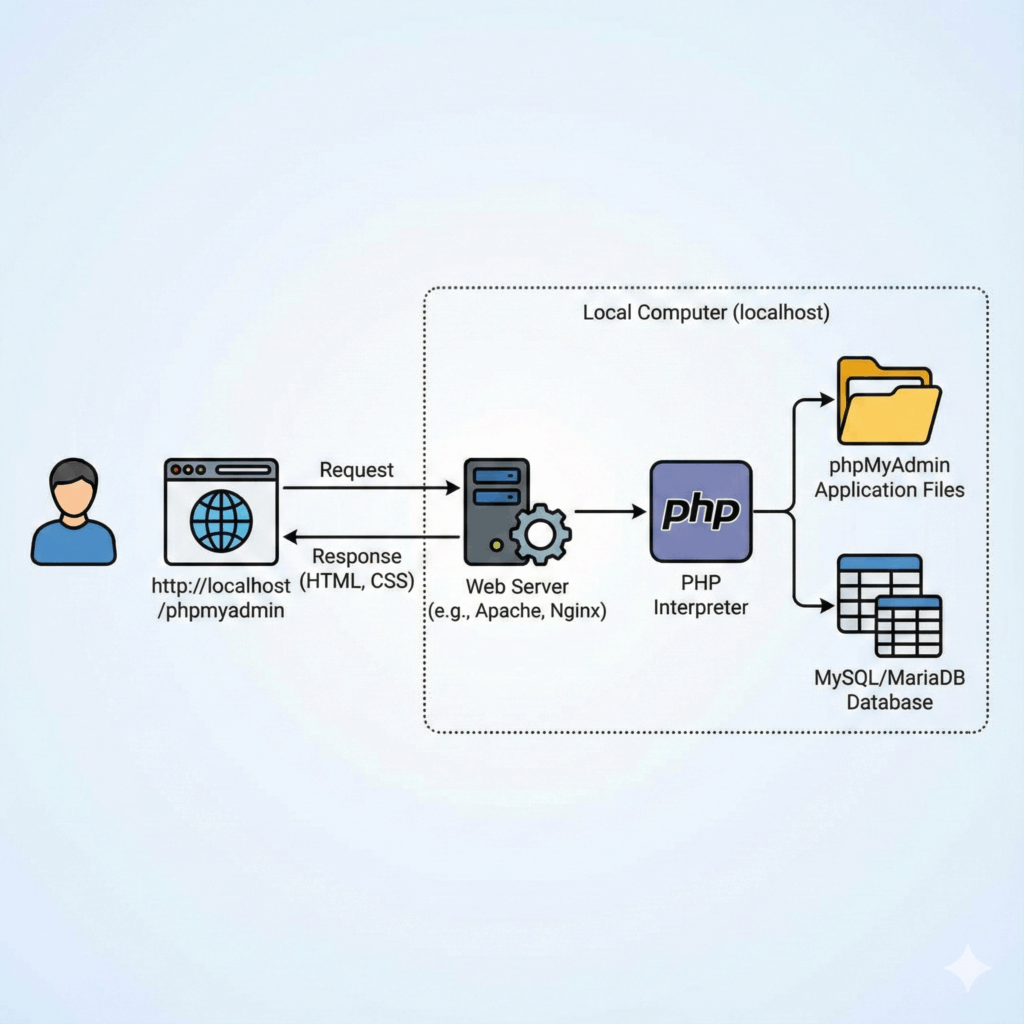
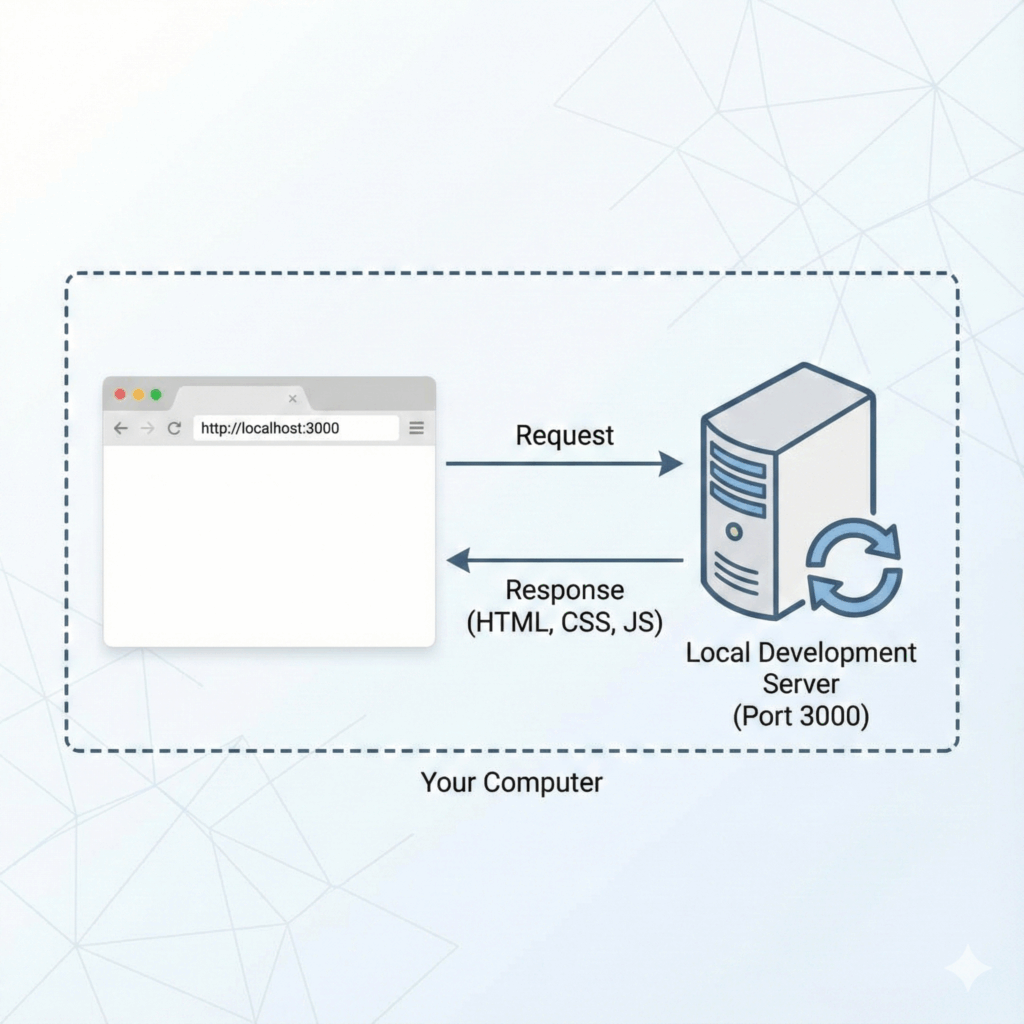
3. Install a Web Server (optional): While not strictly necessary for MySQL testing, installing a web server like Apache or Nginx is highly recommended if you’re working with PHP, Python, or other server-side languages. This will enable you to develop and test full-stack applications in your localhost environment.
4. Install a GUI-based Database Management Tool (optional): Although you can manage MySQL databases using the command-line interface, utilizing a graphical tool like phpMyAdmin, MySQL Workbench, or Adminer can greatly enhance your productivity.
With your localhost test environment set up, it’s time to put it to work!
Verifying the MySQL Connection
Before running any tests, it’s crucial to ensure that your application can properly connect to the MySQL server. To do so, create a simple PHP script called `test_connection.php` that uses the `mysqli_connect()` function:
“`php
“`
Save this file in your web server’s document root (e.g., `htdocs` for Apache or `www` for Nginx) and access it via your web browser (e.g., http://localhost/test_connection.php). If you see the “Connected successfully” message, you’re all set to proceed to the test phase.
Testing MySQL Queries
To effectively conduct MySQL localhost tests, you need to rigorously test your queries against various scenarios. Some key aspects to consider include:
– Creating, updating, and deleting records: Test your INSERT, UPDATE, and DELETE statements to ensure data integrity.
– Selecting data: Make sure your SELECT queries return the correct results, taking into account any JOINs, WHERE clauses, and sorting requirements.
– Handling NULL values: Test how your application copes with NULL values in the database, as these can sometimes cause unexpected behavior.
– Performance: Analyze the performance of your queries, particularly those involving large datasets or complex calculations, using the `EXPLAIN` statement or MySQL Workbench’s Performance Schema.
– Security: Protect your application from SQL injection attacks by using prepared statements or parameterized queries when dealing with user input.
Error Handling and Troubleshooting
When testing, you’ll inevitably encounter errors in your code. To ensure a smooth testing process, implement robust error handling mechanisms to catch and log all exceptions. In PHP, this can be achieved using `mysqli_report()` in conjunction with error logging functions:
“`php
“`
These settings will log detailed error messages, allowing you to quickly identify and fix issues during the testing process.
Advanced MySQL Localhost Test Techniques
Now that you have a solid grasp of the basics, let’s explore some advanced techniques to turbocharge your MySQL localhost test strategy:
– Test Automation: Automate your tests using tools like PHPUnit or Behat for PHP, Django for Python-based projects, or a dedicated MySQL testing framework like sqlmap or MyTAP.
– Continuous Integration (CI): Integrate your tests with a CI system like Jenkins, Travis CI, or GitLab CI to automatically check for issues whenever code changes are pushed to your repository.
– Version Control: Use a version control system like Git to manage your database schema and SQL scripts, making it easier to track changes, collaborate with other developers, and revert to a previous state if needed.
– Database Snapshots: Create snapshots of your database before testing to quickly revert to a clean state after each test run. This can be done using native MySQL features like `mysqldump` or third-party tools like Percona XtraBackup.
By implementing these advanced techniques, you’ll optimize your MySQL localhost testing process and position yourself as an indispensable asset on any development team.
In conclusion, mastering the intricacies of MySQL localhost test will not only enable you to develop and debug your code more effectively but also open up a world of advanced testing possibilities that can propel your programming skills to new heights. So go ahead, put these tips into practice, and get ready to become the localhost test maestro you’ve always dreamed of being!
Connect to MySQL with PHP in XAMPP / Create a new database
How to test a local website on your phone
How to test local MySQL connection?
To test a local MySQL connection, you must follow these steps:
1. Install MySQL Server: Make sure you have MySQL Server installed on your local machine. You can download it from the official website: https://dev.mysql.com/downloads/mysql/
2. Start MySQL Server: Start the MySQL Server on your local machine. You can do this by running the following command (for MacOS or Linux):
“`
sudo service mysql start
“`
For Windows, you can start it from the Services panel or using the MySQL Installer.
3. Install MySQL client: Make sure you have a MySQL client installed on your machine to interact with the MySQL server. Some popular MySQL clients are MySQL Workbench, phpMyAdmin, or just the command-line client.
4. Test the Connection: Open your preferred MySQL client and try to connect to your local MySQL server. You will usually need to provide the following information:
– Host: localhost or 127.0.0.1
– User: root (or another user with privileges)
– Password: the password you set for the user during the installation process.
If the connection is successful, you should be able to view your databases, create new ones, and perform various SQL operations.
5. Troubleshooting: If you experience any issues while connecting, verify that the MySQL Server is running, your username and password are correct, and firewall settings are not blocking the connection.
How to use MySQL on localhost?
To use MySQL on localhost, follow these steps:
1. Install a local server environment: To use MySQL on your local machine, you’ll need to install software like XAMPP, WAMP or MAMP, which provide a local web server environment with Apache, PHP, and MySQL.
2. Start the web server and MySQL services: After installation, start the services from the control panel of the installed application (XAMPP, WAMP, or MAMP).
3. Access phpMyAdmin: Open a browser window and enter “http://localhost/phpmyadmin” in the address bar. phpMyAdmin is a web-based tool for managing MySQL databases that comes pre-installed with your local web server environment.
4. Create a new database: Click the “New” button on the left sidebar of phpMyAdmin to create a new database. Give it a name and select the appropriate collation for your database.
5. Manage tables and data: Once the database is created, you can create tables, import data or run SQL queries directly from the phpMyAdmin interface.
6. Connect to the MySQL database from your software or script: Use the following connection parameters to connect your application or script to your local MySQL server:
– Hostname: `localhost` or `127.0.0.1`
– Username: root (default)
– Password: (leave it blank, unless you’ve set a custom password during installation)
– Database name: (use the name of the database you created in the previous steps)
In conclusion, using MySQL on localhost involves installing a local server environment, creating a database using phpMyAdmin, and connecting your script or software to the MySQL server using the appropriate connection parameters.
How do I know if MySQL is running on localhost?
To check if MySQL is running on localhost, follow these steps:
1. Open the Command Prompt or Terminal depending on your operating system (Windows or macOS/Linux).
2. Type the following command and press Enter:
– On Windows:
“`
netstat -ano | findstr 3306
“`
– On macOS/Linux:
“`
sudo lsof -i :3306
“`
Note: The default port for MySQL is 3306. Replace it with your custom port if you have one.
3. If MySQL is running on localhost, you should see a line containing “LISTEN” and the port number (usually 3306). The output will look something like this:
– On Windows:
“`
TCP 127.0.0.1:3306 0.0.0.0:0 LISTENING [Process ID]
“`
– On macOS/Linux:
“`
COMMAND PID USER FD TYPE DEVICE SIZE/OFF NODE NAME
mysqld [Process ID] mysql [File Descriptor]u IPv4 [Device Number] 0t0 TCP *:mysql (LISTEN)
“`
If you don’t see any output or the output doesn’t contain “LISTEN” and the port number, it’s likely that MySQL is not running on localhost.
4. Alternatively, try connecting to MySQL using a MySQL client such as MySQL Workbench, phpMyAdmin, or the command-line `mysql` utility. If you can establish a connection, it’s an indication that MySQL is running on localhost.
Remember to always verify if your MySQL service is up and running. This will ensure that your application can connect and interact properly with the database.
Where can I test MySQL?
You can test MySQL on your localhost by installing a local server environment, such as XAMPP, WampServer, or MAMP. These applications provide you with a complete environment to run PHP, MySQL, and Apache on your local machine, making it easy to test and develop web applications without having to rely on an external server.
To get started, simply download and install the appropriate application for your operating system. Once installed, start the server software and use tools like phpMyAdmin to manage your MySQL databases.
Remember that this setup is meant for development and testing purposes only and should not be used for live production environments.
How do you set up and test a MySQL database on a localhost environment?
To set up and test a MySQL database on a localhost environment, follow these steps:
1. Download and install a web server software like XAMPP or WAMP that includes MySQL, PHP, and Apache bundled together. This will set up the localhost environment on your computer.
2. Start the Apache and MySQL services using the control panel provided by the web server software.
3. Create a new MySQL database:
a. Open your browser and go to `http://localhost/phpmyadmin`, which is the default address for the phpMyAdmin tool that comes with XAMPP and WAMP.
b. Click on the “Databases” tab and create a new database by entering the name and selecting the appropriate collation.
4. Create a table and columns within the database according to your project requirements.
5. Connect to the MySQL database using PHP or any other programming language:
For PHP, you can use either `mysqli` or `PDO` extension. An example code for connecting using `mysqli` would be:
“`php
connect_error) {
die(“Connection failed: ” . $conn->connect_error);
}
echo “Connected successfully”;
?>
“`
6. Place the PHP file containing the connection code in the appropriate folder (for XAMPP, it’s `C:xampphtdocs`, and for WAMP, it’s `C:wampwww`).
7. Test the connection: Open your browser and go to `http://localhost/your_file_name.php`. If everything is set up correctly, you should see “Connected successfully” displayed in your browser.
By following these steps, you can set up and test a MySQL database on a localhost environment. Make sure to replace “your_database_name” and “your_file_name.php” with your actual database name and file name.
What are the most efficient methods for troubleshooting MySQL localhost connection issues?
The most efficient methods for troubleshooting MySQL localhost connection issues are:
1. Check if the MySQL service is running: Ensure that the MySQL server is running on your local machine by checking the services or using command line tools.
2. Verify the configuration file: Check the MySQL configuration file (my.cnf or my.ini) to make sure the bind-address is set to 127.0.0.1 (localhost) or commented out.
3. Confirm correct port number: Ensure you’re using the correct port (default is 3306) to establish a connection with the MySQL server.
4. Test the connection: Test the connection using command-line tools like the MySQL client or a scripting language like PHP, Python, or Node.js.
5. Check firewall settings: Verify that your firewall isn’t blocking MySQL connections on the given port.
6. Validate user privileges: Ensure the MySQL user has sufficient privileges to access the localhost database.
7. Examine error logs: Review the MySQL error logs for any clues or specific error messages, which may help pinpoint the issue.
8. Restart MySQL service: If all else fails, try restarting the MySQL service to resolve any temporary issues.
By following these steps, you should be able to identify and resolve most MySQL localhost connection problems.
How can you optimize the performance of MySQL queries when testing on localhost?
Optimizing the performance of MySQL queries when testing on localhost is essential for ensuring efficient and fast performance. Here are some ways to optimize MySQL queries:
1. Choose optimal data types: Using appropriate data types for your columns can greatly improve query performance. Opt for smaller data types when possible, such as using INT instead of BIGINT if the range permits.
2. Indexing: Creating indexes on the columns involved in WHERE clauses, JOINs, and ORDER BY statements can speed up queries significantly. However, be careful with over-indexing, as it may lead to slower write operations.
3. Use EXPLAIN: The EXPLAIN command shows the execution plan for a query, allowing you to identify potential bottlenecks and inefficiencies. Analyze the output and make necessary changes to optimize performance.
4. Optimize queries: Simplify complex queries by breaking them down into smaller parts or using subqueries. Avoid using SELECT * and instead specify the required columns to reduce the amount of data to be processed.
5. Normalize database schema: A normalized database schema helps eliminate redundancy, reduces update anomalies, and improves query performance. Ensure your tables are properly structured and follow normalization rules.
6. Use LIMIT wisely: When retrieving large datasets, use LIMIT clauses to paginate results and prevent excessive data retrieval.
7. Optimize server configuration: Adjust MySQL server settings like buffer sizes, cache, and query cache in the my.cnf or my.ini file to improve performance.
8. Keep MySQL up-to-date: Always use the latest stable version of MySQL, as new releases often include performance improvements and bug fixes.
9. Analyze and optimize tables: Use the ANALYZE TABLE and OPTIMIZE TABLE commands to update table statistics and defragment data, which can enhance query performance.
By employing these techniques, you can significantly optimize the performance of MySQL queries when testing on localhost.


