Unlocking the Secrets of MySQL -h localhost: A Deep Dive for Advanced Programmers
As an advanced programmer, you’ve probably found yourself curious about what exactly happens when you use the `mysql -h localhost` command. You may have used it countless times, but have you ever stopped to ponder its intricacies? In this article, we’ll dive deep into the world of MySQL and localhost, exploring how this powerful tool operates behind the scenes. We’ll cover everything from understanding how the client and server communicate to optimizing your queries for maximum efficiency. Intrigued yet? Keep reading – you won’t want to miss a single detail.
Decoding the MySQL -h localhost Command
First, let’s break down the `mysql -h localhost` command into its components. The “mysql” part is the command-line tool that allows you to interact with the MySQL server. Following “mysql” is the -h flag, which specifies the hostname of the server. In our case, the hostname is “localhost”, indicating that the MySQL server is running on the same machine as the client.
In essence, when you input `mysql -h localhost`, you’re telling the client to connect to the MySQL server running on the local machine. Simple enough, right? Well, there’s more to it than meets the eye. Let’s delve further into the connection process and uncover the magic that unfolds beneath the surface.
Establishing Connections: Understanding Protocols and Sockets
# TCP/IP Protocol
When connecting to a MySQL server, there are two primary protocols at play: TCP/IP and Unix Domain Socket. By default, using `mysql -h localhost` relies on the TCP/IP protocol. This protocol is responsible for establishing a connection between the client and the server over the network, even if it’s the local loopback interface (127.0.0.1).
To connect to the MySQL server using the TCP/IP protocol, you need to specify the port number on which the server is listening. The default port for MySQL is 3306. So, if you wanted to use the TCP/IP protocol explicitly, you’d use this command: `mysql -h localhost –protocol=TCP -P 3306`.
# Unix Domain Socket
The alternative to using the TCP/IP protocol is the Unix Domain Socket. This method is typically faster since it bypasses the network interface stack and communicates directly between the client and the server using a socket file on the local filesystem.
If you want to connect to the MySQL server using the Unix domain socket, you can issue the following command: `mysql –socket=/path/to/socket/file` (e.g., `mysql –socket=/var/lib/mysql/mysql.sock`). Note that the path to the socket file may vary based on your configuration.
MySQL Server Configuration: How to Optimize for Localhost Connections
As an advanced programmer, you’re likely interested in squeezing every ounce of performance from your MySQL connections. Here are some tips to optimize your MySQL server for localhost connections:
# Bind to Localhost
To ensure that your MySQL server only accepts connections from the local machine, update the server’s configuration file (usually `my.cnf` or `my.ini`) with the following line:
“`
bind-address = 127.0.0.1
“`
By setting the `bind-address` directive to “127.0.0.1”, you’re telling the server to listen only for connections coming from the local loopback interface.
# Use Unix Domain Sockets
As mentioned earlier, using Unix domain sockets is generally faster than relying on the TCP/IP protocol for localhost connections. To take advantage of this speed boost, make sure your MySQL server is configured to create a socket file. Add or update the following line in your server’s configuration file:
“`
socket = /path/to/socket/file
“`
Now, ensure your clients use the appropriate `–socket` option when connecting to the server.
Performance Metrics: Measuring the Benefits of MySQL -h localhost Optimizations
One way to measure the performance improvements gained from these optimization strategies is to track query response times. You can use the `mysqladmin` tool to check the connection status and monitor query execution times. Compare the performance of TCP/IP and Unix domain socket connections and determine which option delivers better results for your specific use case.
Final Thoughts: Maximizing the Potential of MySQL -h localhost
By now, you should have a deeper understanding of the inner workings behind the `mysql -h localhost` command. It’s not just a simple instruction for connecting to a local MySQL server – there’s a lot more happening beneath the surface. With the knowledge gained from this article, you can now optimize your MySQL configurations for better performance and resilience.
Remember, every advanced programmer should continuously strive to improve their skills and understanding of the tools they employ. If you’re eager to learn more about MySQL and further enhance your programming prowess, consider exploring topics such as advanced query optimization, database indexing, and clustering techniques. Your journey into the world of MySQL has only just begun.
MySql Database Server Hosting On Local Host ……
How To Install MySQL (Server and Workbench)
How to access MySQL on localhost?
To access MySQL on localhost, follow these steps:
1. Install a MySQL server on your local machine if you haven’t already. You can download the MySQL installer from the official website: https://dev.mysql.com/downloads/mysql/
2. After installation, start the MySQL server. This process can vary depending on your operating system. On Windows, you can start it as a service; on Linux and macOS, you can use the terminal to start the MySQL server.
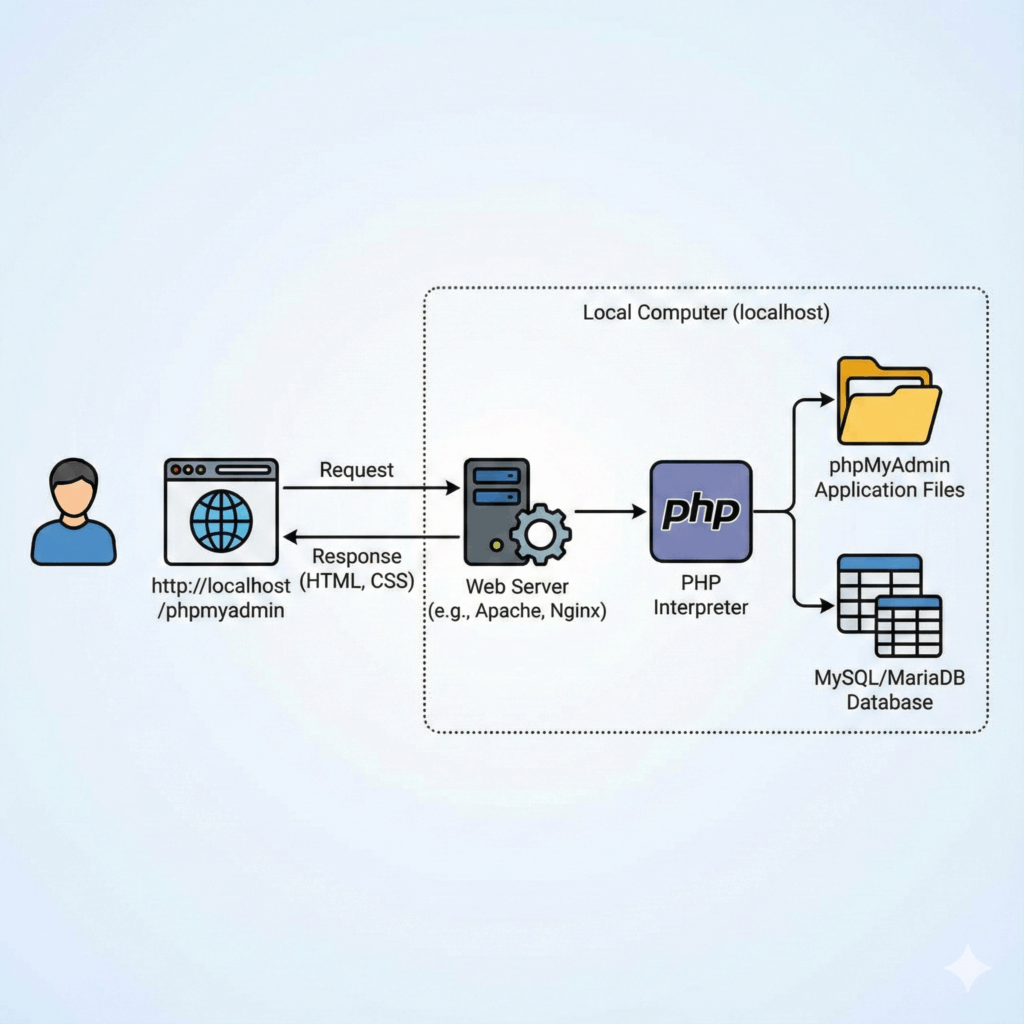
3. Use a MySQL client to connect to the server. Many clients are available, such as MySQL Workbench, PHPMyAdmin, or the command-line interface (CLI) that comes with MySQL.
4. To connect using the CLI, open a terminal or command prompt and type the following command:
“`
mysql -h localhost -u your_username -p
“`
Replace “your_username” with the username you set during the installation. You will be prompted to enter your password.
5. Once connected, you can interact with the database by running various SQL queries and commands. For example, to see a list of all available databases, type:
“`
SHOW DATABASES;
“`
6. To work with a specific database, use the following command, replacing “your_db_name” with the name of the database:
“`
USE your_db_name;
“`
7. From here, you can create tables, insert data, query, and modify your database as needed.
Remember, when working with MySQL on localhost, it’s essential to ensure that the MySQL server is running, and you’re using the correct credentials to connect to it.
What is the localhost address for MySQL?
The localhost address for MySQL is typically 127.0.0.1 or localhost, and the default port used is 3306. To connect to a MySQL server on your local machine, you can use the following format: mysql:host=localhost;port=3306;dbname=your_database_name.
What is 127.0 0.1 MySQL?
127.0.0.1 is the loopback IP address, also known as localhost. In the context of MySQL, connecting to the 127.0.0.1 MySQL refers to establishing a connection to a MySQL server instance running on the same machine where your application or client software is running.
Using 127.0.0.1 MySQL means that your application or client software will communicate with the MySQL server locally, without any network latency or security issues typically associated with remote connections. This is ideal for users who are developing and testing applications on their personal computers or on a single machine.
How do I connect to a MySQL database hosted on localhost using the “-h” flag?
To connect to a MySQL database hosted on localhost using the “-h” flag, you can execute the following command in your command prompt or terminal:
“`
mysql -u username -p -h localhost
“`
Replace `username` with your MySQL username. After executing this command, you’ll be prompted to enter your password. Once you provide the correct password, you’ll be connected to your MySQL database on localhost.
What are the common issues faced while connecting to a MySQL server on localhost with the “-h localhost” command?
Are there any specific configurations required when using “mysql -h localhost” for accessing a MySQL database on the same machine?
When using mysql -h localhost for accessing a MySQL database on the same machine, there are a few specific configurations you need to consider:
1. MySQL Server Installation: Ensure that MySQL server is installed on your local machine, and the service is running.
2. Granting User Privileges: You should grant appropriate privileges to the user who will access the database on localhost. Use the following command to grant localhost-specific access:
   GRANT ALL PRIVILEGES ON *.* TO 'username'@'localhost' IDENTIFIED BY 'password';
   FLUSH PRIVILEGES;
3. Connection Parameters: When connecting to the local MySQL server, use the correct username, password, and database name in the connection string:
mysql -h localhost -u username -p database_name
Enter your password when prompted.
4. Socket Connection: On some systems, connecting to localhost may use a UNIX socket file instead of a TCP/IP port. Make sure the socket file path is correctly configured in the MySQL server and client configuration files (usually my.cnf or my.ini). Also, ensure that the socket file exists and has correct permissions.
5. Firewall Configuration: Although it’s less likely to cause issues with localhost connections, ensure that your local firewall does not block MySQL connections. The default MySQL port is 3306, so make sure it is allowed in the firewall settings.
By following these steps, you should be able to configure your local system to use mysql -h localhost for accessing a MySQL database on the same machine.


