
Title: Java MacOS Uninstall: The Ultimate Guide to Clearing Your System
Have you ever faced a situation where you need to uninstall Java from your MacOS but can’t figure out how? Don’t worry, because you’ve just stumbled upon the ultimate guide for Java MacOS uninstall! In this article, we will reveal the crucial steps and tips on how to uninstall Java properly and avoid any potential pitfalls in the process. So let’s dive right into it!
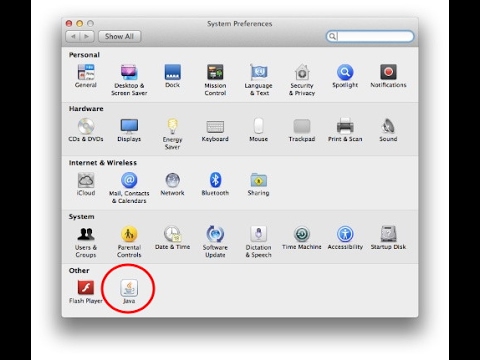
Why Would You Want to Perform Java MacOS Uninstall?
First things first, let’s discuss why you might want to remove Java from your MacOS. Java is a popular programming language that runs on billions of devices worldwide. However, some users may find it unnecessary or even unsafe due to security vulnerabilities. This is where the need for a clean and efficient Java MacOS uninstall arises.
Understanding Different Versions of Java on MacOS
Before we proceed with the actual uninstall process, it is vital to understand that there are two primary versions of Java on MacOS: the built-in Apple’s Java and Oracle’s Java installed later. These versions have different directories and require different methods to perform a complete Java MacOS uninstall.
Java MacOS Uninstall: Removing Apple’s Java
You may be surprised to know that MacOS comes with a built-in version of Java known as Apple’s Java. To remove this version, follow these simple steps:
1. Open Terminal (you can search for it in Spotlight).
2. Type the following command and press enter: `sudo rm -fr /Library/Java/JavaVirtualMachines/*`
3. This command will remove Apple’s Java from your system.
4. Don’t forget to restart your computer after uninstallation for the changes to take effect.
Please note that this method requires administrative privileges. If you face any issues or permission errors, make sure to log in with an administrator account on your MacOS.
Java MacOS Uninstall: Removing Oracle’s Java
If you have installed Oracle’s Java separately (which is more common and feature-rich), you need to follow these steps to uninstall it properly:
1. Open Terminal.
2. Type the following command and press enter: `sudo rm -fr /Library/Internet Plug-Ins/JavaAppletPlugin.plugin`
3. This command will remove the Java Internet Plugin from your system.
4. Next, type the following command and press enter: `sudo rm -fr /Library/PreferencePanes/JavaControlPanel.prefPane`
5. This command will remove the Java Control Panel from your system preferences.
6. Restart your computer after the Java MacOS uninstall process.
Again, this method requires administrative privileges. Ensure you have the necessary permissions before proceeding.
Double-Checking Your Java MacOS Uninstall
To make sure that the Java MacOS uninstall process is successful, follow these steps:
1. Open Terminal.
2. Type the following command and press enter: `java -version`
3. If Java has been completely removed, you should see a message saying, “No Java runtime present, requesting install.”
4. If you still see a version number, you may need to repeat the processes mentioned above.
Conclusion
In conclusion, uninstalling Java on MacOS can be simple if you follow the correct steps for each version. Keep in mind that you must have administrative privileges to remove Java successfully. Take your time, double-check everything, and don’t hesitate to seek help if needed.
Now that you’ve mastered the art of Java MacOS uninstall, you can easily manage your system and maintain optimal performance. Don’t forget to share this guide with others who may find it helpful!
Remember, knowing how to perform a Java MacOS uninstall is just the beginning. Make sure to stay tuned with our blog for more informative articles on software and system maintenance. Happy computing!
Uninstall JAVA in MAC 100% in 5 MIN
When Preseason is in May – 12 ADC Items Reworked!

How do I completely remove Java from my Mac?
Completely removing Java from your Mac involves several steps. Here’s a step-by-step guide on how to uninstall Java:
1. Close any applications that may be using Java.
2. Open the Terminal application, which can be found in the Utilities folder within the Applications folder.
3. In the Terminal, enter the following command and press Enter:
“`
sudo rm -fr /Library/Internet Plug-Ins/JavaAppletPlugin.plugin
“`
This command will remove the Java Applet plugin. You will be prompted for your admin password.
4. Next, enter the following command to remove the Java Development Kit (JDK):
“`
sudo rm -fr /Library/Java/JavaVirtualMachines/
“`
5. After executing these commands, Java should be removed from your system. However, it’s essential to check for any leftover folders or files related to Java. Navigate to the following directories and delete any Java-related items:
– `/Library/Application Support/Oracle/Java`
– `/Library/Preferences/com.oracle.java.JavaAppletPlugin.plist`
– `/Library/Preferences/com.oracle.javadeployment.plist`
6. Empty your Trash to ensure all Java-related files are completely deleted.
7. Finally, restart your Mac to apply the changes.
By following these steps, you should have successfully removed Java from your Mac.
Is it safe to remove Java from Mac?
It is generally safe to remove Java from your Mac if you do not need it for any specific applications or tasks. Java is a programming language and runtime environment that allows certain applications to run on your computer. However, many modern applications have moved away from using Java, making it less necessary for everyday use.
Before uninstalling Java, it’s important to ensure that you don’t have any applications or services relying on it. Some common examples of Java-dependent software include game servers, development tools, and financial applications. If you do not have any critical applications depending on Java, you can proceed with the uninstallation process.
To uninstall Java from your Mac, follow these steps:
1. Open Finder and navigate to the /Library/Internet Plug-Ins/ directory.
2. Locate the JavaAppletPlugin.plugin file and move it to the Trash.
3. Empty the Trash to complete the removal process.
Keep in mind that uninstalling Java may cause issues with applications or services that rely on it. If you encounter any problems after removing Java, you may need to reinstall it to regain the lost functionality.
How do I uninstall Java 11 from my Mac?
Uninstalling Java 11 from your Mac involves a few easy steps. Follow this guide to remove it completely:
1. Open Terminal: Go to the ‘Utilities’ folder inside the ‘Applications’ folder and launch the Terminal application.
2. Find Java Installation Path: To find the path where Java is installed on your Mac, type the following command in Terminal and hit ‘Enter’:
“`
/usr/libexec/java_home -V
“`
This command will display all the installed Java versions and their respective paths. Look for Java 11 in the list and note down its path. It should be something like `/Library/Java/JavaVirtualMachines/jdk-11.jdk/Contents/Home`.
3. Remove Java from Mac: With the Java installation path, you can now delete Java 11 from your Mac. Type the following command in Terminal, replacing “ with the actual path you found in step 2:
“`
sudo rm -Rf
“`
Hit ‘Enter’, provide your administrator password when prompted, and press ‘Enter’ again to proceed with the removal.
4. Verify Uninstallation: To confirm that Java 11 has been successfully uninstalled, run the `/usr/libexec/java_home -V` command in the Terminal again. Make sure that Java 11 is no longer listed.
And that’s it! You have successfully uninstalled Java 11 from your Mac.
How do I completely uninstall Java?
To completely uninstall Java from your computer, follow these steps:
Step 1: Uninstall Java through Control Panel or Settings
1. Click the Start button (or press the Windows key) and open the Control Panel on Windows 7, or open Settings on Windows 10.
2. For Windows 7, click on Programs and Features. For Windows 10, click on Apps and Features.
3. Locate the Java program in the list of installed applications.
4. Click on the Java entry, and then click Uninstall.
5. Follow the on-screen prompts to completely remove Java from your computer.
Step 2: Delete any remaining Java files and folders
1. Open File Explorer (or press the Windows key + E).
2. Navigate to C:Program Files (x86)Java if you have a 64-bit system or C:Program FilesJava if you have a 32-bit system.
3. If you find a Java folder, right-click on it and select Delete.
4. Additionally, you can search for any other files or folders related to Java on your computer and delete them.
Step 3: Remove Java-related registry entries
1. Press the Windows key + R to open the Run dialog box.
2. Type “regedit” (without quotes) and press Enter to open the Registry Editor.
3. Click on Edit from the menu, and then click Find.
4. Type “Java” (without quotes) in the search box and press Enter.
5. When the Registry Editor finds a Java-related entry, right-click on it and select Delete.
6. Press F3 to continue searching for more Java-related entries and repeat the deletion process until no more entries are found.
Note: Editing the registry can be risky, and any mistakes can lead to system instability. It’s advisable to create a backup of your registry before making any changes. To do this, click on File from the Registry Editor menu, then click Export and save the backup file to a safe location.
After following these steps, Java should be completely uninstalled from your computer.
How can I completely uninstall Java from my macOS system while using uninstall apps?
To completely uninstall Java from your macOS system while using uninstall apps, follow these steps:
1. Download an uninstall app: First, download a reputable uninstall app, such as AppCleaner, CleanMyMac, or TrashMe. These apps are designed to thoroughly remove applications and their associated files from your system.
2. Install the uninstall app: Once you’ve downloaded the uninstall app, install it by following the on-screen instructions.
3. Launch the uninstall app: Open the uninstall app and navigate to its main interface.
4. Find Java on the app list: Look for Java in the list of installed applications within the uninstall app’s interface. The list may be sorted alphabetically or according to installation date.
5. Select Java: Click on Java to select it. The uninstall app may display additional information about the application, including the size and associated files.
6. Uninstall Java: Press the uninstall or delete button within the uninstall app. This will initiate the process of removing Java and all its associated files from your macOS system. You may be prompted to enter your administrator password to confirm the action.
7. Restart your Mac: After the uninstall process is complete, it’s recommended to restart your Mac to ensure all changes have been applied.
By following these steps, you can use an uninstall app to completely remove Java from your macOS system. Remember to always use trusted and reputable uninstall apps to avoid potential issues.
What are the most efficient uninstall apps to remove Java from my macOS device?
Some of the most efficient uninstall apps to remove Java from your macOS device are:
1. AppCleaner: AppCleaner is a free application that thoroughly uninstalls unwanted apps, including Java. It searches for all associated files and removes them completely.
2. AppZapper: AppZapper is another popular uninstaller that helps you remove Java along with its related files. Although it’s a paid app, it offers a free trial for a limited number of uses.
3. CleanMyMac X: CleanMyMac X is an all-in-one optimization tool that also includes an uninstaller feature. It effectively removes Java and cleans up any leftover files. However, it is a paid app with a free trial available.
4. TrashMe: TrashMe is a powerful uninstaller that removes applications like Java and their associated files. It offers a free version with some limitations, but a paid version is available for more advanced features.
Remember to always backup your data and verify that you no longer need Java before uninstalling it using any of these apps.
Are there any specific steps or precautions to follow when using uninstall apps to remove Java on macOS?
When using uninstall apps to remove Java on macOS, it’s essential to follow specific steps and precautions to ensure a smooth and successful removal process. Some of the key points to consider include:
1. Backup your data: Before you start the uninstallation process, make sure to backup any important files or documents that might be affected by the removal of Java.
2. Close all Java-related applications: To prevent any possible conflicts or errors during the uninstallation process, close all Java-related applications running on your system.
3. Select a reliable uninstaller app: Choose an uninstaller app with a good reputation and positive reviews to ensure that it will properly and completely remove Java from your macOS system.
4. Follow the uninstaller app instructions: Once you have chosen an uninstaller app, carefully follow its instructions to remove Java. Most uninstaller apps will guide you through the process step-by-step.
5. Confirm the removal of all Java components: After the uninstallation process is complete, verify that all Java components have been removed from your system. You can check the Library and System folders for any remaining Java-related files or folders. If any are found, remove them manually.
6. Restart your computer: After verifying that all Java components have been removed, restart your computer to apply the changes and ensure that the uninstallation process has been successful.
By following these crucial steps and precautions, you can effectively use uninstall apps to remove Java from your macOS system without encountering any issues.