Hola, bienvenidos a mi blog sobre uninstall apps. Hoy, aprenderemos cómo desactivar Metro en Windows 8, para mejorar la experiencia del usuario y optimizar el rendimiento de nuestro sistema. ¡No te lo pierdas!
Disabling Metro Apps in Windows 8: Streamline Your Uninstallation Process
Disabling Metro Apps in Windows 8: If you want to streamline your uninstallation process for Metro apps in Windows 8, follow these simple steps:
1. Open the Start screen: Press the Windows key on your keyboard or click/tap the Windows icon located in the lower-left corner of the screen.
2. Access the Apps view: In the Start screen, either right-click an open area or swipe upwards from the bottom edge of the screen to reveal the hidden options at the bottom. Click or tap on “All apps” to display all installed applications.
3. Uninstalling a Metro app: Locate the app you want to remove in the Apps view. Right-click on the app (or swipe down if using a touchscreen) to reveal the app options, then click or tap on “Uninstall” to start the removal process.
4. Confirm the action: A pop-up window will appear asking you to confirm that you want to uninstall the app. Click or tap on “Uninstall” again to proceed. The app will be removed from your system.
By following these steps, you can effectively streamline your uninstallation process for Metro apps in Windows 8 and maintain a cleaner, more organized operating system.
Windows 8 , 8.1 Disable touchpad gestures
Fix Windows 8 Shutdown & Restart Problems (2 Solutions)

How do I turn off Windows Metro?
To turn off Windows Metro (the Start screen with tiles) in the context of uninstalling apps, you can follow these steps:
1. Right-click on an empty space in the Taskbar and select Properties.
2. Click on the Start or Navigation tab (depending on your Windows version).
3. Look for an option related to the Start screen, like “When I sign in or close all apps on a screen, go to the desktop instead of Start” or “Go to the desktop instead of Start when I sign in”. Check this option and click Apply.
4. In Windows 10, you can also switch from tablet mode to desktop mode by clicking on the Notification Center icon in the lower-right corner of the taskbar, then selecting Tablet mode to disable it.
Please note that Windows Metro is an integral part of the operating system, and it cannot be entirely uninstalled. However, by following these steps, you’ll be able to avoid using the Start screen and access the desktop directly upon startup.
What is the metro screen in Windows 8?
The Metro Screen in Windows 8 is a modern, touch-friendly interface designed by Microsoft to provide users with easy access to apps and settings. It replaced the traditional Start menu and features live tiles, showing real-time information from installed apps. When it comes to uninstalling apps, the Metro Screen offers a simple and straightforward method for removing unwanted software. Users can easily locate the app they want to uninstall and perform the action directly from the Metro Screen.
How do I disable an app in Windows 8?
To disable an app in Windows 8, follow these steps:
1. Press the Windows key on your keyboard to open the Start screen.
2. Locate and right-click on the desired app tile you want to disable.
3. Click on the Uninstall option that appears at the bottom of the screen.
4. A prompt will appear asking if you are sure you want to uninstall the app. Click on Uninstall again to confirm your choice.
5. The app will now be disabled and removed from your system.
Note: Disabling built-in system apps may cause issues with your Windows 8 experience. Be cautious when disabling apps and make sure to research which apps are safe to remove.
How do I enable metered connection in Windows 8?
In the context of uninstalling apps, enabling a metered connection in Windows 8 can help you save data and prevent unwanted app updates. Here’s how to enable it:
1. Open the Charms bar by swiping from the right edge of your screen (or press Windows + C on your keyboard).
2. Click on Settings.
3. Select Change PC settings at the bottom of the Settings panel.
4. In the PC settings window, click on Network in the left pane.
5. On the Networks pane, you will find a list of available networks. Choose the network you’re connected to and set it as a metered connection by turning Set as metered connection toggle switch to ‘On’.
Once you’ve enabled the metered connection, Windows will limit its background data usage, which includes pausing app updates and system updates that consume large amounts of data. This can be useful when you want to manually uninstall apps without having them updated automatically.
How can I effectively disable Metro UI in Windows 8 when uninstalling apps?
To effectively disable Metro UI in Windows 8 when uninstalling apps, follow these steps:
1. Press the “Windows” key on your keyboard or click the “Windows” icon in the bottom-left corner of your screen to open the Start screen.
2. Type “regedit” (without quotes) and press “Enter” to open the Registry Editor. It is important to note that making changes to your computer’s registry can be risky, so proceed with caution and make sure to backup your system before continuing.
3. In the Registry Editor, navigate to the following key: HKEY_CURRENT_USERSoftwareMicrosoftWindowsCurrentVersionExplorer
4. In the right pane, locate the “RPEnabled” entry. If it doesn’t exist, right-click on an empty space, select “New” and then “DWORD (32-bit) Value.” Name the new value “RPEnabled.”
5. Double-click “RPEnabled” to edit its properties. Change the “Value data” field to “0” (zero) to disable Metro UI, and then click “OK.”
6. Close the Registry Editor and restart your computer for the changes to take effect.
After disabling Metro UI, you can uninstall apps using the traditional desktop interface. To do this, follow these steps:
1. Right-click on the app’s icon in the Start menu or on your desktop.
2. Select “Uninstall” from the context menu that appears.
3. Follow the prompts to complete the uninstallation process.
Remember to be cautious while making changes to the registry, and always create a backup before proceeding to avoid any potential issues.
What are the top methods to disable Metro interface while removing unwanted applications on Windows 8?
The Metro interface on Windows 8, also known as the Modern UI, can sometimes make it difficult to remove unwanted applications. Here are the top methods to disable the Metro interface while removing unwanted applications on Windows 8:
1. Use the Classic Shell: This is a third-party application that brings back the Start menu from previous versions of Windows, allowing you to bypass the Metro interface. Download and install Classic Shell, then launch it to access your installed programs and uninstall the ones you don’t want.
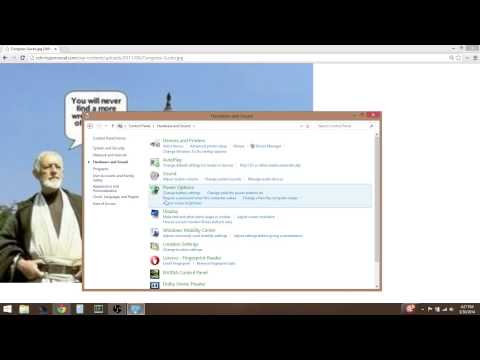
2. Access Control Panel: Bypass the Metro interface by accessing the Control Panel directly. Press the Windows key + X shortcut, and click on “Control Panel” from the menu that appears. Once in the Control Panel, navigate to “Programs and Features.” Here you’ll find a list of installed applications, which can be uninstalled by right-clicking on them and choosing “Uninstall.”
3. Use Task Manager: Another way to disable the Metro interface is by using the Task Manager. Press Ctrl + Shift + Esc to open the Task Manager, go to the “Startup” tab, locate the unwanted applications in the list, and disable them. You can then proceed with their removal using either the Control Panel method mentioned above or a third-party uninstaller.
4. Utilize a third-party uninstaller: There are several reliable third-party uninstallers, such as Revo Uninstaller, IObit Uninstaller, or Geek Uninstaller, that can help you remove unwanted applications without having to deal with the Metro interface. These uninstallers often provide more thorough removal and cleanup options than the built-in Windows uninstaller.
5. Uninstall apps directly from the Start screen: While this method doesn’t necessarily disable the Metro interface, it allows you to uninstall apps without diving into the Control Panel or Task Manager. Simply right-click on the unwanted app’s tile on the Start screen, and select “Uninstall” from the options that appear at the bottom of the screen.
By using these methods, you can bypass or disable the Metro interface while removing unwanted applications on Windows 8, making the uninstallation process more straightforward and efficient.
Can you provide steps to safely disable Metro UI during the uninstallation process of apps in Windows 8?
To safely disable Metro UI during the uninstallation process of apps in Windows 8, follow these steps:
1. Press the ‘Win + R’ keys simultaneously to open the Run dialog box.
2. In the Run dialog box, type gpedit.msc and press Enter. This will open the Local Group Policy Editor.
3. On the left pane of the Local Group Policy Editor window, navigate to:
User Configuration > Administrative Templates > Start Menu and Taskbar.
4. In the right pane, locate the setting named “Go to the desktop instead of Start when signing in or when all the apps on a screen are closed.”
5. Double-click on this setting to open its properties.
6. In the properties window, select Enabled and then click Apply followed by OK. This will disable the Metro UI and redirect you to the Desktop environment when logging in or closing all apps.
7. Close the Local Group Policy Editor window.
8. Now that Metro UI is disabled, to uninstall apps in Windows 8, right-click on the app’s icon in the Start menu, and select Uninstall from the context menu that appears. Follow the on-screen prompts to complete the uninstallation process.
Remember to re-enable Metro UI after uninstalling the app, if desired. To do this, follow the same steps as above, but in step 6, select Not Configured instead of Enabled, and click Apply followed by OK.