
Creating a Localhost SQL Server: A Comprehensive Guide for Advanced Programmers
In today’s fast-paced world of technology, the need for efficient database management is more important than ever. If you’ve ever wondered how to create a localhost SQL server for your development projects, you’re in the right place. As an advanced programmer, you’ll appreciate this comprehensive and technical guide that covers everything you need to know to get started. By the end of this article, you’ll be able to set up your own SQL server on localhost to streamline your database management tasks.
Let’s dive deep into the intriguing world of SQL servers!
What is a Localhost SQL Server?
Before we dive into the process of setting up your localhost SQL server, let’s first understand what exactly it is. A localhost SQL server refers to a local instance of a server running SQL, accessible only on the computer on which it is installed. This type of setup is useful during development as it allows developers to work on their databases without the need to connect to remote servers. It provides faster access and enables the programmer to test their applications in a controlled environment.
Choosing the Right SQL Server Edition
When creating a localhost SQL server, the first step is selecting the right edition that best suits your needs. Microsoft offers various editions of SQL Server, each catering to specific budget limitations and performance requirements.
Consider the following options:
1. SQL Server Developer Edition: This edition is free and provides a full-featured version of SQL Server, but it can only be used for development and testing purposes.
2. SQL Server Express Edition: This free edition is designed for small-scale applications with limited resources, making it ideal for individuals and small businesses.
3. SQL Server Standard and Enterprise Editions: These commercial editions are meant for larger organizations, and they come with advanced features, including better scalability and performance.
For the purpose of this guide, we will focus on the Developer Edition since it is a cost-effective choice for advanced programmers looking to set up a localhost SQL server.
Setting Up Your Localhost SQL Server
Now that we’ve decided on the edition, let’s get started with the installation process. Before you begin, ensure that your system meets the minimum hardware and software requirements. You can find these details in the official [Microsoft SQL Server documentation](https://docs.microsoft.com/en-us/sql/sql-server/install/hardware-and-software-requirements-for-installing-sql-server).
# Step 1: Download and Install SQL Server Developer Edition
To download SQL Server Developer Edition, head over to the [official Microsoft website](https://www.microsoft.com/en-us/sql-server/sql-server-downloads) and click on the “Developer” option. Follow the on-screen instructions to download the installer. Once downloaded, run the setup file and follow these steps:
1. On the initial screen, select Basic installation.
2. Accept the license terms and click Install.
3. The installer will now download the necessary files and begin the installation process.
4. After the installation is complete, you will see a screen displaying the SQL Server instance name (by default, it’s “MSSQLSERVER”). Take note of this, as you will need it later.
5. Click Close to exit the installer.
Congratulations! You have successfully installed SQL Server Developer Edition on your localhost.
# Step 2: Download and Install SQL Server Management Studio (SSMS)
SQL Server Management Studio (SSMS) is the primary tool used by developers to interact with their localhost SQL server. You can download SSMS from the [official Microsoft website](https://docs.microsoft.com/en-us/sql/ssms/download-sql-server-management-studio-ssms).
After downloading the setup file, run the installer and follow these steps:
1. On the initial screen, click Install.
2. The installer will now download the necessary files and begin the installation process.
3. Once the installation is complete, click Close.
You have now successfully installed SQL Server Management Studio on your computer.
# Step 3: Connect to Your Localhost SQL Server using SSMS
With both SQL Server Developer Edition and SSMS installed, it’s time to connect to your localhost SQL server. Follow these steps:
1. Launch SSMS and click Connect > Database Engine.
2. In the “Server name” field, type localhost or (local).
3. Choose Windows Authentication as the authentication method.
4. Click Connect.
That’s it! You are now connected to your localhost SQL server using SSMS.
Conclusion
By following this comprehensive guide, you have successfully set up SQL Server Developer Edition on your localhost and learned how to connect to it using SQL Server Management Studio. As an advanced programmer, this setup will enable you to efficiently manage and test your databases during development. From here, you can start creating databases, tables, and stored procedures to power up your web applications. Happy coding!
Pro Tip: While working with your localhost SQL server, remember to periodically take backups of your databases to avoid data loss in case of system crashes or other unforeseen circumstances.
HOW TO START SQL SERVER AGENT | 3 WAYS TO START SQL SERVER AGENT | SQL SERVER QUICK TIPS
Intro To SSMS – Get to know SQL Server Management Studio

How to setup SQL Server localhost?
Setting up SQL Server on localhost involves the following steps:
1. Install SQL Server: First, download the SQL Server Developer Edition or SQL Server Express Edition (free version) from the official Microsoft website. Run the installer and follow the instructions to install SQL Server on your computer.
2. Install SQL Server Management Studio (SSMS): Download the latest version of SQL Server Management Studio from the Microsoft website. Install it by following the on-screen instructions.
3. Create a Database: Open SSMS and connect to your local SQL Server instance. To create a new database, right-click on “Databases” in the “Object Explorer” and choose “New Database.” Enter a name for your database and click “OK.”
4. Configure SQL Server Authentication Mode: By default, SQL Server uses Windows Authentication for connecting to the server. You may want to set up SQL Server Authentication, which allows you to create SQL Server users and log in using their credentials. To do this, right-click on your SQL Server instance in SSMS, select “Properties,” and choose the “Security” tab. Select “SQL Server and Windows Authentication mode” and apply the changes. You will need to restart the SQL Server service to make the changes effective.
5. Create a SQL Server User: Expand your SQL Server instance in SSMS, right-click on “Security” under the instance, and choose “New Login.” Enter a username, select “SQL Server Authentication,” and enter a password. In the “Default Database” section, choose the database that you created earlier. In the “User Mappings” section, check the box next to your database and assign the appropriate roles for the user.
6. Allow SQL Server Through the Firewall: If you plan on connecting to your SQL Server from other devices on your network, you need to allow SQL Server through your firewall. To do this, open “Windows Firewall with Advanced Security” and create a new inbound rule. Choose “Program” as the rule type and select the sqlservr.exe file (usually located in C:Program FilesMicrosoft SQL ServerMSSQL[version].MSSQLSERVERMSSQLBinn). Allow the connection and apply the rule.
7. Connect to SQL Server: Now that you have set up your SQL Server on localhost, you can connect to it using SSMS or any other tool that supports SQL Server connections. Use your server name (usually “(local)” or “localhost”), authentication type, and credentials to connect to the server.
Once you have completed these steps, you will have successfully set up SQL Server on your localhost. You can now create and manage databases, tables, and users within SQL Server to build and develop your applications.
How to make local SQL Server online?
To make a local SQL Server online, you need to follow these steps:
1. Install SQL Server: If you haven’t already, download and install Microsoft SQL Server on your local machine. Make sure to choose the appropriate edition for your needs (SQL Server Express is generally recommended for local development).
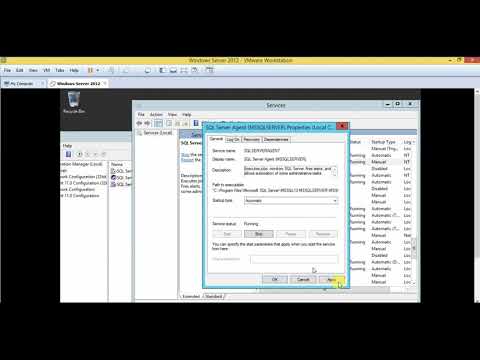
2. Start SQL Server services: Open the SQL Server Configuration Manager, navigate to SQL Server Services, find the SQL Server (MSSQLSERVER) service, right-click and select “Start” if it’s not already running.
3. Enable TCP/IP connections: Go to SQL Server Network Configuration in the Configuration Manager, open the Protocols for MSSQLSERVER, right-click on TCP/IP, and select “Enable”. Restart the SQL Server service after enabling TCP/IP.
4. Allow remote connections: Launch SQL Server Management Studio (SSMS), connect to your local SQL Server instance, and right-click on the server node in the Object Explorer. Select “Properties”, go to the “Connections” page, and check the box for “Allow remote connections to this server”. Click “OK” to save the changes.
5. Configure firewall settings: Open your firewall program (e.g., Windows Defender Firewall) and create a new inbound rule allowing incoming traffic on the default SQL Server port (1433). Ensure the rule is enabled.
6. Find your IP address: Use the “ipconfig” command in the Command Prompt to find your local machine’s IPv4 address.
7. Connect to the local SQL Server online: With your SQL Server running and accessible, you can now use the local IP address and instance name to connect to your server from any tool or application that supports SQL Server connections.
Once these steps are complete, your local SQL Server should be online and accessible for clients or applications to connect to.
How to set up a local SQL Server instance on your machine for smooth development and testing?
To set up a local SQL Server instance on your machine for smooth development and testing, follow these steps:
1. Download SQL Server: Download the SQL Server Developer Edition or the free SQL Server Express Edition from the official Microsoft website.
2. Install SQL Server: Run the downloaded installer and follow the installation wizard to set up SQL Server on your machine. Make sure to select the necessary features such as Database Engine Services, SQL Server Replication, and Full-Text Search.
3. Configure SQL Server: After the installation is complete, open SQL Server Configuration Manager to configure the SQL Server instance. Make sure the SQL Server service is running and set to start automatically.
4. Set up Authentication: During the installation process, you will be prompted to choose an authentication mode for your SQL Server instance. You can select either Windows Authentication or Mixed Mode (Windows and SQL Server Authentication). If you select Mixed Mode, make sure to create a strong password for the ‘sa’ account.
5. Install SQL Server Management Studio (SSMS): Download and install SSMS from the official Microsoft website. This is a separate installation from the SQL Server instance and provides a graphical interface for managing your databases.
6. Connect to your local SQL Server instance: Open SSMS and connect to your local SQL Server instance using the authentication method you chose during installation. By default, the instance name will be in the format “localhostSQLExpress” for SQL Server Express or simply “localhost” for other editions.
7. Create a new database: In SSMS, right-click the ‘Databases’ folder, choose ‘New Database’, and provide a name for your new test database.
8. Set up your development environment: If you’re using an Integrated Development Environment (IDE) or a code editor, make sure it’s configured to connect to your local SQL Server instance. This typically involves specifying the server name, authentication method, and database name in your project settings or connection strings.
Now you have a local SQL Server instance on your machine for smooth development and testing. Make sure to regularly back up your databases and keep your SQL Server updated with the latest patches and security updates.
What are the necessary configurations and steps to create a secure connection between your localhost environment and the SQL Server?
To create a secure connection between your localhost environment and SQL Server, follow these necessary configurations and steps:
1. Install SQL Server: Download and install the appropriate version of Microsoft SQL Server. SQL Server Express is a free version suitable for local development.
2. Enable SQL Server authentication: During the installation process or afterward via SQL Server Management Studio, enable the mixed mode (SQL Server authentication and Windows authentication) to allow connections from your localhost.
3. Create a SQL Server login: Create a new SQL Server login with a username and strong password. This login will be used to connect to the server from your localhost environment.
4. Open firewall ports: Ensure that the SQL Server port (default: 1433) is open in your firewall settings. This will allow incoming connections to SQL Server.
5. Configure SQL Server to accept remote connections: In SQL Server Management Studio, right-click on the server instance, select “Properties”, navigate to “Connections”, and check the option “Allow remote connections to this server”. Restart the SQL Server service if required.
6. Install SQL Server drivers: Download and install the necessary SQL Server drivers for your programming language or development framework.
7. Establish a connection: Utilize the SQL Server login details and the server instance name to establish a connection from your localhost environment. Make sure to use secure connection protocols (such as SSL/TLS) when configuring the connection string.
8. Test the connection: Execute a simple query or command (e.g., SELECT 1) to confirm that the connection is working correctly and securely.
By following these steps, you will create a secure connection between your localhost environment and SQL Server. Remember to always follow best practices for securing your SQL Server instance, such as regularly updating software, using strong passwords, and limiting access to authorized users.
What are the best practices for managing databases, tables, and user permissions while working with a localhost SQL Server setup?
In the context of a localhost SQL Server setup, the best practices for managing databases, tables, and user permissions are:
1. Structured Folder Hierarchy: Organize your databases, tables, and scripts into a structured folder hierarchy for easy navigation and management.
2. Utilize Database Management Tools: Use SQL Server Management Studio (SSMS) or similar tools to manage databases, tables, and user permissions efficiently.
3. Create Separate Environments: Set up separate environments – development, staging, production – on your localhost to ensure smooth testing, deployment, and maintenance.
4. Backup Your Data: Regularly backup your database and store the backups in a secure location to prevent data loss in the event of any failure.
5. Use Version Control: Employ a version control system like Git to keep track of changes made to your database schema and source code.
6. Design Efficient Database Schema: Design a well-thought-out and efficient database schema, with proper relationships between tables, primary keys, and indexes to enhance performance.
7. Implement Security Best Practices: Secure your databases by enforcing strong passwords, using encryption, following the principle of least privilege, and restricting access to sensitive data.
8. Regular Maintenance: Perform regular database maintenance tasks such as updating statistics, rebuilding indexes, and optimizing queries to ensure optimal performance.
9. Monitor Performance: Keep an eye on the performance of your SQL Server instance using performance monitoring tools, and identify any bottlenecks or issues that may require attention.
10. Document Your Setup: Maintain clear and up-to-date documentation of your database schema, user permissions, and settings for more straightforward troubleshooting and onboarding of new team members.


