¡Hola! Bienvenidos a mi blog. Hoy les mostraré cómo desinstalar el Subsistema de Windows para Android, un componente clave que permite ejecutar aplicaciones Android en su dispositivo Windows. Asegúrese de seguir estos pasos al pie de la letra para una experiencia sin problemas.
Effortless Guide to Uninstalling Windows Subsystem for Android: Simplifying the App Removal Process
Effortless Guide to Uninstalling Windows Subsystem for Android: Simplifying the App Removal Process
Uninstalling Windows Subsystem for Android can be a straightforward and hassle-free process, if you follow these simple steps:
1. Open Windows Settings: Click on the Start button and select the gear icon to access the settings.
2. Navigate to Apps: In the Windows Settings window, click on “Apps” to view a list of installed applications.
3. Search for Windows Subsystem for Android: In the search bar, type “Windows Subsystem for Android” to quickly locate the app in the list of installed applications.
4. Select the App and Click Uninstall: Click on the app to select it and then click the “Uninstall” button that appears below it. Confirm your choice by clicking the “Uninstall” button again in the confirmation dialog box.
5. Wait for the Uninstallation to Finish: The uninstallation process might take a few minutes. Once it’s complete, the Windows Subsystem for Android will no longer appear in the list of installed applications.
6. Remove Related Files and Folders (Optional): To remove any leftover files or folders associated with Windows Subsystem for Android, open File Explorer and navigate to the installation directory. Typically, you’ll find it in C:Program FilesWindowsApps. Locate the folder corresponding to Windows Subsystem for Android and delete it.
By following these simple steps, you can easily uninstall Windows Subsystem for Android and keep your system organized and clutter-free.
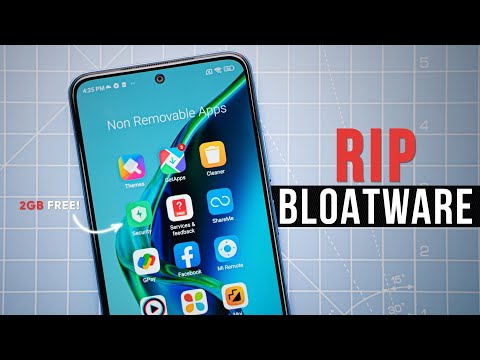
The Simplest Way to Remove Bloatware on Android! (No Root Required)
How To Uninstall System Apps On Android Without Root

How do I remove Windows subsystem?
To remove the Windows Subsystem for Linux (WSL), follow these simple steps:
1. Open the PowerShell as an administrator by right-clicking on the Start button and selecting “Windows PowerShell (Admin)”.
2. Type the following command in the PowerShell window and hit Enter:
“`
wsl –list –verbose
“`
This will show the list of all installed WSL distributions along with their version numbers.
3. If you have a specific WSL distribution you’d like to remove, run the following command, replacing ‘YourDistro’ with the name of the distribution you want to uninstall:
“`
wsl –unregister YourDistro
“`
For example, if you’re uninstalling the Ubuntu distribution, you would type:
“`
wsl –unregister Ubuntu
“`
4. To completely remove the Windows Subsystem for Linux itself, use the following command in the PowerShell:
“`
wsl –set-default-version 1
“`
5. Finally, you’ll need to disable the WSL feature in Windows. Type the following command into the PowerShell window and hit Enter:
“`
Disable-WindowsOptionalFeature -Online -FeatureName Microsoft-Windows-Subsystem-Linux
“`
6. Restart your computer to apply the changes.
By following these steps, you should have successfully removed the Windows Subsystem for Linux and any installed distributions from your system.
How to Uninstall Windows from Android?
How to Uninstall Windows from Android?
Firstly, it’s important to clarify that it’s not feasible to install or uninstall Windows on an Android device, as both platforms are designed for different types of hardware and use different operating systems.
However, if you want to remove a Windows emulator or remote desktop app from your Android device, you can follow these steps:
1. Open the App Drawer: Tap on the app drawer icon on your Android device, which is usually a circle with six dots, to access the list of installed apps.
2. Locate the Windows Emulator or Remote Desktop App: Look for the app you’d like to uninstall, such as “Microsoft Remote Desktop” or “ExaGear.”
3. Long-press the App Icon: Press and hold the app icon until a menu appears.
4. Select ‘Uninstall’: In the menu that appears, tap on the ‘Uninstall’ option. If this option doesn’t appear in the menu, you might need to drag the app icon to the ‘Uninstall’ or ‘Trash bin’ icon that appears at the top or bottom of the screen.
5. Confirm Uninstallation: A prompt will appear asking you to confirm the uninstallation. Tap on ‘OK’ or ‘Uninstall’ to proceed.
6. Wait for the Process to Finish: The app will be uninstalled from your Android device, and you’ll receive a confirmation message once the process is complete.
Keep in mind that uninstalling a Windows emulator or remote desktop app will not affect your actual Windows computer or its files in any way. It simply removes the app from your Android device.
Where is Windows Subsystem for Android installed?
The Windows Subsystem for Android is typically installed within the Windows operating system, specifically under the Settings app. To access it, go to Settings > Apps > Optional features. From there, you can find the Windows Subsystem for Android and uninstall it if desired.
How do I Uninstall an app that won’t Uninstall on Android?
If you’re trying to uninstall an app on your Android device, but it won’t uninstall, follow these steps:
1. Restart your device: Sometimes, a simple restart can fix minor glitches that prevent the app from uninstalling. Press and hold the power button, then select “Restart” or “Power off and on.”
2. Check for app updates: The issue might be resolved in an update. Go to Google Play Store > Menu (three horizontal lines) > My apps & games > find the app > Update (if available).
3. Clear the app’s cache and data: Go to Settings > Apps & notifications > See all apps > select the problematic app > Storage & cache > Clear cache and Clear storage. This will remove any temporary files and settings associated with the app.
4. Force stop the app: In the same app settings mentioned above, tap Force stop. This ensures the app is not running in the background when you attempt to uninstall it.
5. Try uninstalling the app again: After clearing the cache and force stopping the app, try to uninstall it again by tapping Uninstall in the app settings or by long-pressing the app icon on the home screen or app drawer and selecting Uninstall.
6. Safe mode: Boot your device in safe mode to disable third-party apps temporarily. Press and hold the power button, then tap and hold the “Power off” option until the “Reboot to Safe Mode” prompt appears. Tap “OK.” In safe mode, try uninstalling the problematic app.
7. Disable administrator permissions: Some apps might have device administrator privileges that prevent them from being uninstalled. Go to Settings > Security (or Lock screen and security) > Device administrators > uncheck the box next to the problematic app > Deactivate. Try uninstalling the app again.
8. Factory reset: If all else fails, as a last resort, perform a factory reset on your device. This will erase all data and installed apps, returning your device to its original settings. Make sure to back up any important data before proceeding. To perform a factory reset, go to Settings > System (or General management) > Reset (or Backup and reset) > Factory data reset > Reset device (or Reset phone).
Remember, always download apps from trusted sources such as the Google Play Store, and keep your device updated for optimal performance and security.
How do I factory reset my Windows subsystem Android?
To factory reset your Windows Subsystem for Android, follow these steps:
1. Open the Windows Settings by pressing the Windows key + I on your keyboard or search for “Settings” in the Start menu.
2. Navigate to Apps > Apps & features.
3. Scroll down and locate the Windows Subsystem for Android in the list of installed apps.
4. Click on the Windows Subsystem for Android entry, and then click on the Advanced options link.
5. In the new window, scroll down to the Reset section.
6. Click on the Reset button. A warning message will appear, letting you know that this process will delete all data, settings, and apps within the Windows Subsystem for Android.
7. Click on the Reset button again to confirm the action.
The factory reset process will start, and it might take a few minutes to complete. Once it’s done, your Windows Subsystem for Android will be back to its original state, and any apps installed within it will be uninstalled.
How do I Uninstall WSL?
If you want to uninstall Windows Subsystem for Linux (WSL), follow these simple steps:
Step 1: Open PowerShell with administrative privileges. To do this, type “PowerShell” in the Start menu, right-click on the “Windows PowerShell” result, and select “Run as administrator.”
Step 2: If you have WSL 2 installed and want to completely remove it and revert to WSL 1, type the following command and press Enter:
“`
wsl –set-default-version 1
“`
Step 3: To list all the installed Linux distributions, type the following command and press Enter:
“`
wsl –list –verbose
“`
Step 4: To uninstall a specific Linux distribution, type the following command and replace “YourDistro” with the name of the distribution you want to uninstall:
“`
wsl –unregister YourDistro
“`
For example, if you want to uninstall Ubuntu, the command will be:
“`
wsl –unregister Ubuntu
“`
Step 5: After successfully unregistering the Linux distribution, you can remove it from the Windows Store by navigating to the app’s page and clicking on Uninstall.
Step 6: To uninstall the Windows Subsystem for Linux feature from Windows, type the following command in the PowerShell window and press Enter:
“`
wslconfig /u
“`
Step 7: Finally, if you’d like to remove the “Windows Subsystem for Linux” optional feature, type the following command in PowerShell and press Enter:
“`
Disable-WindowsOptionalFeature -Online -FeatureName Microsoft-Windows-Subsystem-Linux
“`
This will disable and uninstall the WSL feature. You may need to restart your computer for the changes to take effect.
How can I properly uninstall the Windows Subsystem for Android to ensure no residual files or settings are left behind?
To properly uninstall the Windows Subsystem for Android and ensure no residual files or settings are left behind, follow these steps:
1. Uninstall the Windows Subsystem for Android application: Open the Start menu, search for “Windows Subsystem for Android,” right-click on the app, and select “Uninstall.”
2. Remove associated files and folders: Open File Explorer and navigate to the following folder: `%LOCALAPPDATA%Microsoft`. Locate the folder named “WSA” or “Windows Subsystem for Android” and delete it.
3. Uninstall the virtual machine: Press the Windows key + X, and click on “Windows PowerShell (Admin).” Type the following command and press Enter: `wsl –unregister WSA`.
4. Disable the Windows Subsystem for Linux: Open the Control Panel, click on “Programs,” then “Turn Windows features on or off.” In the list of features, uncheck the box next to “Windows Subsystem for Linux” and click “OK.” Restart your computer if prompted.
5. Check for any remaining files: Manually search your computer for any additional files or folders related to the Windows Subsystem for Android and delete them.
By following these steps, you can be confident that the Windows Subsystem for Android has been thoroughly uninstalled and all residual files have been removed from your system.
What are the potential issues that one might encounter when trying to uninstall Windows Subsystem for Android, and how can they be resolved?
When trying to uninstall the Windows Subsystem for Android, one might encounter several potential issues. Here are some of the most common problems and their solutions:
1. Unable to locate the app: If you’re having trouble finding the Windows Subsystem for Android in the list of installed programs, make sure to check the “Apps & features” section in the Windows Settings. You can also search for it directly using the search bar.
2. Error messages during uninstallation: If you encounter errors or prompts during the uninstallation process, try restarting your computer and attempting the uninstallation again. Sometimes, running applications or processes may interfere with the successful removal of the app.
3. Leftover files or registry entries: After uninstalling the Windows Subsystem for Android, you might notice that some files or registry entries still exist on your computer. To remove these leftovers, you can use a third-party tool such as CCleaner or Revo Uninstaller. Be cautious while using these tools and make sure to back up your registry before making any changes.
4. Incomplete uninstallation: In some cases, the uninstallation process might not remove all components related to the Windows Subsystem for Android. To ensure a complete removal, you can use a dedicated uninstaller software like IObit Uninstaller, which can remove all associated files, folders, and registry entries.
5. Issues with other applications: After uninstalling the Windows Subsystem for Android, you might experience problems with other apps on your system, especially those that depend on the Android subsystem. To resolve this issue, consider reinstalling those applications or contacting their support teams for further assistance.
In conclusion, when uninstalling the Windows Subsystem for Android, be prepared to face potential issues, such as difficulty locating the app, error messages, leftover files, incomplete uninstallation, and problems with other applications. By following the suggested solutions, you can successfully remove the app and resolve any related issues.
Are there any recommended third-party tools or utilities to assist in the complete removal of the Windows Subsystem for Android from my system?
Yes, there are third-party tools or utilities that can assist in the complete removal of the Windows Subsystem for Android from your system. One such popular and reliable tool is Revo Uninstaller. This software helps in not only uninstalling the application but also in removing leftover files and registry entries to ensure a thorough cleaning process.
To use Revo Uninstaller, follow these steps:
1. Download and install Revo Uninstaller from their official website.
2. Launch the application and look for the Windows Subsystem for Android in the list of installed programs.
3. Select the Windows Subsystem for Android and click on the “Uninstall” button.
4. The software will then perform a deep scan to find any leftovers in the system, including registry entries.
5. Once the scan is complete, review the results and select all detected leftovers to remove them completely from your system.
Please note that it is essential to create a system restore point or backup before making any significant changes to your system. Uninstalling critical components may cause issues with your system’s functionality.