¡Bienvenidos a mi blog! Hoy hablaremos de cómo desinstalar CUDA en Windows. Te guiaremos paso a paso para eliminar esta herramienta de programación paralela de tu sistema. ¡Sigue leyendo para aprender más!
Unleash Your System’s Potential: A Comprehensive Guide to Uninstalling CUDA on Windows Safely and Efficiently
Uninstalling CUDA on Windows is an essential step for users who want to switch to a different GPU, optimize their system, or simply free up valuable space. This comprehensive guide will walk you through the process of safely and efficiently uninstalling CUDA on your Windows operating system.
First, back up any important data you may have stored within the CUDA folders. This might include code, project files, or configuration settings. Locate the main CUDA installation folder, which is typically found at “C:Program FilesNVIDIA GPU Computing ToolkitCUDA.”
Next, open the Windows Control Panel by pressing the Windows key and typing “Control Panel” into the search bar. Click on the result to open the Control Panel window.
In the Control Panel, click on “Uninstall a program” under the “Programs” category. This will take you to the “Programs and Features” window, where you can manage installed software on your system.
Look for “NVIDIA CUDA” or a similar entry in the list of installed programs. Keep in mind that the exact name may vary depending on the version and installation method used.
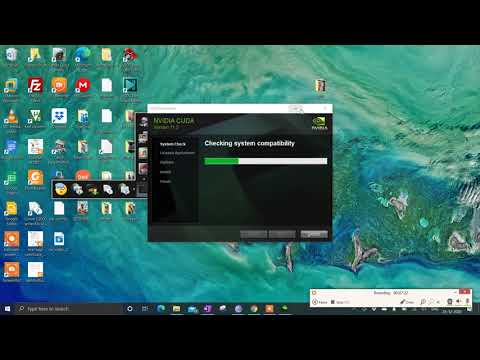
Once you’ve located the CUDA entry, click on it to select it, then click the “Uninstall” button near the top of the window. A confirmation prompt will appear, asking if you’re sure you want to uninstall the CUDA software. Click “Yes” to proceed with the uninstallation process.
The CUDA uninstaller will now launch, and you’ll be prompted to choose the components you want to remove. Ensure that all checkboxes are selected, then click “Uninstall” to begin removing the selected components.
After the uninstaller has completed its work, it’s important to remove any remaining CUDA-related files and registry entries to ensure a clean uninstallation. To do this, open the “Run” dialog box by pressing the Windows key + R, then type “regedit” and press Enter to open the Windows Registry Editor.
In the Registry Editor, use the left-hand pane to navigate to “HKEY_LOCAL_MACHINESOFTWARENVIDIA Corporation.” Locate and delete any folders related to CUDA, such as “CUDA_Toolkit” or “NvInstaller.”
Finally, restart your computer to make sure all changes take effect and complete the uninstallation process. Once you’ve safely uninstalled CUDA on your Windows system, you can proceed with optimizing your system, installing alternative software, or updating your GPU drivers to unleash your system’s full potential.
BLOAT is killing your FPS

CUDA Driver installation on Windows to fix GPU error 2021
How do I completely uninstall CUDA?
Completely Uninstalling CUDA:
To completely uninstall CUDA from your system, follow these steps:
1. Close all running applications: Ensure that there are no applications or processes using CUDA libraries or features before proceeding with the uninstallation.
2. Remove the CUDA Toolkit: The easiest way to do this is by using the “Add or Remove Programs” feature on Windows or the package manager on Linux:
– Windows: Go to Control Panel > Programs and Features, search for “NVIDIA CUDA Toolkit,” and click ‘Uninstall.’
– Linux (Ubuntu): Open Terminal and run the following command:
“`
sudo apt-get purge –auto-remove nvidia-cuda-toolkit
“`
3. Delete CUDA-related files and directories: Remove any residual files from the CUDA installation:
– Windows: Navigate to the “Program Files” and “Program Files (x86)” directories, and delete any folders related to NVIDIA or CUDA.
– Linux: Run the following commands in Terminal:
“`
sudo rm -rf /usr/local/cuda*
sudo rm /etc/profile.d/cuda.sh
sudo rm /etc/ld.so.conf.d/cuda*.conf
“`
4. Uninstall the GPU driver: This step is optional but recommended if you intend to reinstall a different version of CUDA or switch to a different GPU hardware/software stack.
– Windows: In Device Manager, locate your NVIDIA display adapter under ‘Display adapters.’ Right-click it, and choose ‘Uninstall device.’ Check ‘Delete the driver software for this device’ before clicking ‘Uninstall.’
– Linux (Ubuntu): Open Terminal and run the following command:
“`
sudo apt-get purge –auto-remove nvidia*
“`
5. Reboot your system: Finally, restart your computer to ensure that all components are removed from your system.
By following these steps, you should have successfully uninstalled CUDA from your system. If you encounter any issues or errors during the process, consult NVIDIA’s official documentation for additional troubleshooting information.
How do I uninstall CUDA Toolkit window?
Uninstalling the CUDA Toolkit on Windows can be done following these steps:
1. Open the Control Panel: Click on the Start button and search for “Control Panel”. Select it from the search results.
2. Navigate to Programs and Features: In the Control Panel, click on “Uninstall a program” under the Programs category.
3. Locate the CUDA Toolkit: Look for “NVIDIA CUDA” or “NVIDIA CUDA Toolkit” in the list of installed programs. The version number may also be included in the name.
4. Uninstall the CUDA Toolkit: Click on the CUDA Toolkit entry to select it, then click on the “Uninstall/Change” button above the list. Follow the prompts to complete the uninstallation process. If asked to restart your computer, please do so.
5. Remove remaining files (optional): If you want to make sure all the CUDA Toolkit files are removed, navigate to the installation directory (usually `C:Program FilesNVIDIA GPU Computing ToolkitCUDA`) and delete the folder with the version number (e.g., `v10.2`).
6. Update your Environment Variables (optional): Press the Windows key + X and select “System”. Click on “Advanced system settings” on the right side. Under the Advanced tab, click on the “Environment Variables” button. In the “System variables” section, find and edit the variables containing the CUDA Toolkit paths (e.g., `CUDA_PATH`, `PATH`). Remove any entries related to the CUDA Toolkit.
After completing these steps, the CUDA Toolkit should be successfully uninstalled from your Windows system.
Do I need to uninstall old CUDA?
Yes, it is essential to uninstall old CUDA versions before installing a new one. Having multiple versions can cause conflicts and compatibility issues with your applications or system. To ensure optimal performance and prevent any potential errors, it’s best to remove the previous version of CUDA and then proceed with the installation of the updated toolkit.
How to downgrade CUDA Windows?
How to downgrade CUDA on Windows
Downgrading the CUDA toolkit on your Windows system is essential if you are facing compatibility issues or need an older version for a specific application. To downgrade CUDA on Windows, follow these steps:
Step 1: Uninstall the current CUDA version
1. Go to the “Control Panel” by clicking on the “Start” button and typing “Control Panel” in the search bar.
2. Click on “Programs and Features” to access the list of installed programs.
3. Locate the “NVIDIA CUDA” entry in the list, then right-click on it and select “Uninstall/Change.”
4. Follow the on-screen instructions to remove the current version of CUDA from your system.
Step 2: Remove residual files and folders
1. Open “Windows Explorer” and navigate to the following directory: C:Program FilesNVIDIA Corporation
2. Delete the “CUDA Toolkit” folder if it still exists.
3. Open the “Windows Registry Editor” by pressing Win + R, typing regedit, and clicking “OK.”
4. Navigate to the following path in the Registry Editor: HKEY_CURRENT_USERSoftwareNVIDIA Corporation
5. If there is a “CUDA” key, right-click on it and choose “Delete.”
Step 3: Download and install the desired CUDA version
1. Visit the NVIDIA CUDA Toolkit Archive page: https://developer.nvidia.com/cuda-toolkit-archive
2. Select the desired CUDA version from the list and download it.
3. Once the download is complete, run the installer and follow the on-screen instructions to install the downgraded version of CUDA.
4. Restart your computer to apply the changes.
Note: Downgrading CUDA may also require you to downgrade your NVIDIA graphics driver, as certain driver versions may not be compatible with older CUDA versions. Be sure to check the CUDA version’s system requirements before installation to ensure compatibility with your current setup.
Is CUDA installed on my Windows?
Before determining whether CUDA is installed on your Windows, it’s essential to know what CUDA is. CUDA (Compute Unified Device Architecture) is a parallel computing platform and application programming interface (API) model created by NVIDIA. It allows developers to use NVIDIA GPUs for general-purpose processing.
To check if CUDA is installed on your Windows, follow these steps:
1. Press Win + X and select Device Manager.
2. Expand the Display adapters category.
3. Look for an NVIDIA GPU (e.g., NVIDIA GeForce GTX 1080). If you don’t see an NVIDIA GPU, then your system doesn’t have one, and CUDA is not installed.
4. If you have an NVIDIA GPU, go to the next step.
5. Press Win + S and search for NVIDIA Control Panel.
6. Open the NVIDIA Control Panel and navigate to Help > System Information.
7. In the Details tab, look for the CUDA line under the Components section. If it’s present, then CUDA is installed in your system.
If you want to uninstall CUDA from your Windows, follow these steps:
1. Press Win + X and select Apps and Features.
2. In the search bar, type “CUDA”.
3. If found, click on the NVIDIA CUDA software and select Uninstall.
4. Follow the on-screen instructions to complete the uninstallation process.
Remember that uninstalling CUDA may affect the performance or functionality of applications that depend on it.
Where is CUDA installed Windows 10?
When it comes to uninstalling apps, knowing the installation location is essential. For CUDA on Windows 10, it is typically installed in the following directory:
C:Program FilesNVIDIA GPU Computing ToolkitCUDAvX.Y
In this path, X.Y refers to the version number of the installed CUDA toolkit. To uninstall CUDA completely, you can follow these steps:
1. Open the Control Panel.
2. Navigate to “Programs and Features”.
3. Look for NVIDIA CUDA Toolkit vX.Y in the list of installed programs.
4. Select the CUDA Toolkit and click on the Uninstall/Change button.
5. Follow the prompts to complete the uninstallation process.
After completing these steps, your system should no longer have the CUDA toolkit installed.
How to uninstall CUDA completely from a Windows system in the context of uninstalling apps?
Uninstalling CUDA completely from a Windows system involves several steps. Here’s a guide to help you through the process:
1. Close any active applications that may be using CUDA, such as video editing or deep learning software.
2. Open the Control Panel: Click on the Start button and type “Control Panel” in the search bar. Select the Control Panel app from the results.
3. Navigate to Programs and Features: In the Control Panel window, click on “Programs and Features” to access the list of installed applications.
4. Uninstall the NVIDIA CUDA Toolkit: Locate “NVIDIA CUDA Toolkit” (or similar) in the list of installed programs. Select it and click on the “Uninstall/Change” button above the list. Follow the prompts to uninstall the toolkit.
5. Remove remaining CUDA files and folders: Open the File Explorer and navigate to the location where CUDA was installed (usually `C:Program FilesNVIDIA GPU Computing Toolkit` by default). Delete the “CUDA” folder.
6. Delete environment variables: Right-click on “My Computer” or “This PC” and select “Properties.” Click on “Advanced system settings” on the left side of the window. In the “System Properties” window, click on the “Environment Variables” button.
In the Environment Variables window, under “System variables”, look for the following entries: `CUDA_PATH`, `CUDA_PATH_Vx_y` (where x and y represent version numbers), and `Path`. Delete the `CUDA_PATH` and `CUDA_PATH_Vx_y` variables by selecting them and clicking “Delete.”
For the “Path” variable, select it and click on “Edit.” Look for any entries related to CUDA (such as `C:Program FilesNVIDIA GPU Computing ToolkitCUDAvX.Ybin`) and remove them. Click “OK” to save the changes.
7. Restart your computer: Reboot your system for the changes to take effect.
8. Verify the uninstallation: To ensure that CUDA has been completely uninstalled, you can open a Command Prompt and type “nvcc –version”. If the command is not recognized, it means that the uninstallation was successful.
Please note that this process only removes the CUDA software from your system. Your NVIDIA GPU hardware will remain fully functional for other tasks and applications that do not require CUDA.
What are the potential issues one might face during the uninstallation process of CUDA on Windows in the context of uninstall apps?
During the uninstallation process of CUDA on Windows, one might face several potential issues. Some of the most important ones are:
1. Incomplete uninstallation: If the uninstallation process is not done correctly or is interrupted, it could lead to an incomplete removal of CUDA components. This might cause issues when trying to reinstall or upgrade CUDA in the future.
2. Registry entries: Uninstalling CUDA might leave behind registry entries that are associated with the software. These leftover entries can clutter the Windows registry and potentially cause issues with other applications or system performance.
3. Dependency conflicts: Other applications that rely on CUDA libraries might malfunction or fail to launch after the uninstallation. This is because their dependencies on the removed CUDA components are no longer satisfied.
4. Manual removal: In some cases, the uninstaller might not remove all the files and folders associated with CUDA. Users may need to identify and delete these files manually, which can be challenging and time-consuming.
5. System Restore Points: Uninstalling CUDA might create system restore points that consume storage space on the hard drive. It is crucial to manage these restore points to avoid unnecessary storage usage.
6. Error messages: During the uninstallation process, users might encounter error messages or warnings. These can be due to a variety of reasons, such as insufficient permissions or corrupted files.
To minimize these potential issues, it is essential to follow the proper steps during the uninstallation process and use reliable uninstall apps to ensure a thorough removal of CUDA from the system.
Is there any recommended procedure to follow for achieving a clean uninstallation of CUDA from a Windows system in the context of uninstall apps?
Yes, there is a recommended procedure to follow for achieving a clean uninstallation of CUDA from a Windows system in the context of uninstall apps. By following these steps, you can ensure a smooth and complete removal of the software:
1. Close any running applications that are using the CUDA toolkit or libraries.
2. Open the Control Panel by searching for “Control Panel” in the Windows search bar or pressing the “Windows key + X” and selecting “Control Panel” from the list.
3. In the Control Panel, click on “Uninstall a program” under the “Programs” section.
4. Locate the NVIDIA CUDA Toolkit in the list of installed programs. It may be listed as “NVIDIA CUDA” or a similar name.
5. Select the CUDA Toolkit by clicking on it, and then click the “Uninstall/Change” button above the list. This will launch the NVIDIA CUDA Toolkit uninstall process.
6. Follow the on-screen instructions to complete the uninstallation. During this process, you may be prompted to remove additional components, such as samples or documentation. Ensure that you also uninstall them if you wish to fully remove the CUDA Toolkit from your system.
7. After the uninstallation is complete, restart your computer to ensure that all changes are applied and any remaining files are removed.
For a more thorough cleanup, you can also manually remove any lingering files and folders related to CUDA on your system, such as user-generated projects, sample files, and preferences stored in the AppData folder.
By following this recommended procedure, you can ensure a clean uninstallation of the CUDA Toolkit from your Windows system.