7 Easy Steps for Installing a PowerShell Module: Your Ultimate Guide
As an expert software engineer, I am frequently asked questions about PowerShell and its usage. One of the most common queries is related to installing a PowerShell module. In this comprehensive guide, I will unveil the mystery behind this prevalent topic and provide you with a step-by-step method to achieve it.
Did you know that PowerShell can become even more powerful through the use of modules? These dynamic extensions can elevate your command-line experience by adding new cmdlets and functionalities. If you have ever wondered how to expand your PowerShell capabilities, then this article is for you.
We’ll cover the entire process all the way from finding the desired module to handling its installation seamlessly. So, let’s dive right in!
1. Understanding PowerShell Modules
Before we begin with the installation process, it’s crucial to understand what a PowerShell module is. A PowerShell module is essentially a package that contains related scripts, functions, cmdlets, and other resources. By installing these modules, you can enhance the functionality of PowerShell to better suit your needs.
2. Identifying the Right Module
To find the appropriate module for your needs, you can either turn to the PowerShell Gallery or perform a quick web search. The PowerShell Gallery is the official repository for all PowerShell modules and scripts, and it is a fantastic resource to start your search. You can access it at [www.powershellgallery.com](https://www.powershellgallery.com/).
Once on the website, use the search bar to look for the module you require. Take note of the module name, as you will need it in the next step.
3. Updating Package Management
Before proceeding with the actual installation, it’s essential to update your PackageManagement provider. This ensures that you have the latest version, which can help avoid any compatibility issues during the installation. To do this, run the following command in your PowerShell window:
“`
Install-PackageProvider -Name NuGet -MinimumVersion 2.8.5.201 -Force
“`
4. Installing the Required Module
Now that you have updated the package management and located the desired PowerShell module, it’s time to install it. To do this, simply run the following command, replacing the “ placeholder with the name of the module from step 2:
“`
Install-Module -Name -Scope CurrentUser
“`
For example, if you’re installing the popular `AzureRM` module, the command would look like this:
“`
Install-Module -Name AzureRM -Scope CurrentUser
“`
The `-Scope` parameter defines where the module will be installed. By setting it to `CurrentUser`, the module will only be available for the user running the command. Alternatively, you can use `AllUsers` instead, which will make the module available for all users on the machine. Note that installing for “AllUsers” might require administrative privileges on the system.
5. Verifying the Installation
Once the installation process completes, it’s essential to verify that the module is installed correctly. You can do this by running the following command:
“`
Get-Module -Name -ListAvailable
“`
If the module has been installed successfully, you will see information about the module, such as its version number, displayed in the output.
6. Importing the Module
With the module now installed on your system, you’ll need to import it into your PowerShell session to begin using its cmdlets and functionalities. To do this, just run the following command:
“`
Import-Module -Name
“`
Once the module is imported, you can begin using the new cmdlets and functions provided by the module.
7. Updating the Module
It is vital to frequently check for updates to your installed modules, as they may include essential bug fixes, security patches, or new features. To update a module, simply run the following command:
“`
Update-Module -Name
“`
And there you have it! You now know how to locate, install, and manage PowerShell modules like a pro.
By understanding the importance of PowerShell modules and mastering the installation process, you can extend the functionality of PowerShell to suit your unique requirements. This powerful and dynamic tool can be a game-changer in your command-line experience.
So, go ahead, explore the wealth of available PowerShell modules, and unlock the true potential of this already formidable command-line tool.
How to set up PowerShell prompt with Oh My Posh on Windows 11

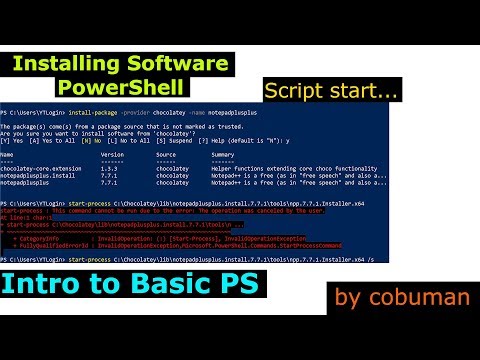
Installing Software through Power Shell, Intro to powershell scripts
How can I manually install a PowerShell module?
Manually installing a PowerShell module involves a few essential steps. In this guide, I will walk you through the process of manually installing a PowerShell module using the command-line interface.
Step 1: Download the module
First, you need to download the module you want to install. Modules are usually distributed as ZIP files. You can either download these files from the official repository, such as the PowerShell Gallery, or from other sources provided by the module developer.
Step 2: Extract the module
Once you have downloaded the module ZIP file, extract its content to a folder. Inside this folder, you should find a subfolder with the same name as the module that contains the necessary PowerShell scripts and configuration files.
Step 3: Choose the installation location
Before copying the extracted module folder, decide where you want to install it. There are two common locations for installing PowerShell modules:
1. User-specific location: This is the easiest option, as it does not require administrative rights. Modules installed in this location are only available to the current user. The default path for the user-specific location is `%USERPROFILE%DocumentsWindowsPowerShellModules`.
2. System-wide location: If you want to make the module available to all users on your system, you should install it in the system-wide location. The default path for this location is `%WINDIR%System32WindowsPowerShellv1.0Modules`. Note that this requires administrative rights.
Step 4: Copy the module folder
Now, copy the extracted module folder (the one containing the PowerShell scripts and configuration files) to the desired installation location. Ensure that the folder structure is preserved.
Step 5: Import the module
Finally, you can import the module into your PowerShell session using the `Import-Module` command followed by the module’s name:
“`powershell
Import-Module -Name
“`
Replace “ with the actual name of the module.
After following these steps, you should now have the PowerShell module installed and ready to use.
How can I install a PowerShell module from a file?
To install a PowerShell module from a file, follow these steps:
1. Download the module file (usually a `.zip` file) from the source and extract its contents to a folder.
2. Open the PowerShell command-line environment by pressing `Win + X`, then selecting Windows PowerShell (Admin) or by searching for PowerShell in the start menu and running it as Administrator.
3. Change the directory to the folder where you have extracted the module files using the `cd` command, e.g., `cd C:UsersYourUsernameDownloadsModuleFolder`.
4. Before installing the module, you may need to change the Execution Policy to allow the installation of modules from your local machine. To do this, run the following command:
“`
Set-ExecutionPolicy RemoteSigned
“`
5. Confirm the execution policy change by typing `Y` or `A` when prompted.
6. After changing the Execution Policy, import the module by using the `Import-Module` cmdlet followed by the path to the `.psd1` or `.psm1` file, like this:
“`
Import-Module .ModuleName.psd1
“`
7. If the module requires installation, use the cmdlet provided by the module to install it. For example, if the cmdlet is `Install-MyModule`, run:
“`
Install-MyModule
“`
8. After installing the module, you can verify if it has been installed correctly by running the following command:
“`
Get-Module -ListAvailable
“`
You should now see the newly installed module in the output list of available modules.
How can one install PowerShell using the command prompt?
To install PowerShell using the command prompt, you can follow these steps:
1. First, open the command prompt with administrator privileges. To do this, press `Win + X` and select Command Prompt (Admin) or Windows PowerShell (Admin) depending on your Windows version.
2. Next, you need to download the PowerShell installer. You can use the following commands:
For PowerShell 7 (the latest version), which works side-by-side with Windows PowerShell 5.1:
“`
curl.exe -LO https://github.com/PowerShell/PowerShell/releases/download/v7.2.0/PowerShell-7.2.0-win-x64.msi
“`
For Windows PowerShell 5.1 (the built-in version for Windows 8.1 and Windows Server 2012 R2 and later):
“`
curl.exe -LO https://download.microsoft.com/download/6/F/5/6F5FF66C-6775-42B0-86C4-47D41F2DA187/Win8.1AndW2K12R2-KB3191564-x64.msu
“`
Make sure to replace the version number and architecture (x64 for 64-bit systems, x86 for 32-bit systems) as needed.
3. Install PowerShell by running the downloaded installer:
For PowerShell 7:
“`
msiexec.exe /i PowerShell-7.2.0-win-x64.msi
“`
For Windows PowerShell 5.1:
“`
wusa.exe Win8.1AndW2K12R2-KB3191564-x64.msu
“`
4. Once the installation is complete, launch PowerShell by searching for it in the Windows Start menu or by running `pwsh.exe` (PowerShell 7) or `powershell.exe` (Windows PowerShell 5.1) from the command prompt.
Now you have successfully installed PowerShell using the command prompt!
How can I obtain a PowerShell module?
To obtain a PowerShell module, you can utilize the PowerShell Gallery, an online repository of various scripts and modules created by the community. You can access the gallery using the Install-Module cmdlet in PowerShell command-line.
First, make sure you have the latest version of PowerShellGet installed. To do this, run the following command:
“`powershell
Install-Module PowerShellGet -Force
“`
Now, you can search for a specific module using the Find-Module cmdlet with the name of the module you are looking for:
“`powershell
Find-Module -Name *ModuleName*
“`
Replace *ModuleName* with the actual name of the module you want to find.
To install a module from the PowerShell Gallery, use the Install-Module cmdlet followed by the name of the module:
“`powershell
Install-Module -Name *ModuleName*
“`
Again, replace *ModuleName* with the actual name of the module you want to install.
Please note that it is necessary to launch PowerShell as an administrator when installing modules.
What is the method for installing the PowerShell Universal Module?
To install the PowerShell Universal Module, follow these steps within the PowerShell command-line environment:
1. Open PowerShell: Ensure that you have PowerShell 5.1 or newer installed on your system. You can check the version by running `$PSVersionTable.PSVersion` in PowerShell.
2. Install the module: Run the following command to install the PowerShell Universal Module from the PowerShell Gallery:
“`
Install-Module -Name Universal
“`
3. Import the module: After the installation is complete, import the module into your PowerShell session using the following command:
“`
Import-Module Universal
“`
You have now installed and imported the PowerShell Universal Module. You can start using its cmdlets and features within the PowerShell command-line environment.
How can I install the Office 365 PowerShell module?
To install the Office 365 PowerShell module, follow these steps:
1. Open a PowerShell session as an administrator. To do this, right-click on the PowerShell icon and select “Run as Administrator.”
2. First, you need to install the Microsoft Online Services Sign-in Assistant. Run the following command:
“`powershell
Install-PackageProvider -Name NuGet -MinimumVersion 2.8.5.201 -Force
“`
3. Next, install the Azure Active Directory (AD) module. Execute the following command:
“`powershell
Install-Module -Name MSOnline -Scope AllUsers -Force
“`
4. Finally, install the Office 365 module itself by running the following command:
“`powershell
Install-Module -Name MicrosoftTeams -Scope AllUsers -Force
“`
Now, you have successfully installed the Office 365 PowerShell module. You can manage your Office 365 environment using various cmdlets provided by the module.
Remember to always run the PowerShell session as an administrator while working with the Office 365 module.
How to install a PowerShell module from the PowerShell Gallery using the command-line interface?
To install a PowerShell module from the PowerShell Gallery using the command-line interface, you can use the Install-Module cmdlet. Before you start, make sure you have the latest version of the PowerShellGet module and NuGet provider installed.
Follow these steps:
1. First, open PowerShell as an Administrator. To do this, right-click on the PowerShell icon and select “Run as Administrator.”
2. If you haven’t already, update the PowerShellGet module by running the following command:
“`powershell
Install-Module PowerShellGet -Force
“`
3. Update the NuGet package provider with the following command:
“`powershell
Install-PackageProvider Nuget -Force
“`
4. Finally, to install a module from the PowerShell Gallery, use the Install-Module cmdlet followed by the module name. For example, to install the “PSScriptAnalyzer” module, run:
“`powershell
Install-Module PSScriptAnalyzer -Scope CurrentUser
“`
Replace “PSScriptAnalyzer” with the name of the module you want to install.
The `-Scope CurrentUser` parameter ensures that the module will be installed only for the current user, not system-wide. If you prefer a system-wide installation, you can use `-Scope AllUsers` instead.
After the installation is complete, you can check if the module is installed correctly by running `Get-Module -ListAvailable`.
What are the key considerations and prerequisites for installing a PowerShell module from a local file or a remote URL?
When installing a PowerShell module from a local file or a remote URL, there are several key considerations and prerequisites to keep in mind:
1. Execution Policy: Before installing a module, ensure that your system’s execution policy allows you to run scripts. You can check the execution policy by running `Get-ExecutionPolicy`. If necessary, change the policy to allow script execution with the command: `Set-ExecutionPolicy RemoteSigned` or `Set-ExecutionPolicy Unrestricted`. Be aware that changing the execution policy may expose your system to security risks.
2. PowerShell Version: Make sure you have an appropriate version of PowerShell installed on your system. Some modules may require a specific version or a later one. You can check your PowerShell version by running `$PSVersionTable.PSVersion`.
3. Administrator Privileges: In some cases, you may need to run PowerShell as an administrator to install certain modules. To do this, right-click on the PowerShell icon and select “Run as Administrator.”
4. Local File or Remote URL: Determine whether you are installing the module from a local file or from a remote URL. For local files, ensure the module is saved on your computer. For remote URLs, make sure you have a stable internet connection to download the module.
5. Installation Command: Use the appropriate command to install the module based on its source:
– For local files, use `Import-Module `
– For remote URLs, use `Install-Module -Name -Repository `
6. Untrusted Repositories: By default, PowerShell will not install modules from untrusted repositories. If you trust the repository and want to install the module, use the `-Force` flag in the `Install-Module` command: `Install-Module -Name -Repository -Force`.
7. Module Dependencies: Some modules may depend on other modules or software to function correctly. Ensure that all required dependencies are installed and configured on your system before installing the module.
In summary, to install a PowerShell module from a local file or a remote URL, always consider factors such as execution policy, PowerShell version, and administrator privileges. Additionally, be cautious when installing modules from untrusted repositories and ensure all necessary dependencies are in place.
How can I verify if a particular PowerShell module is installed correctly and how to troubleshoot common issues during the installation process?
To verify if a particular PowerShell module is installed correctly and to troubleshoot common issues during the installation process, follow these steps:
1. Check if the Module is Installed: You can use the Get-Module cmdlet with the -ListAvailable parameter to list all installed modules on your system. For example:
“`powershell
Get-Module -ListAvailable -Name “ModuleName”
“`
Replace “ModuleName” with the desired module name.
2. Examine Module Installation Path: If the module is listed, check its installation path. Modules are usually installed in one of these two locations:
– User-specific: $homeDocumentsPowerShellModules
– System-wide: $env:ProgramFilesPowerShellModules
3. Verify Module Version: Ensure you have the correct version of the module installed. To do this, use the following cmdlet:
“`powershell
(Get-Module -ListAvailable -Name “ModuleName”).Version
“`
4. Check for Errors: If the module is not listed or there are issues, check the error messages in the console. Common issues include missing dependencies, incorrect permissions, and network connectivity problems.
5. Update Execution Policy: Some modules might not be installed due to restrictions set by the execution policy. To allow the installation or importation of the module, you may need to change the execution policy using the Set-ExecutionPolicy cmdlet:
“`powershell
Set-ExecutionPolicy -ExecutionPolicy RemoteSigned -Scope CurrentUser
“`
6. Reinstall or Update the Module: If issues persist, consider reinstalling or updating the module using the Install-Module or Update-Module cmdlets:
“`powershell
Install-Module -Name “ModuleName” -Scope CurrentUser -Force
Update-Module -Name “ModuleName” -Force
“`
7. Check for Conflicting Modules: If multiple versions of the same module are installed, it may cause conflicts. To resolve this, uninstall the unwanted version using the Uninstall-Module cmdlet:
“`powershell
Uninstall-Module -Name “ModuleName” -RequiredVersion “VersionNumber”
“`
By following these steps, you can verify if a particular PowerShell module is installed correctly and troubleshoot any common issues that may arise during the installation process.
