¡Bienvenidos al blog de ! Hoy vamos a mostrarles cómo desinstalar Windows PowerShell, una herramienta muy útil pero que a veces puede ser innecesaria para algunos usuarios. Aprende los pasos para eliminarla de tu sistema operativo con éxito.
Effortless Steps to Uninstall Windows PowerShell: Simplifying App Removal
Uninstalling Windows PowerShell can be a straightforward process if you follow these effortless steps. This guide aims to simplify app removal and ensure that you can uninstall Windows PowerShell without any complications.
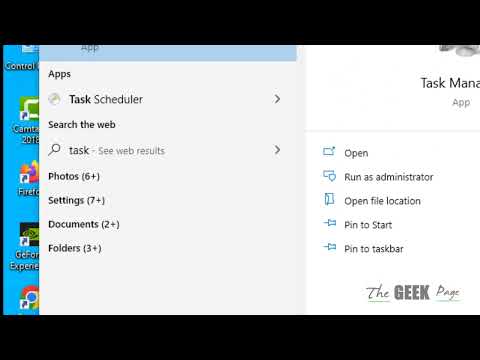
Step 1: Open the Control Panel. To do this, simply click on the Start button and search for “Control Panel” in the search bar. Once the Control Panel is open, navigate to the “Programs and Features” section.
Step 2: In the Programs and Features window, you will see a list of all the installed applications on your system. Locate “Windows PowerShell” in the list. You can use the search bar at the top-right corner if you have trouble finding it.
Step 3: Once you have found Windows PowerShell, select it by clicking on it once. After selecting the program, you should see an option to “Uninstall” or “Uninstall/Change” at the top of the window.
Step 4: Click on the Uninstall or Uninstall/Change button. This will initiate the uninstallation process for Windows PowerShell. Follow the prompts provided by the uninstaller to completely remove the application from your system.
Step 5: After the uninstallation process is completed, it is recommended to restart your computer to apply the changes and ensure that Windows PowerShell has been fully removed.
By following these simple steps, you can effortlessly uninstall Windows PowerShell, simplifying app removal on your system.
How to Uninstall Microsoft Edge the right way?

PowerShell Keep Popping Up Randomly In Windows 11/10 Fix
Can we Uninstall Windows PowerShell?
Yes, it is possible to uninstall Windows PowerShell, but it is not recommended for most users. Windows PowerShell is an essential component of the Windows operating system, and uninstalling it may cause system instability or prevent you from performing important tasks.
If you still want to uninstall Windows PowerShell, you can do so by following these steps:
1. Open the Control Panel by searching for it in the Start menu or by pressing Win+X and choosing Control Panel.
2. In the Control Panel, click on Programs.
3. Under Programs and Features, click Turn Windows features on or off.
4. In the Windows Features window, scroll down until you see Windows PowerShell 2.0. Uncheck the box next to it.
5. Click OK to save your changes and close the Windows Features window.
Please note that this will only uninstall Windows PowerShell 2.0, which is an older version. The newer PowerShell versions (e.g., PowerShell 5.0 and later) are integrated into Windows 10 and cannot be uninstalled.
Warning: Be aware that uninstalling Windows PowerShell may have unintended consequences, including damaging your system or making certain administrative tasks impossible. It’s better to keep it installed unless you’re an advanced user with specific reasons to remove it.
How do I Uninstall a program from PowerShell in Windows 10?
To uninstall a program from PowerShell in Windows 10, follow these simple steps:
1. Press Windows Key + X and choose Windows PowerShell (Admin) from the menu to open PowerShell with Administrator privileges. Alternatively, you can type “Powershell” in the Start menu search bar, right-click on the search result, and select Run as Administrator.
2. In the PowerShell window, type the following command and press Enter to list all installed programs:
`Get-InstalledApplication`
This command will display a list of all installed applications on your computer, including their name, version, and PackageFullName.
3. Locate the application you want to uninstall from the list.
4. To uninstall the application, run the following command:
`Get-AppxPackage *App_Name* | Remove-AppxPackage`
Replace *App_Name* with the actual name of the application you want to uninstall. You can also use a part of the application’s name and use an asterisk (*) as a wildcard. Do not include the version number in the app name.
For example, to uninstall Microsoft OneNote, type:
`Get-AppxPackage *OneNote* | Remove-AppxPackage`
5. Wait for the process to complete. Once it is finished, the application will be uninstalled from your system.
Please note that this method is specifically for removing Universal Windows Platform (UWP) apps or Windows Store apps. For traditional Windows desktop applications, you need to use the `Uninstall-Package` or `msiexec.exe` commands instead.
Is deleting Windows PowerShell safe?
Deleting Windows PowerShell is generally not recommended, as it is an essential part of the Windows operating system. Windows PowerShell is designed to provide automation and configuration management with a powerful scripting language, making it necessary for various tasks such as managing services, processes, and hardware.
If you choose to delete Windows PowerShell, you may face several issues like software malfunctions, inability to perform system management tasks, or even more severe problems that could render your operating system unusable. Consequently, it’s advisable to keep Windows PowerShell intact on your computer. If you have concerns about user access to it, you can restrict permissions within the system settings.
In summary, deleting Windows PowerShell is not safe and should be avoided to prevent potential complications with your Windows operating system.
How to remove PowerShell virus?
When it comes to removing the PowerShell virus in the context of uninstalling apps, you need to follow a series of steps to ensure the malicious software is completely removed from your system. Please note that this guide is for informational purposes only, and it is always recommended to consult a professional or use dedicated antivirus software to deal with potential malware infections.
1. Enter Safe Mode: First, restart your computer and enter Safe Mode by pressing F8 repeatedly during boot. This will start your computer with the minimum necessary drivers and programs.
2. Delete Suspicious Files: Navigate to the following directories and delete any suspicious files that could be related to the PowerShell virus:
– %AppData%
– %LocalAppData%
– %ProgramData%
– %WinDir%System32
– %WinDir%System32WindowsPowerShellv1.0
3. Check Windows Registry: Press Windows key + R, type ‘regedit,’ and press Enter to access the Windows Registry Editor. Carefully search for any suspicious entries related to the PowerShell virus and delete them. Common locations for these entries include:
– HKEY_CURRENT_USERSoftwareMicrosoftWindowsCurrentVersionRun
– HKEY_LOCAL_MACHINESOFTWAREMicrosoftWindowsCurrentVersionRun
– HKEY_LOCAL_MACHINESOFTWAREMicrosoftWindowsCurrentVersionRunOnce
4. Reset Browser Settings: Reset your web browser settings to default to remove any possible changes made by the PowerShell virus. This process varies depending on the browser you are using.
5. Scan for Malware: Use a reputable antivirus or anti-malware software to perform a full system scan. This will help to detect and remove any remaining traces of the PowerShell virus from your computer.
6. Update Your System and Software: After removing the PowerShell virus, ensure your operating system and all software are up-to-date. This will help protect your computer from future infections.
Remember, successfully removing malware requires patience and diligence. Always keep your security software updated and exercise caution when browsing the web or downloading files from unknown sources.
What are the step-by-step instructions to safely remove Windows PowerShell from my system?
It’s important to note that Windows PowerShell is an integral part of the Windows operating system, and it is not recommended to remove or uninstall it. Disabling or removing it may cause system instability or make your system vulnerable. However, if you still want to proceed with the removal, please follow these step-by-step instructions:
1. Back up your system: Before making any significant changes to your system, it is always a good practice to create a backup, so you can revert to the previous state in case something goes wrong.
2. Press Win + R to open the Run dialog box. Type appwiz.cpl and press Enter to access the Programs and Features window.
3. In the Programs and Features window, click on Turn Windows features on or off located in the left sidebar.
4. A new window named Windows Features will appear. Scroll down and locate the Windows PowerShell 2.0 option. Uncheck the box beside it to disable the feature.
5. Click OK to apply the changes and close the Windows Features window.
6. Restart your computer for the changes to take effect.
Please be aware that this process only disables Windows PowerShell 2.0, and it does not completely remove PowerShell from your system. As mentioned earlier, it is not advisable to remove or disable Windows PowerShell completely, since it can potentially damage your operating system or affect its functionality.
Are there any potential risks or issues I should be aware of when uninstalling Windows PowerShell?
Uninstalling Windows PowerShell can lead to several potential risks and issues. Some of the most important ones are:
1. Loss of functionality: PowerShell is an advanced scripting environment that provides robust automation capabilities for various tasks, such as system administration, data manipulation, and application deployment. Uninstalling it may lead to a loss of functionality associated with these tasks.
2. Dependency issues: Many applications and scripts rely on PowerShell to function correctly. Uninstalling PowerShell could cause these applications to fail or behave unexpectedly.
3. Security concerns: PowerShell includes several security features that help protect your system from malicious scripts and other threats. Removing PowerShell might expose your system to potential security risks.
4. System instability: PowerShell is an integral part of the Windows operating system, and uninstalling it may cause your system to become unstable or even fail to boot.
5. Difficulty in future installations: Some software installations may require PowerShell to be installed on your system. If you uninstall it, you may face challenges when trying to install these applications in the future.
It’s essential to weigh the benefits and risks of uninstalling PowerShell before taking any action. In most cases, it’s best to leave PowerShell installed on your system to ensure overall stability and maintain access to its powerful automation capabilities.
What alternative methods can I use if the standard uninstallation process for Windows PowerShell fails?
If the standard uninstallation process for Windows PowerShell fails, you can try the following alternative methods to remove an app:
1. Control Panel: Go to Control Panel > Programs > Programs and Features, find and select the app, and click on Uninstall.
2. Settings App: Open the Settings App (Windows key + I), go to Apps > Apps & features, find and click on the app, and then click on Uninstall.
3. Third-Party Uninstaller: Use a third-party uninstaller like Revo Uninstaller or IObit Uninstaller, which can help remove leftover files and registry entries, ensuring a complete uninstallation.
4. Manual Uninstallation: As a last resort, manually remove the app by deleting its installation folder and related files. You may also need to remove associated registry entries using the Registry Editor (regedit). However, this method is not recommended for inexperienced users, as it may cause system instability if done incorrectly.
Remember always to create a backup of your files and registry before attempting any manual uninstallation, and only proceed with this option if you have experience in handling system files and the Registry Editor.