The 5-Step Guide to Successfully Uninstall Microsoft Teams on Windows 11
If you’ve been wondering *how to uninstall Microsoft Teams on Windows 11*, you’re in the right place. In this comprehensive guide, we will walk you through every step of the process, providing expert advice and examples to ensure you have no issues during the procedure.
As an expert engineer of software, I am well-equipped to discuss the intricacies and challenges of uninstalling apps, and I’m excited to share this knowledge with you. So, without further ado, let’s dive into the world of uninstalling Microsoft Teams on your Windows 11 device.
1. Understand the Challenges of Uninstalling Microsoft Teams
Before we get into the meat of the process, it’s crucial to understand some of the unique challenges associated with uninstalling Microsoft Teams on Windows 11. As a *persistent and pre-installed application*, Microsoft Teams is designed to stay on your device and update itself regularly. This can create difficulties for users attempting to remove the app entirely.
So why should we know about these complexities? Uninstalling applications can sometimes involve unexpected obstacles, and having a solid background helps us tackle them efficiently. The following steps are specifically designed to overcome the challenges of removing Microsoft Teams from Windows 11 devices.
2. Disable Auto-Update Settings
First and foremost, we must begin with disabling the auto-update settings for Microsoft Teams. This is because if the app updates itself while you attempt to uninstall it, this can cause conflicts and prevent successful removal.
To disable auto-update, follow these steps:
a. Open Microsoft Teams.
b. Click on your *profile icon* located at the top-right corner of the application window, and select *Settings* from the dropdown menu.
c. In the Settings window, navigate to the *General* tab.
d. Locate the *Automatically download updates* option and disable it by unchecking the box.
3 .Remove Microsoft Teams Using Windows Settings
Now that we have disabled auto-updates, we can proceed with the actual uninstallation process. The first method we will discuss involves using the built-in Windows Settings. Here’s how you can uninstall Microsoft Teams using this approach:
a. Press the *Windows key* on your keyboard and type “Settings”. Open the Settings app.
b. In the Settings app, click on the *Apps* category.
c. Scroll through the list of installed applications until you find *Microsoft Teams*. If you’re having difficulty locating it, use the search bar located at the top-right corner of the window.
d. Once you’ve found Microsoft Teams, click on the three-dot icon located next to it, and select *Uninstall*. Follow the on-screen prompts to complete the process.
Please note that although this method may appear sufficient, there are instances where some residual files might remain. For a thorough uninstallation, proceed to the next step.
4. Utilize PowerShell for Complete Removal
For an extensive and thorough removal, using PowerShell allows you to delve deeper into the system and remove residual files. If you’re unsure of how to use PowerShell, don’t worry – we’ve got you covered. Simply follow these steps:
a. Press the *Windows key* and type “PowerShell” in the search bar.
b. Right-click on *Windows PowerShell* from the search results, and choose *Run as administrator*.
c. With PowerShell running, copy and paste the following command (or type it manually):
“`
Get-AppxPackage *Microsoft.Teams* | Remove-AppxPackage
“`
d. Press *Enter*, and PowerShell will remove any remaining Microsoft Teams components from your system.
5. Verify Successful Uninstallation
True experts ensure that everything goes as planned, which means verifying the successful removal of Microsoft Teams from your Windows 11 device. To do so, follow these steps:
a. Press the *Windows key* and type “Settings”. Open the Settings app.
b. In the Settings app, click on the *Apps* category.
c. In the list of installed applications, search for *Microsoft Teams*. If it doesn’t appear, congratulations! You have successfully uninstalled Microsoft Teams from your Windows 11 device.
Now that you know how to uninstall Microsoft Teams on Windows 11 effectively and thoroughly, you can apply this knowledge not only in your personal settings but also in professional environments where it’s crucial to remove unnecessary software while leaving no trace behind. The entire process should take just a few minutes but will save you a significant amount of time and resources in the long run.
How To Get Out Of Windows 11 S Mode To Install Apps Outside of Microsoft Store

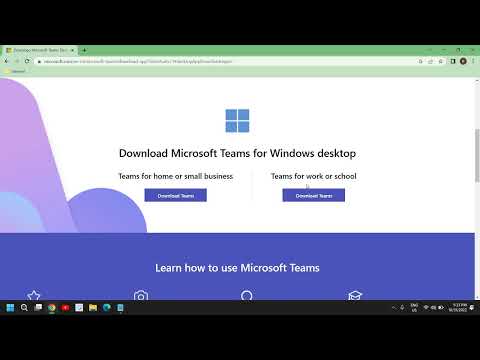
How To Download & Install Microsoft Teams on Windows 10/Windows 11
Where is Teams exe located in Windows 11?
In the context of uninstalling apps, to locate the Teams.exe file in Windows 11, follow these steps:
1. Press Windows key + E to open File Explorer.
2. Navigate to the following path: C:UsersYourUsernameAppDataLocalMicrosoftTeamscurrent.
3. Locate the file named Teams.exe.
However, to properly uninstall Microsoft Teams, it’s recommended that you use the built-in settings or a third-party uninstaller tool instead of directly deleting the .exe file. To uninstall Microsoft Teams through Windows 11 settings, follow these steps:
1. Press Windows key + I to open Settings.
2. Click on Apps.
3. Select Apps & features from the left pane.
4. Find and click on Microsoft Teams in the list of installed applications.
5. Click on the three-dot menu icon and select Uninstall.
6. Follow the prompts to complete the uninstallation process.
How do I remove Microsoft chat from Windows 11?
Uninstalling Microsoft Chat from Windows 11 is a straightforward process. Follow these steps to remove the app from your system:
1. Press the Windows key on your keyboard or click the Start button in the bottom-left corner of your screen.
2. Type “Settings” into the search bar and hit Enter to open the Settings app.
3. In the Settings app, go to the Apps section by clicking on Apps in the left sidebar.
4. Under the Apps section, click on Apps & features.
5. Scroll down or use the search bar to find Microsoft Chat in the list of installed apps.
6. Click on the three dots (…) next to Microsoft Chat and select Uninstall.
7. Confirm the uninstallation by clicking Uninstall again in the pop-up window.
After completing these steps, Microsoft Chat will be removed from your Windows 11 system. If you want to reinstall the app in the future, you can do so through the Microsoft Store.
Why does Windows 11 Teams keep reinstalling?
Windows 11 Teams keeps reinstalling because it is integrated into the operating system as a core app, and Windows 11 is designed to automatically update and maintain its built-in apps. The frequent updates can cause the app to reinstall itself, ensuring that it remains available on your system.
To prevent Windows 11 Teams from reinstalling, you can try the following methods:
1. Uninstall Microsoft Teams through the Settings app: Navigate to Apps & Features, search for Microsoft Teams, and click Uninstall.
2. Use PowerShell: Run PowerShell as an administrator, and execute the following command to remove the app package: Get-AppxPackage *MicrosoftTeams* | Remove-AppxPackage.
Keep in mind that these solutions might only offer a temporary fix, as future Windows updates may cause the app to reinstall itself. To ensure this does not happen, you can consider disabling automatic updates for Microsoft Teams or monitoring upcoming updates to see if they include changes to the integration of Teams in Windows 11.
What is the step-by-step process for completely uninstalling Microsoft Teams from a Windows 11 computer?
Uninstalling Microsoft Teams from a Windows 11 computer requires a few important steps. Following this step-by-step guide will help you completely remove the software from your system:
1. Close Microsoft Teams: Before uninstalling, ensure that Microsoft Teams is not running in the background. Right-click on the Microsoft Teams icon in the taskbar and click on ‘Quit.’
2. Open Settings: Click on the Start button and select the ‘Settings’ (gear-shaped) icon to open the Settings app.
3. Navigate to Apps: In the Settings app, click on the ‘Apps’ option on the left-hand sidebar.
4. Access Apps & Features: Under ‘Apps,’ click on ‘Apps & features’ to view the list of installed applications on your computer.
5. Search for Microsoft Teams: In the ‘Search apps’ bar, type ‘Microsoft Teams’ to quickly locate the program in the list.
6. Uninstall Microsoft Teams: Once you find Microsoft Teams in the list, click on the three-dot icon next to it, then select ‘Uninstall.’ A prompt will appear to confirm the action; click ‘Uninstall’ again to start the process.
7. Remove Teams Machine-Wide Installer: To ensure a complete uninstallation, repeat steps 5 and 6 for the ‘Teams Machine-Wide Installer’ as well.
8. Delete residual folders: Open File Explorer and navigate to these locations:
– C:Users%username%AppDataRoamingMicrosoftTeams
– C:Users%username%AppDataLocalMicrosoftTeams
Replace ‘%username%’ with your specific Windows username. Delete the ‘Teams’ folders in both locations to remove any remaining files associated with Microsoft Teams.
After completing these steps, Microsoft Teams should be completely uninstalled from your Windows 11 computer.
Are there any precautions or settings to consider before attempting to uninstall Microsoft Teams on Windows 11 devices?
Before attempting to uninstall Microsoft Teams on Windows 11 devices, it’s essential to consider the following precautions and settings:
1. Administrator Privileges: Ensure that you have administrator privileges on the device. This will help prevent any issues during the uninstall process.
2. Team Data Backup: Make sure to backup any important data such as chat history, files, and team-related documents before the uninstallation process. Uninstalling Microsoft Teams may result in losing all the data associated with the app.
3. Close Microsoft Teams: Close the Microsoft Teams application if it is running. Uninstalling the app while it’s still active could cause errors or corrupt files.
4. Disable Auto-start: Disable Microsoft Teams from starting automatically with your device. This can be done within the Microsoft Teams settings or through the Task Manager.
5. Uninstall Related Apps: If you have other Microsoft Office applications installed on your device, it’s recommended to uninstall them first. Some Office apps may integrate with Microsoft Teams and could cause issues during uninstallation.
6. Use Control Panel or Settings: Utilize the built-in options in Windows 11 to uninstall Microsoft Teams, either via the Control Panel or the Settings app.
By taking these precautions and reviewing the necessary settings, you can ensure a smooth uninstallation process for Microsoft Teams on your Windows 11 device.
Can I use third-party uninstaller applications for removing Microsoft Teams on Windows 11, and if so, which ones are the most recommended?
Yes, you can use third-party uninstaller applications for removing Microsoft Teams on Windows 11. These applications often provide more thorough removal than the built-in options, ensuring that all residual files and registry entries are deleted. Some of the most recommended third-party uninstaller applications include:
1. Revo Uninstaller: Revo Uninstaller is a popular and widely-used uninstaller that offers advanced scanning algorithms to detect leftover files, folders, and registry entries. It also features a “Forced Uninstall” mode for stubborn applications.
2. IObit Uninstaller: IObit Uninstaller is another reputable uninstaller with an easy-to-use interface. It not only removes applications but also cleans up any leftovers. It also has a batch uninstall feature, allowing you to remove multiple programs at once.
3. Wise Program Uninstaller: Wise Program Uninstaller is a lightweight and user-friendly uninstaller that performs deep scans to ensure all traces of an application are removed. It also has a “Force Uninstall” feature to tackle stubborn software.
Remember to always download these applications from their official websites to ensure you get the latest and most secure version. Additionally, some uninstallers may come with additional features, so it’s essential to explore each option thoroughly to determine the best one for your needs.