Title: How to Uninstall Bootcamp on Mac: A Comprehensive Guide
Have you ever tried to uninstall Bootcamp on your Mac but ended up getting lost in the process? Don’t worry; you’re not alone. Many users have faced obstacles when trying to remove this utility from their computers. In this article, we will explore an easy-to-follow guide on how to uninstall Bootcamp on Mac. Sit tight and continue reading, as we unravel the mystery behind this process.
Introduction
Bootcamp is a useful utility provided by Apple that allows users to run Windows on their Mac computers. However, there may come a time when you no longer need this feature, and that’s when knowing how to uninstall Bootcamp on Mac becomes crucial. Before diving into the process, let’s first clarify the terminologies related to the main keyword.
Keywords:
– How to uninstall Bootcamp on mac
– Removing Bootcamp on Mac
– Bootcamp uninstall process
– Uninstalling Bootcamp
H2: Understanding the Terms: Bootcamp, Partition, and macOS
Before we begin, it’s essential to understand the terms Bootcamp, partition, and macOS. This will help you better comprehend the process of how to uninstall Bootcamp on Mac.
1. Bootcamp: A utility provided by Apple that enables Mac users to install and run Windows on their computers.
2. Partition: A section of your hard drive dedicated to keeping the installed operating system and associated files separate.
3. macOS: The primary operating system for Mac computers.
Now that we’ve established what these terms mean, let’s proceed with the step-by-step instructions.
H2: Step-by-Step Guide to Uninstall Bootcamp on Mac
Follow this simple guide to learn how to uninstall Bootcamp on your Mac, and don’t worry; it’s easy as pie!
H3: Step 1: Backup Your Data
Before making any changes to your system, it’s always wise to back up essential files and data. This helps prevent any accidental loss of information during the uninstallation process.
H3: Step 2: Open Disk Utility
To begin the uninstallation process, open the Disk Utility application by navigating to Applications > Utilities > Disk Utility. This program will assist you in removing the Bootcamp partition from your hard drive.
H3: Step 3: Select the Bootcamp Partition
In Disk Utility, locate the Bootcamp partition on the left sidebar. It will typically be labeled as “BOOTCAMP.” Click on it to select it.
H3: Step 4: Remove the Bootcamp Partition
With the Bootcamp partition selected, click on the “Erase” button located at the top of the Disk Utility window. Make sure to confirm the deletion when prompted. This action will remove the Bootcamp partition and reclaim the disk space it occupied.
H3: Step 5: Resize Your macOS Partition
After deleting the Bootcamp partition, you’ll want to resize your macOS partition to use the newly available space. To do this, select your primary macOS partition (usually named “Macintosh HD”) and click on the “Partition” button at the top of the Disk Utility window. Then, drag the resizing handle to fill up the available space and click “Apply.”
H3: Step 6: Restart Your Mac
Once the process is complete, restart your Mac for the changes to take effect. Congratulations, you have successfully uninstalled Bootcamp from your Mac!
Conclusion
Knowing how to uninstall Bootcamp on Mac is a valuable skill, as it frees up disk space and simplifies your system. By following this comprehensive guide, you’ve learned how to remove this utility with ease. Keep this knowledge in mind for future reference, and share it with friends who might also benefit from uninstalling Bootcamp on their Mac computers. Happy computing!
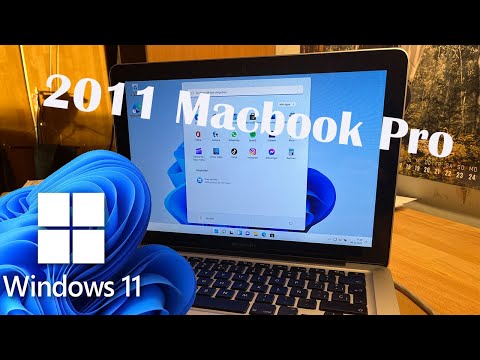
Windows 11 Install On 2011 Macbook Pro
Installing Windows 11 via Bootcamp
How do I uninstall Boot Camp from my Mac?
Uninstalling Boot Camp from your Mac is a straightforward process. Boot Camp Assistant allows you to remove the Windows partition and restore your hard drive to a single partition. Here’s how to do it:
1. First, make sure to back up any important files that you have on the Windows partition, as this process will delete all data on that partition.
2. Open the Boot Camp Assistant app on your Mac. You can find it by going to the Finder, selecting the Applications folder, and then searching for “Boot Camp Assistant” in the search bar.
3. Once Boot Camp Assistant is open, click on the “Continue” button.
4. On the next screen, select the option “Remove Windows 7 or later version” (or similar based on your installed Windows version). Then click on the “Continue” button.
5. Boot Camp Assistant will display the current size of your Windows partition. Verify that it’s the correct partition you want to delete and click “Restore”.
6. You will be prompted to enter your Mac’s administrator password. Enter the password and click “OK”.
7. The Boot Camp Assistant will begin the process of removing the Windows partition and restoring your Mac’s hard drive to a single partition. This may take some time, so be patient.
8. Once the process is complete, you will see a confirmation message. Click on the “Quit” button to close Boot Camp Assistant.
Now, you have successfully uninstalled Boot Camp from your Mac, and your hard drive has been restored to a single partition.
Does deleting Boot Camp delete your files?
Deleting Boot Camp does not directly delete your files, but it removes the partition where your Windows operating system and its associated files are stored. As a result, all files stored on that partition, including personal files and data, will be permanently deleted. To prevent losing important files, it is crucial to back up your data before deleting Boot Camp or removing the Windows partition.
How do I get Windows back from Boot Camp to Mac?
If you want to remove Windows and Boot Camp from your Mac and reclaim the disk space, follow these steps:
1. Boot into macOS: Restart your Mac and hold down the ‘Option’ key while it’s booting up. Select macOS from the list of available operating systems.
2. Open Boot Camp Assistant: Go to ‘Applications’ > ‘Utilities’ and launch Boot Camp Assistant.
3. Select “Remove Windows 7 or later version”: In Boot Camp Assistant, click ‘Continue’ and then select the option “Remove Windows 7 or later version” (or similar, depending on your macOS version).
4. Click “Restore”: Confirm that you want to remove Windows by clicking the ‘Restore’ button. This action will remove the Boot Camp partition and restore your Mac’s hard drive to a single partition.
5. Wait for the process to complete: The removal process might take some time, so be patient. Once it’s done, your Mac will have a single macOS partition, and the Windows partition will be deleted.
Please note that this process will delete all files and data on the Windows partition, so ensure that you have backed up any important data before proceeding.
How to remove Boot Camp from terminal?
Removing Boot Camp from your Mac can be done through Terminal by following these steps:
Step 1: Open Terminal
You can open Terminal by navigating to Applications > Utilities in Finder or by searching “Terminal” using Spotlight.
Step 2: Locate the Boot Camp partition
Type the following command in Terminal and press Enter to list all available disk partitions:
“`
diskutil list
“`
From the output, locate the Boot Camp partition (usually labelled as “Microsoft Basic Data” or “BOOTCAMP”). Note down the disk identifier, usually in the format of “diskXsY” (e.g., disk0s3).
Step 3: Unmount the Boot Camp partition
To unmount the Boot Camp partition, type the following command in Terminal and replace “diskXsY” with the partition identifier you noted earlier:
“`
sudo diskutil unmount /dev/diskXsY
“`
Enter your administrator password when prompted.
Step 4: Delete the Boot Camp partition
To delete the Boot Camp partition, type the following command in Terminal and replace “diskXsY” with the partition identifier:
“`
sudo diskutil eraseVolume JHFS+ “Empty Space” /dev/diskXsY
“`
This will delete the Boot Camp partition and replace it with an “Empty Space” partition.
Step 5: Expand the Macintosh HD partition
Finally, expand your main Macintosh HD partition to take up the freed space. Type the following command, replacing “diskXsY” with your Macintosh HD partition identifier (usually disk0s2):
“`
sudo diskutil resizeVolume /dev/diskXsY R
“`
Once the process is complete, the free space from the deleted Boot Camp partition will be added back to your Macintosh HD partition.
Remember to backup any important data from your Boot Camp partition before performing these steps, as it will be permanently deleted.
What is the most efficient method to uninstall Bootcamp on a Mac in the context of uninstall apps?
The most efficient method to uninstall Bootcamp on a Mac is by using the Boot Camp Assistant application. Follow these steps:
1. Back up your data: Before uninstalling Bootcamp, ensure that you have backed up all important files and data from your Windows partition.
2. Open Boot Camp Assistant: Go to the Applications folder, then open the Utilities folder and launch the Boot Camp Assistant app.
3. Select “Remove Windows”: In the Boot Camp Assistant window, you’ll see three options. Choose “Remove Windows 7, 8, or later version” (or a similar option) and click Continue.
4. Authenticate: You may be prompted to enter your admin password. Enter it and click Continue.
5. Confirm deletion: The application will display the Windows partition and ask you to confirm the removal. Click Restore to continue.
6. Wait for the process to complete: Boot Camp Assistant will remove the Windows partition and restore the disk space to a single macOS partition. This process may take some time.
After completing these steps, Bootcamp will be successfully uninstalled from your Mac, and the disk space will be reclaimed for macOS use.
Are there any precautions to take before uninstalling Bootcamp on a Mac within the uninstall apps scope?
Yes, there are several precautions to take before uninstalling Bootcamp on a Mac within the uninstall apps scope. Here are some important points to consider:
1. Backup your data: Before uninstalling Bootcamp, ensure that you have backed up any important files or documents stored in the Windows partition. This is crucial, as all data will be deleted when the partition is removed.
2. Check for required apps: Make sure you do not rely on any applications that are exclusive to the Windows environment, as you will not be able to access them after uninstalling Bootcamp. If needed, look for alternative apps compatible with macOS.
3. Have the macOS installation media: In some cases, you might need the macOS installation media (such as a USB drive or DVD) during the Bootcamp removal process. Make sure you have this handy before beginning the uninstallation.
4. Properly uninstall software: If you have installed any software on the Windows partition, it is recommended to properly uninstall it before removing Bootcamp. This helps avoid potential issues with software conflicts or licenses.
5. Ensure ample disk space: Bootcamp partitions require a specific amount of disk space on your Mac. Before uninstalling, ensure you have enough free space on your macOS partition to accommodate the newly released space from the Windows partition.
By following these precautions, you can ensure a smooth and trouble-free uninstallation process for Bootcamp on your Mac.
How can one troubleshoot issues that may arise when attempting to uninstall Bootcamp on a Mac as part of uninstall app processes?
When attempting to uninstall Bootcamp on a Mac as part of uninstall app processes, some issues may arise. To troubleshoot these issues, follow these steps:
1. Restart your Mac: Sometimes, a simple restart can resolve any issues related to uninstalling Bootcamp. Be sure to save all your work before restarting.
2. Update macOS and Bootcamp: Ensure that both your macOS and Bootcamp Assistant are up-to-date. Updating can fix any compatibility issues that may be preventing you from uninstalling Bootcamp.
3. Check Disk Utility: Open Disk Utility to verify and repair any issues with your Mac’s internal drive. This includes the partition where Bootcamp is installed.
4. Boot into Recovery Mode: If you’re still experiencing issues, try booting your Mac into Recovery Mode by holding down Command + R during startup. From there, you can use Disk Utility to repair any disk issues and try uninstalling Bootcamp again.
5. Remove Bootcamp manually: If all else fails, you can manually remove the Bootcamp partition using Disk Utility. However, this option should be used as a last resort since it may result in data loss. Before proceeding, ensure that you have backed up any important data from the Bootcamp partition.
6. Seek professional assistance: If none of the above steps help, consider reaching out to Apple Support or visiting an Apple Store for further assistance in resolving the problem.
By following these troubleshooting steps, you should be able to resolve most issues when attempting to uninstall Bootcamp on a Mac as part of uninstall app processes.