
Title: 5 Essential Steps to Execute a PowerShell Script Like a Pro
Imagine a world where managing and automating tasks on your Windows operating system is as simple as writing a few lines of code. Well, that world exists, and it’s called PowerShell scripting. In this article, we will delve into the intricacies of how to execute a PowerShell script efficiently and effectively.
PowerShell, a command-line shell, and scripting language developed by Microsoft helps you automate tasks and manage configuration data. It empowers system administrators, developers, and IT professionals to gain control and enhance productivity. Whether you are a novice or an expert, we trust this article will provide valuable insights to help you elevate your skills in executing PowerShell scripts.
Table of Contents:
1. Setting up the Environment
2. Creating Your First PowerShell Script
3. Execution Policies
4. Running a PowerShell Script
5. Extra Tips for Advanced Users
1. Setting up the Environment
Before you dive into executing PowerShell scripts, it’s essential to set up your environment. Ensure that you have PowerShell installed on your system. Windows 7 and later versions come with PowerShell pre-installed. However, if you need to update or install it, visit the [official Microsoft website](https://docs.microsoft.com/en-us/powershell/scripting/install/installing-windows-powershell?view=powershell-7.1).
Once you’ve installed PowerShell, navigate to the start menu or taskbar and search for ‘PowerShell’, then right-click and select ‘Run as administrator.’ It will open the PowerShell console where you’ll be able to execute your scripts.
2. Creating Your First PowerShell Script
To create a PowerShell script:
1. Open your preferred text editor, such as Notepad, Visual Studio Code or PowerShell ISE.
2. Start by writing a single command or a series of commands you wish to automate.
3. Save the file with a ‘.ps1’ extension, e.g., `MyFirstScript.ps1`.
Here’s an example of a basic PowerShell script that retrieves the current date and time.
“`powershell
$date = Get-Date
Write-Output “Today’s date and time: $date”
“`
3. Execution Policies
Before running your script, you must understand PowerShell’s execution policies. These policies determine if and how a user can run scripts on their system. There are four policy types:
1. Restricted (Default) – Scripts won’t run.
2. AllSigned – Only scripts signed by a trusted publisher will run.
3. RemoteSigned – Local scripts will run, but remote scripts need to be signed by a trusted publisher.
4. Unrestricted – All scripts will run without any restrictions.
To check your current execution policy, use the following command:
“`powershell
Get-ExecutionPolicy
“`
If you want to change the execution policy, use the following command (replace “ with the desired policy):
“`powershell
Set-ExecutionPolicy -Scope CurrentUser
“`
For example, to set the execution policy to RemoteSigned, run:
“`powershell
Set-ExecutionPolicy RemoteSigned -Scope CurrentUser
“`
Keep in mind that modifying execution policies might expose your system to potential security risks. Always ensure you understand the implications before changing them.
4. Running a PowerShell Script
Once your environment is set up, and you’ve created your script, it’s time to learn how to execute a PowerShell script. Here are three methods:
# Method 1: Run the script from the PowerShell console
Navigate to the location of your script in the PowerShell console using the ‘cd’ command. For example, if your script is located in C:Scripts:
“`powershell
cd C:Scripts
“`
Next, use the following command to run the script:
“`powershell
.MyFirstScript.ps1
“`
# Method 2: Invoke the script using Invoke-Expression
This method allows you to execute a script from another script or directly from the command line. Use the following command:
“`powershell
Invoke-Expression ‘C:ScriptsMyFirstScript.ps1’
“`
# Method 3: Execute the script as a scheduled task
PowerShell scripts can be scheduled to run at specific times using Windows Task Scheduler. This way, you can automate tasks to occur at a predetermined interval.
5. Extra Tips for Advanced Users
Here are some additional tips for users who want to take their PowerShell scripting expertise to the next level:
1. Comment your code and use proper indentation to enhance readability and clarity.
2. Use error handling techniques like `try-catch-finally` for more robust scripts.
3. Monitor script execution by logging output to a text file.
4. Master the use of variables, loops, and conditional statements to create versatile and powerful scripts.
In conclusion, understanding how to execute a PowerShell script is an invaluable skill for any IT professional or developer working with Windows-based systems. By following these essential steps, you will unlock vast potential for automation and configuration management through the power of PowerShell.
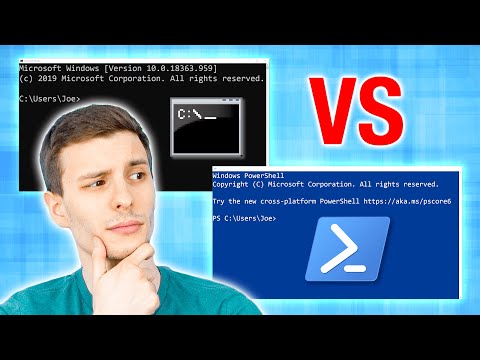
Windows Powershell vs Command Prompt: What’s The Difference Anyway?
Top 5 Useful PowerShell Commands

How can I execute a PowerShell script using the command prompt?
To execute a PowerShell script using the command prompt, you’ll need to use the following steps:
1. Open the command prompt by pressing Win + R keys, typing cmd, and pressing Enter.
2. You can execute a PowerShell script by invoking the PowerShell executable with the `-File` parameter followed by the path to the script. Use the following syntax in the command prompt:
“`cmd
powershell.exe -ExecutionPolicy Bypass -File “Path_to_your_script.ps1”
“`
Replace `Path_to_your_script.ps1` with the actual path to your script file. The `-ExecutionPolicy Bypass` is used to allow the script to run without any restrictions.
Example:
“`cmd
powershell.exe -ExecutionPolicy Bypass -File “C:Scriptsmyscript.ps1”
“`
This will execute the `myscript.ps1` PowerShell script located in the `C:Scripts` directory.
Keep in mind that running scripts might be restricted by the system administrator, so you might need to configure the execution policy on your computer if you encounter issues.
What is the process for saving and executing a PowerShell script?
To save and execute a PowerShell script, follow these steps:
1. Create the script: Open your favorite text editor (e.g., Notepad, Visual Studio Code) and write the PowerShell commands you want to execute in the script.
2. Save the script: Save the file with a “.ps1” extension to indicate that it is a PowerShell script. For example, save your script as “MyScript.ps1”.
3. Enable script execution: By default, PowerShell restricts script execution for security reasons. To allow the execution of PowerShell scripts on your system, open PowerShell as an administrator and run the following command:
“`
Set-ExecutionPolicy RemoteSigned
“`
This command will set the execution policy to allow scripts signed by a trusted publisher or locally-created scripts to be executed.
4. Execute the script: To run your PowerShell script, open a new PowerShell window (preferably as an administrator) and navigate to the folder where the script is saved using the `cd` command. Then, execute the script using the following syntax:
“`
.MyScript.ps1
“`
Replace “MyScript.ps1” with the name of your script.
Remember, it’s essential to take caution when running scripts from untrusted sources, as they can potentially harm your system or compromise sensitive data. Always inspect the contents of a script before executing it.
What are the different methods to run a PowerShell script from the command-line, and what are their benefits or drawbacks?
There are several methods to run a PowerShell script from the command-line. Here are the most common ones:
1. Running a script directly
To execute a PowerShell script (file extension .ps1) directly from the command prompt, simply type the script name followed by its file path.
Example:
“`
PS C:> .script.ps1
“`
Benefits:
– Quick and easy execution of a script
Drawbacks:
– Requires you to be in the same directory as the script
2. Using the `powershell.exe` or `pwsh` (PowerShell Core) command
This method allows you to run a script using the PowerShell executable. It’s useful when executing scripts from other command-line environments, like CMD or Bash.
Example:
“`
PS C:> powershell.exe -File “C:PathToScript.ps1”
“`
In PowerShell Core, use the `pwsh` command:
“`
PS C:> pwsh -File “C:PathToScript.ps1”
“`
Benefits:
– Works well in non-PowerShell environments
– Provides more flexibility with additional parameters like `-NoProfile` or `-ExecutionPolicy`
Drawbacks:
– More typing involved
– Might require administrative privileges
3. Using the `Invoke-Expression` cmdlet
The `Invoke-Expression` cmdlet (alias `iex`) lets you run a script by evaluating an expression or a string that contains script commands.
Example:
“`
PS C:> Invoke-Expression (Get-Content “C:PathToScript.ps1” | Out-String)
“`
Benefits:
– Useful when you need to manipulate the script content before execution
Drawbacks:
– Can lead to security risks if not used with caution
4. Using the `&` call operator
The call operator `&` allows you to run a script by specifying its file path.
Example:
“`
PS C:> & “C:PathToScript.ps1”
“`
Benefits:
– Straightforward method
– Can be used with PowerShell scripts that have spaces in the file path
Drawbacks:
– Requires typing the full path of the script
Remember that, by default, PowerShell restricts script execution. To bypass this, you can modify the Execution Policy using the `Set-ExecutionPolicy` cmdlet or use the `-ExecutionPolicy` parameter when running the PowerShell executable.
How can I configure the execution policy to safely execute PowerShell scripts from the command-line on my system?
To safely execute PowerShell scripts from the command-line on your system, you should configure the execution policy. Execution policy is a built-in security feature in PowerShell that controls the conditions under which scripts are allowed to run. Follow these steps to configure the execution policy:
1. Open PowerShell with administrative privileges: Press `Win + X` and select “Windows PowerShell (Admin)” or search for “PowerShell” in the Start menu, right-click on it, and choose “Run as administrator.”
2. Check the current execution policy: Before changing the execution policy, it’s a good idea to check the current setting. To do this, enter the following command:
“`
Get-ExecutionPolicy
“`
3. Choose an appropriate execution policy: There are several execution policy options available. Here are some commonly used ones:
– Restricted: No scripts can be executed, including configuration files and scripts downloaded from the internet. This is the default setting on most systems.
– AllSigned: Only scripts that have been signed by a trusted publisher can be executed. This is a more secure option than Unrestricted, but you may need to obtain and trust the appropriate signing certificates.
– RemoteSigned: Scripts that have been downloaded from the internet must be signed by a trusted publisher, while locally created scripts can be executed without any signing requirement. This is a good balance between security and flexibility.
4. Set the desired execution policy: To change the execution policy, use the `Set-ExecutionPolicy` cmdlet followed by the chosen policy level. For example, to set the execution policy to RemoteSigned, enter the following command:
“`
Set-ExecutionPolicy RemoteSigned
“`
A prompt will appear, asking you to confirm the change. Type “Y” and press Enter to confirm.
Remember that configuring the execution policy is only one aspect of securing your PowerShell environment. It’s also essential to follow best practices for script creation, maintenance, and execution, as well as keeping your system updated and protected with appropriate security software.
When calling external PowerShell scripts from the command-line, what is the best practice for managing script parameters and handling errors?
In the context of PowerShell command-line, when calling external PowerShell scripts, it is essential to follow best practices for managing script parameters and handling errors. This ensures smooth execution, easy maintenance, and better overall performance. The crucial aspects of these best practices are:
1. Use Parameter Validation: Utilize parameter validation attributes such as [ValidateNotNull()], [ValidateRange()], and [ValidateScript()] to verify input values before they are passed into the script. This helps prevent invalid or unexpected data from causing issues during script execution.
2. Define Mandatory Parameters: Clearly specify which parameters are required by setting the [Parameter(Mandatory=$true)] attribute. This ensures that the user provides all necessary information, and your script will not proceed without it.
3. Set Default Values: Assign default values to non-mandatory parameters using the Param() statement. This allows the script to run even if the user does not provide optional values.
4. Use Named Parameters: When calling your script from the command-line, use named parameters instead of positional parameters. Named parameters are easier to read, understand, and maintain.
5. Handle Errors Gracefully: Utilize Try-Catch blocks to handle errors that may occur during script execution. This allows you to manage errors in a controlled manner and output custom error messages, rather than letting the script fail abruptly.
6. Use ErrorActionPreference: Set the $ErrorActionPreference variable to control how errors are handled. For example, by setting it to ‘Stop’, your script will halt execution if an error occurs, allowing you to address the issue before continuing.
7. Log Errors and Output: Implement logging mechanisms to record errors and relevant information. This is useful for troubleshooting and understanding the script’s behavior.
By following these best practices, you can create robust and maintainable PowerShell scripts that effectively handle parameters and errors, making them more efficient when called from the command-line.
