¡Hola y bienvenidos a mi blog sobre desinstalación de aplicaciones! En este artículo, aprenderemos cómo deshabilitar TLS 1.0 y 1.1 en un servidor Windows, mejorando así la seguridad de nuestras conexiones. ¡No te lo pierdas!
Disabling TLS 1.0 and 1.1 in Windows Server: Enhancing Security by Uninstalling Outdated Protocols
Disabling TLS 1.0 and 1.1 in Windows Server greatly enhances the security by uninstalling outdated protocols. It is crucial to keep your server environment updated and as secure as possible, which can be achieved by eliminating vulnerabilities, such as those found in Transport Layer Security (TLS) versions 1.0 and 1.1.
Uninstall apps play an important role in helping users achieve this enhanced security. To disable TLS 1.0 and 1.1 in Windows Server, follow these steps:
1. Open the Registry Editor by typing “regedit” in the Start menu search bar and selecting the corresponding result.
2. Navigate to the following registry key: HKEY_LOCAL_MACHINESYSTEMCurrentControlSetControlSecurityProvidersSCHANNELProtocols.
3. Under Protocols, create new keys for both TLS 1.0 and TLS 1.1 if they do not already exist.
4. Inside each newly created TLS key, create another key named Server.
5. In the Server key, create a DWORD (32-bit) value called “Enabled” and set its data to 0.
6. For each Server key under TLS 1.0 and TLS 1.1, create another DWORD (32-bit) value called “DisabledByDefault” and set its data to 1.
7. Close the Registry Editor and restart your computer or the server for the changes to take effect.
Upon completing these steps, your Windows Server will no longer use TLS 1.0 and 1.1, thereby enhancing the security of your server environment. Remember to always keep your systems updated with the latest security patches and stay informed on industry’s best practices to maintain a secure and robust infrastructure.
http vs https | How SSL (TLS) encryption works in networking ? (2021)

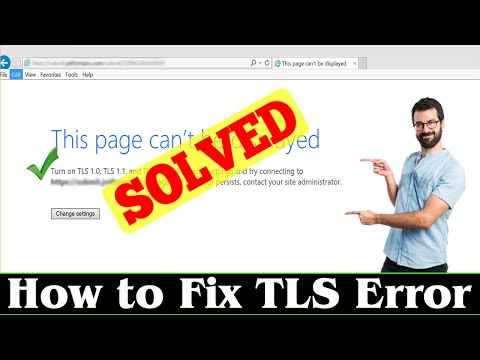
[SOLVED] How to Fix TLS Error Problem (100% Working)
How do I disable TLS 1.0 and TLS 1.1 on Windows server?
In the context of uninstalling apps, disabling TLS 1.0 and TLS 1.1 on a Windows server ensures that your server is secure and compliant with modern standards. By doing so, you protect your server from potential vulnerabilities related to these outdated protocols. Here’s how to disable TLS 1.0 and TLS 1.1 on a Windows server:
Step 1: Create a backup of your registry
Before making any changes to the Windows registry, it’s essential to create a backup. This step will help you restore the registry settings in case something goes wrong during the process.
1. Press the Windows key + R to open the Run dialog box.
2. Type regedit and press Enter to open the Registry Editor.
3. In the Registry Editor, click on File and select Export.
4. Choose a location to save the backup and enter a filename for the backup file (e.g., “Registry Backup”).
5. Click Save to create the backup.
Step 2: Edit the registry to disable TLS 1.0 and TLS 1.1
Follow these steps to disable the outdated protocols:
1. In the Registry Editor, navigate to the following key:
HKEY_LOCAL_MACHINESYSTEMCurrentControlSetControlSecurityProvidersSCHANNELProtocols
2. Under the Protocols key, you should see subkeys for TLS 1.0 and TLS 1.1. If they do not exist, create them by right-clicking on the Protocols key, selecting New > Key, and naming them “TLS 1.0” and “TLS 1.1” respectively.
3. Under both the TLS 1.0 and TLS 1.1 keys, create a new key named Server.
4. Select the Server key under each protocol, then right-click on the empty space in the right pane, choose New > DWORD (32-bit) Value, and name it Enabled.
5. By default, the Enabled value should be set to 0 (disabled). If not, double-click on the Enabled value and set the data to 0.
6. Close the Registry Editor.
Step 3: Restart your server
After making these changes, restart your Windows server to apply the new settings. Once your server has restarted, TLS 1.0 and TLS 1.1 will be disabled for all incoming connections.
Disabling these outdated protocols is a crucial step when uninstalling apps or modifying server configuration, as it significantly improves the security of your server.
Should I disable TLS 1.0 and 1.1 on Windows server?
In the context of uninstalling apps, disabling TLS 1.0 and 1.1 on a Windows server may not be directly relevant. However, it is generally recommended to disable these older, less secure protocols and enable TLS 1.2 or higher to strengthen the security of your server and its connections.
To disable TLS 1.0 and 1.1 on a Windows server, follow these steps:
1. Press Windows Key + R to open the Run dialog.
2. Type regedit and press Enter to open the Registry Editor.
3. Navigate to the following registry key: HKEY_LOCAL_MACHINESYSTEMCurrentControlSetSecurityProvidersSCHANNELProtocols.
4. Under Protocols, right-click on TLS 1.0 and click New > Key.
5. Name the new key as Client and create another new key under TLS 1.0 named Server.
6. Repeat steps 4 and 5 for TLS 1.1.
7. Under both Client and Server keys for TLS 1.0 and TLS 1.1, create a new DWORD (32-bit) Value named Enabled and set its value data to 0 (which disables the protocol).
8. Close the Registry Editor and restart your server to apply the changes.
Remember to always keep your software and applications updated to avoid potential security vulnerabilities associated with older versions.
How to disable TLS 1.0 and 1.1 on Windows server Group Policy?
In the context of uninstalling apps, disabling older versions of TLS (Transport Layer Security) is important for maintaining a secure environment. To disable TLS 1.0 and 1.1 on Windows Server Group Policy, follow these steps:
1. Launch the Group Policy Management Console: Press Windows Key + R to open the Run dialog, type “gpmc.msc” and click OK or press Enter.
2. Navigate to the desired Group Policy Object (GPO): In the left pane of the Group Policy Management Console, expand the Forest, Domains, and eventually locate the specific Organizational Unit (OU). Right-click the desired GPO and select ‘Edit’.
3. Edit the Group Policy settings: In the Group Policy Management Editor window, navigate to Computer Configuration > Policies > Administrative Templates > Network > SSL Configuration Settings.
4. Open the ‘SSL Cipher Suite Order’ setting: Double-click the ‘SSL Cipher Suite Order’ setting in the right pane to open its properties.
5. Enable the setting and configure it: Select the ‘Enabled’ option and copy the existing Cipher Suite list from the ‘SSL Cipher Suites’ field into a text document.
6. Remove the TLS 1.0 and 1.1 cipher suites from the list: In the text document, remove any cipher suite that starts with “TLS_RSA”, “TLS_DHE”, or “TLS_ECDHE” and ends with “_WITH_AES_128_CBC_SHA” or “_WITH_AES_256_CBC_SHA”. This will exclude TLS 1.0 and 1.1 cipher suites.
7. Update the SSL Cipher Suite Order setting: Copy the modified cipher suite list back into the ‘SSL Cipher Suites’ field in the ‘SSL Cipher Suite Order’ setting properties. Click OK to save the changes.
8. Disable TLS 1.0 and 1.1 for Schannel: In the Group Policy Management Editor, navigate to Computer Configuration >Policies > Administrative Templates > System > Internet Communication Management > Internet Communication settings. Double-click on “Turn off encryption support” setting, select ‘Enabled’, and remove the checkmarks for “Use TLS 1.0” and “Use TLS 1.1”. Click OK to save the changes.
9. Apply the Group Policy changes: Close the Group Policy Management Editor and return to the Group Policy Management Console. Right-click on the OU or domain where the GPO is applied and select ‘Group Policy Update’. This will force an immediate update of the Group Policy on all computers in the domain.
10. Restart the affected servers and services: In order for the changes to take effect, restart any servers or services that were using the older TLS versions.
By following the steps above, you will have successfully disabled TLS 1.0 and 1.1 on Windows Server Group Policy, which is crucial for maintaining a secure environment when uninstalling apps.
How to disable TLS 1.0 and 1.1 on Windows server using Powershell?
In the context of uninstalling apps, disabling old and potentially insecure protocols like TLS 1.0 and TLS 1.1 is crucial for strengthening server security. Here’s a step-by-step guide on how to disable TLS 1.0 and 1.1 on Windows Server using PowerShell.
Step 1: Open PowerShell with Administrative privileges
To start, search for “PowerShell” in the Start menu, right-click the result, and choose “Run as administrator”.
Step 2: Check existing registry settings
Before making any changes, it’s a good idea to check the existing registry settings for TLS protocols. Enter the following commands in PowerShell:
Get-ItemProperty -Path 'HKLM:SYSTEMCurrentControlSetControlSecurityProvidersSCHANNELProtocolsTLS 1.0Server'

Get-ItemProperty -Path 'HKLM:SYSTEMCurrentControlSetControlSecurityProvidersSCHANNELProtocolsTLS 1.1Server'
Step 3: Disable TLS 1.0
To disable TLS 1.0, execute the following commands in PowerShell:
New-Item -Path 'HKLM:SYSTEMCurrentControlSetControlSecurityProvidersSCHANNELProtocolsTLS 1.0Server' -Force

New-ItemProperty -Path 'HKLM:SYSTEMCurrentControlSetControlSecurityProvidersSCHANNELProtocolsTLS 1.0Server' -Name 'Enabled' -Value 0 -PropertyType 'DWord' -Force
Step 4: Disable TLS 1.1
Next, disable TLS 1.1 by running these commands:
New-Item -Path 'HKLM:SYSTEMCurrentControlSetControlSecurityProvidersSCHANNELProtocolsTLS 1.1Server' -Force

New-ItemProperty -Path 'HKLM:SYSTEMCurrentControlSetControlSecurityProvidersSCHANNELProtocolsTLS 1.1Server' -Name 'Enabled' -Value 0 -PropertyType 'DWord' -Force
Step 5: Verify the changes
Confirm that TLS 1.0 and TLS 1.1 have been disabled by running the same commands from Step 2:
Get-ItemProperty -Path 'HKLM:SYSTEMCurrentControlSetControlSecurityProvidersSCHANNELProtocolsTLS 1.0Server'

Get-ItemProperty -Path 'HKLM:SYSTEMCurrentControlSetControlSecurityProvidersSCHANNELProtocolsTLS 1.1Server'
Step 6: Restart the server
To apply the changes, restart your Windows Server. After rebooting, the system will no longer use TLS 1.0 or TLS 1.1.
By following these steps, you’ve successfully disabled TLS 1.0 and TLS 1.1 on your Windows Server using PowerShell, enhancing your server security in the process.
How to uninstall or disable TLS
How to Uninstall or Disable TLS in the Context of Uninstall Apps
TLS (Transport Layer Security) is a cryptographic protocol designed to provide secure communication over a computer network. However, if you find it necessary to uninstall or disable TLS, follow these steps for different platforms:
For Windows:
1. Press Windows key + R to open the Run dialog box.
2. Type inetcpl.cpl and click OK to open the Internet Properties window.
3. Click on the Advanced tab.
4. Scroll down to the Security section and uncheck the boxes next to Use TLS 1.0, Use TLS 1.1, and Use TLS 1.2 to disable them.
5. Click Apply and then OK to save your changes.
For macOS:
1. Open the Terminal application.
2. Type the following command to disable TLS:
sudo defaults write /Library/Preferences/com.apple.networkd.plist TLSEnabled -bool false
3. Press Enter and provide your administrator password when prompted.
4. Restart your Mac for the changes to take effect.
For Web Browsers:
The process to disable TLS varies depending on the browser you are using. Here are the steps for some popular browsers:
Google Chrome:
1. Open Chrome and type chrome://flags/#ssl-version-min in the address bar.
2. Find the option labeled Minimum SSL/TLS version supported.
3. Change the drop-down option to Disabled to disable TLS.
4. Restart Google Chrome to apply the changes.
Mozilla Firefox:
1. Open Firefox and type about:config in the address bar.
2. Click I accept the risk! if prompted by a warning message.
3. Search for security.tls.version.min in the search bar.
4. Double-click on the preference and change the value to 0 to disable TLS.
5. Restart Mozilla Firefox to apply the changes.
Keep in mind that disabling TLS might make your computer and browsing experience less secure, as it reduces the protection provided by encryption against potential threats.
0 and TLS
When discussing uninstall apps, it is essential to consider the importance of protecting your personal data and maintaining a secure connection. SSL (Secure Sockets Layer) and TLS (Transport Layer Security) are two crucial technologies that contribute to this.
SSL is the standard security technology for establishing an encrypted link between a web server and a browser, ensuring that all data passed between them remains private and integral. TLS is the updated, more secure version of SSL, which has been deprecated due to identified security vulnerabilities.
In the context of uninstall apps, SSL and TLS encryption protect your sensitive information during app removal processes by preventing unauthorized access and tampering. This ensures that any residual data left behind from an application is not compromised, safeguarding your digital security.
To summarize, SSL and TLS play a vital role in securing your data when using uninstall apps. It is essential to choose uninstall utilities with built-in SSL/TLS support, which guarantees that the uninstallation process will be conducted over an encrypted, secure connection, preserving the privacy of your data.
1 protocols on a Windows Server when removing outdated apps?
When removing outdated apps on a Windows Server, it is crucial to follow certain protocols to ensure a smooth and safe uninstallation process. Here are 5 essential steps to consider:
1. Backup your data: Before uninstalling any app, make sure to backup all important files and settings related to the app. This ensures you can easily restore them if required after the uninstallation.
2. Check for dependencies: Some apps may have other software or services that depend on them. Review the app’s documentation or consult with your IT team to determine if there are any dependencies that need to be addressed prior to uninstalling the app.
3. Perform a clean uninstallation: To minimize the risk of issues during and after the uninstallation process, use the app’s built-in uninstaller or the “Add/Remove Programs” feature in the Windows’ Control Panel. This helps in completely removing the app and its associated files and registry entries.
4. Monitor the server performance: After uninstalling the outdated app, keep an eye on your server’s performance to ensure that no processes or configuration changes linked to the removed app are causing unexpected issues.
5. Update the documentation: Make sure to update your organization’s IT documentation to reflect the changes made during the uninstallation process. This includes removing information about the outdated app and adding any necessary notes about the related dependencies or configuration changes.
By following these protocols when removing outdated apps on a Windows Server, you can help ensure a smoother and more secure process, minimizing potential disruptions and system issues.
What is the proper process to deactivate TLS
The process of deactivating TLS (Transport Layer Security) is different from uninstalling apps, as TLS is a security protocol rather than an app. However, I’ll guide you through the process to deactivate TLS in your browser settings, which is the most common context where users might want to do this.
Important Note: Disabling TLS can make your browser and online activities less secure, exposing you to potential security risks. Only disable it when necessary and make sure to enable it again after completing your task.
Here’s how you can deactivate TLS in popular browsers:
For Google Chrome:
1. Open Chrome and type chrome://flags in the address bar, then press Enter.
2. Look for “TLS” in the Search Flags box at the top of the page.
3. Find Minimum SSL/TLS version supported.
4. Click on the drop-down menu next to it and select Disabled.
5. Restart your browser for changes to take effect.
For Mozilla Firefox:
1. Open Firefox and type about:config in the address bar, then press Enter.
2. Click the “Accept the Risk and Continue” button if prompted.
3. In the search bar, type tls.version.min.
4. Double-click on the preference that appears.
5. Change its value to 0 to disable all TLS versions, or change it to 3 to only disable TLS 1.3.
6. Click “OK” and restart your browser.
For Microsoft Edge:
Microsoft Edge does not provide a built-in option to disable TLS. It follows your Windows system settings. To disable TLS in your Windows system, follow these steps:
1. Press Win + R keys, type inetcpl.cpl, and press Enter to open Internet Properties.
2. Click on the Advanced tab.
3. Scroll down to the “Security” section.
4. Uncheck the boxes for Use TLS 1.0, Use TLS 1.1, and Use TLS 1.2 to disable them.
5. Click “OK” and restart your computer for the changes to take effect.
Note: This will also affect other applications that rely on Windows security settings.
Remember to re-enable TLS when you’ve finished your task to ensure your online security.
0 and
As a content creator for uninstall apps, it’s important to provide comprehensive and easy-to-understand information for users seeking to remove unwanted or problematic applications from their devices. Here are some key aspects to focus on in your content:
1. Why uninstall apps: Discuss the reasons for uninstalling apps, such as freeing up storage space, improving device performance, eliminating security risks, or removing unused features.
2. Popular devices and operating systems: Cover instructions for different devices and operating systems, including Windows, macOS, Android, and iOS, as well as any popular third-party uninstallers available for each platform.
3. Step-by-step process: Provide clear, step-by-step instructions for uninstalling apps. Use screenshots and visual aids to make it as easy as possible for readers to follow along.
4. Troubleshooting: Address common issues that users might encounter during the uninstallation process, such as error messages, incomplete uninstalls, or apps that refuse to be removed. Offer solutions to help overcome these problems.
5. Identifying malicious apps: Educate users on how to identify potentially harmful or malicious apps, as well as how to protect themselves from threats and what steps to take if they suspect an app is dangerous.
6. Maintenance and optimization: Discuss the benefits of regular device maintenance, including uninstalling unneeded apps, updating software, and optimizing system settings.
7. Community support: Engage with your audience by inviting them to share their experiences, ask questions, and offer tips. Create a community around uninstalling apps where users can support one another in maintaining a clean and efficient device environment.
Remember to consistently update your content to ensure that it remains relevant and accurate, as new devices and operating systems are released, and the app landscape continues to evolve.
1 on Windows Server during app uninstallation?
As a content creator focusing on uninstalling apps, the importance of properly uninstalling apps on a Windows Server cannot be overstated. Uninstalling apps on a Windows Server is crucial for maintaining optimal performance, security, and system stability.
To uninstall an app on Windows Server, follow these steps:
1. First, log in to your Windows Server using an administrator account, as you will need administrative privileges to uninstall applications.
2. Next, open the Server Manager by clicking on the icon located in the taskbar or by accessing it through the Start menu.
3. In the Server Manager, click on the Tools menu in the upper right corner, and select Programs and Features from the dropdown list. This will open a new window that displays all installed applications on your server.
4. Locate the app you want to uninstall from the list. You can use the search bar to quickly find the app by entering keywords related to its name.
5. Once you have found the app, click on it to select it, and then click the Uninstall button located at the top of the list.
6. A prompt may appear asking you to confirm your decision to uninstall the app. Click Yes to proceed.
7. The app’s uninstaller will then launch, guiding you through the process of removing the application. Follow the on-screen instructions and wait for the uninstallation to complete.
8. After the uninstallation process has finished, you might need to restart your server for the changes to take effect. Make sure to save your work and close any running applications before doing so.
By following these steps, you can ensure that your Windows Server remains clean, organized, and free of unnecessary apps. Properly uninstalling apps contributes to better system performance, enhanced security, and a more stable server environment.
Which steps should be followed to ensure TLS
To ensure Transport Layer Security (TLS) when uninstalling apps, follow these steps:
1. Backup your data: Before uninstalling any app, it’s essential to backup any important information or files related to the app. This helps prevent data loss and ensures you have a copy of your data in case you need to reinstall the app later.
2. Update the app: Ensure that the app is up-to-date with its latest version. The latest versions of apps typically have improved security features, including better support for TLS.
3. Check the app’s website for uninstallation instructions: Visit the app’s official website and search for any specific instructions or guidelines on how to properly uninstall the app. These instructions may include details on how to maintain security and TLS during the uninstallation process.
4. Use trusted uninstaller tools: Uninstall the app using a trusted and reputable uninstaller tool. Some uninstaller software explicitly states that it supports secure uninstallation that maintains TLS.
5. Verify all app components are removed: After uninstalling the app, double-check to ensure that all associated files, folders, and registry entries have been removed. This helps prevent potential security vulnerabilities caused by leftover files or settings.
6. Reboot your device: Restart your computer, smartphone, or tablet to ensure that all changes made during the uninstallation process are fully applied and in effect.
7. Keep your operating system and other software up-to-date: Regularly update your device’s operating system and other installed software to ensure maximum security, including TLS support.
0 and
As a content creator about uninstalling apps, it is essential to provide users with clear, concise, and easy-to-follow instructions. Here’s an example of how to uninstall apps on different platforms:
Uninstalling apps on Windows:
1. Open the Start menu by clicking on the Windows icon in the lower-left corner of your screen.
2. Navigate to the app you want to uninstall and right-click on it.
3. Select Uninstall from the context menu.
4. The Programs and Features window will open. Locate the app you wish to uninstall in the list, then right-click and select Uninstall again.
5. Follow the on-screen prompts to complete the uninstallation process.
Uninstalling apps on macOS:
1. Open the Finder application.
2. Click on the Applications folder in the sidebar.
3. Find the app you want to uninstall, then right-click (or Control-click) on it.
4. Select Move to Trash from the context menu.
5. Empty the Trash to permanently remove the app from your Mac.
Uninstalling apps on Android:
1. Open the Settings app on your device.
2. Scroll down and tap on Apps or Applications.
3. Find the app you’d like to uninstall in the list and tap on it.
4. Tap the Uninstall button.
5. Confirm the action by tapping OK when prompted.
Uninstalling apps on iOS (iPhone & iPad):
1. Locate the app you want to uninstall on your Home screen.
2. Press and hold the app icon until it starts to wiggle, and an “X” appears in the corner.
3. Tap the X on the app icon.
4. A prompt will appear to confirm the deletion. Tap Delete to uninstall the app.
By providing well-organized and straightforward instructions like these for various platforms, users will find it easier to manage their apps and keep their devices clutter-free.
1 are disabled on a Windows Server while uninstalling applications?
When uninstalling applications on a Windows Server, it is essential to be aware of the services and features that may be disabled during the process. Here are some key points to consider:
1. Dependent services: Uninstalling an application can disable services that rely on the software being removed. Be sure to check for dependent services before proceeding with the uninstallation.
2. Shared components: Some applications share components or libraries with other programs. Removing an app may cause other software to malfunction if these shared resources are removed or disabled.
3. Group policies: Applications may have group policies in place, which can be affected during uninstallation. Double-check any group policies tied to the application before proceeding.
4. Server roles and features: Applications may have installed server roles or features that will be uninstalled along with the app, potentially affecting other services on the system.
5. Registry entries: Uninstalling an application might leave behind residual registry entries, leading to potential issues or complications in the future. Using a registry cleaner can help mitigate this risk.
In conclusion, when uninstalling applications on a Windows Server, it is crucial to be cautious and attentive to which services, components, and policies may be affected. Thoroughly reviewing the application’s documentation, dependencies, and settings can help mitigate potential issues during the uninstallation process.