
How to Disable Do Not Disturb on iPhone: A Comprehensive Guide for Advanced Users
You’re in the midst of an important meeting or project deadline, and your iPhone’s incessant pinging is driving you to distraction. In a desperate attempt to concentrate, you enabled the Do Not Disturb feature. Fast forward a few days, and now you can’t figure out how to disable it. This article will not only solve your problem but also dive deep into the technical workings of this built-in feature.
In this comprehensive guide, we’ll go beyond just showing you how to *disable Do Not Disturb on iPhone*. We’ll use semantic words and provide expert insight into the elements that make this feature tick. By understanding its functionalities, you’ll be able to optimize it to suit your individual preferences and requirements. So let’s get started!
Table of Contents
1. [Understanding Do Not Disturb](#section-1)
2. [Disabling Do Not Disturb Mode](#section-2)
3. [Customizing Do Not Disturb Settings](#section-3)
4. [Taking Advantage of Automation](#section-4)
5. [Troubleshooting Common Issues](#section-5)
# 1. Understanding Do Not Disturb
Before learning how to disable the mode, it’s worth understanding the intricacies of this native iOS feature. The primary function of Do Not Disturb (DND) is to *temporarily silence incoming alerts* and focus on the task at hand. When DND is enabled, the iPhone suppresses all notifications, including calls and messages, but does not interfere with any ongoing background processes, like data syncing or fetching emails.
From a technical standpoint, Do Not Disturb utilizes *conditionals* in iOS framework code to filter out alerts based on user preferences. By default, it silences notifications only when the device is locked. However, users can customize these settings to silence notifications at all times or schedule the feature to automatically enable and disable based on specific times of day.
# 2. Disabling Do Not Disturb Mode
Now that we know the basics of Do Not Disturb, let’s learn how to *disable do not disturb iPhone*. You can disable it in two ways – either through the Control Center or the Settings app:
Method 1: Control Center
1. Access the Control Center by swiping down from the top-right corner of the screen (iPhone X or later) or swiping up from the bottom edge of the screen (iPhone 8 or earlier).
2. Look for the crescent moon icon, which represents Do Not Disturb.
3. If the icon is highlighted, simply tap it to disable Do Not Disturb mode. Upon doing so, the icon will turn from blue to gray.
Method 2: Settings App
1. Open the Settings app on your iPhone.
2. Scroll down and tap on Do Not Disturb.
3. Toggle off the switch next to Do Not Disturb. This will disable the feature, and you should see the crescent moon icon disappear from your status bar.
# 3. Customizing Do Not Disturb Settings
For advanced users, the ability to customize Do Not Disturb settings can introduce another level of control. By tweaking default configurations, you can ensure that the feature works precisely as you need it to. Below are some essential customizations to consider:
– *Scheduled Activation*: To automatically enable and disable Do Not Disturb at specific times, navigate to *Settings > Do Not Disturb* and toggle on the Scheduled switch. Set your preferred time range for the feature to be active.
– *Allow Calls From*: This setting lets you specify which contacts can reach you even if your iPhone is in Do Not Disturb mode. Go to *Settings > Do Not Disturb > Allow Calls From* and select All Contacts, a specific group, or favorites.
– *Repeated Calls*: If someone calls you multiple times within 3 minutes, you can choose to let their call through. Enable this option by toggling on Repeated Calls in the *Settings > Do Not Disturb* menu.
# 4. Taking Advantage of Automation
For those looking to fine-tune their iPhone experience further, automation can be a powerful tool. The Shortcuts app allows users to create custom automations that execute particular actions based on triggers (e.g., time of day, location, or device state). To create an automation that disables Do Not Disturb when you reach a specific location, follow these steps:
1. Open the Shortcuts app on your iPhone.
2. Tap the Automation tab at the bottom of the screen.
3. Tap the ‘+’ icon in the top-right corner and select Create Personal Automation.
4. Choose Arrive under the Location category.
5. Set the desired location and tap Next.
6. Tap Add Action and search for “Do Not Disturb” in the search bar.
7. Select the Set Do Not Disturb action.
8. Ensure that the Turn Do Not Disturb Off option is selected, then tap Next.
9. Disable the Ask Before Running switch, then tap Done.
# 5. Troubleshooting Common Issues
If you find that Do Not Disturb mode isn’t functioning as expected or you can’t disable it, here are a few potential solutions:
– *Restart your iPhone*: Sometimes the simplest solution is to restart your device. Press and hold the side (or top) button until the slider appears, then slide it to turn off your iPhone. Turn it back on by pressing and holding the side (or top) button again.
– *Check for iOS updates*: If restarting doesn’t help, make sure your iPhone is running on the latest version of iOS. Go to *Settings > General > Software Update* and follow the prompts if an update is available.
– *Reset all settings*: As a last resort, you can reset all settings on your iPhone. This step should be taken cautiously, as it will revert every setting on your device back to factory defaults. Navigate to *Settings > General > Reset > Reset All Settings* and confirm your decision.
In conclusion, the native Do Not Disturb feature on iPhone offers users a way to silence alerts and focus on their work. By understanding its functionalities, disabling it when necessary, and personalizing it to suit individual needs, advanced users can maximize the efficiency of this built-in tool. So go ahead – disable do not disturb iPhone, optimize its features, and take control of your digital life.
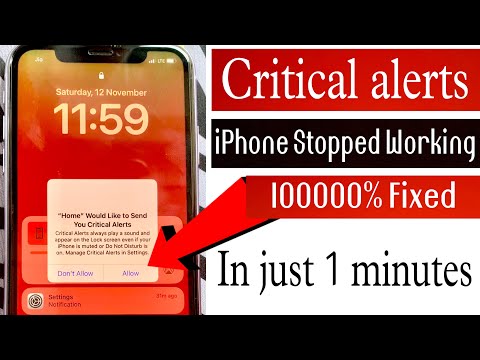
Fix iPhone Stuck on Home Would Like to Send You Critical Alerts

“Home” Would Like to Send You Critical Alert | How to Fix | How to Manage Critical Alerts in iPhone
How do I permanently turn off Do Not Disturb?
To permanently turn off Do Not Disturb in the context of uninstall apps, follow these steps:
1. Open the Settings app on your device.
2. Scroll down and tap on Apps & notifications (or simply “Apps” depending on your device).
3. In the list of installed apps, look for the app responsible for managing the Do Not Disturb feature. This could be a native setting within your device’s settings or a third-party app you have installed.
4. Tap on the Do Not Disturb app or setting to open its details.
5. If it’s a native setting, there should be an option to turn off the feature permanently. Toggle the switch to the off position.
6. If it’s a third-party app, tap Uninstall to remove the app from your device. This will permanently disable the Do Not Disturb feature associated with that app.
If you are using an iPhone, follow these steps:
1. Go to Settings.
2. Tap on Do Not Disturb.
3. Toggle the switch next to Do Not Disturb to the off position.
By following these steps, you can permanently turn off the Do Not Disturb feature and stop it from interfering with your notifications and calls.
Why does my iPhone keep going into Do Not Disturb mode?
When discussing the issue of an iPhone constantly going into Do Not Disturb mode in the context of uninstalling apps, it is possible that a third-party app on your device may be causing this problem. Some apps have access to modify settings on your phone, such as switching Do Not Disturb mode on and off.
To resolve this issue, consider taking the following steps:
1. Identify the problematic app: Observe when your iPhone goes into Do Not Disturb mode and try to find a pattern or correlation with a specific app.
2. Review app permissions: Go to your iPhone’s Settings and review the permissions granted to the suspicious app. Limit or revoke any unnecessary permissions, especially those related to modifying system settings.
3. Uninstall the app: If the problem persists after adjusting permissions, uninstall the app to see if the issue is resolved. Remember to backup any important data related to the app before uninstalling.
4. Monitor your iPhone: After uninstalling the suspected app, monitor your iPhone to see if it still goes into Do Not Disturb mode unexpectedly. If the issue is resolved, be cautious when downloading similar apps in the future.
By following these steps, you can determine if an app is causing your iPhone to repeatedly enter Do Not Disturb mode and take the necessary actions to resolve the issue.
How do I turn off Do Not Disturb on my iPhone 13?
In the context of uninstalling apps, turning off Do Not Disturb on your iPhone 13 can help you receive notifications immediately when an app is successfully uninstalled. To turn off Do Not Disturb, follow these steps:
1. Go to your Home Screen.
2. Swipe down from the top right corner to open the Control Center.
3. Locate the Do Not Disturb icon, which looks like a crescent moon.
4. Tap the Do Not Disturb icon to disable it. The icon will be grayed out when it’s turned off.
Now that Do Not Disturb is disabled, you’ll receive instant notifications about the progress of the app uninstallation process.
How do I disable Do Not Disturb on my iPhone 12?
When talking about uninstalling apps, disabling the Do Not Disturb feature on your iPhone 12 is essential to ensure that you receive notifications and alerts from the apps you’re dealing with. Follow these steps to disable the Do Not Disturb feature:
1. Unlock your iPhone 12 and open the Settings app.
2. Scroll down and find the Do Not Disturb option in the Settings menu.
3. Tap on the Do Not Disturb option.
4. To disable the feature, simply toggle off the switch next to Do Not Disturb.
Now, you will receive all notifications and alerts while working on uninstalling apps.
How can I disable the Do Not Disturb feature while uninstalling apps on my iPhone?
To disable the Do Not Disturb feature while uninstalling apps on your iPhone, follow these steps:
1. Open the Settings app on your iPhone.
2. Scroll down and tap on “Do Not Disturb”.
3. Turn off the “Do Not Disturb” toggle if it’s enabled.
Now that the Do Not Disturb feature is disabled, you can proceed with uninstalling apps on your iPhone:
1. From the Home screen, find the app you want to uninstall.
2. Press and hold the app icon until a menu appears.
3. Select “Remove App” from the menu.
4. Finally, tap on “Delete App” to confirm the uninstallation.
Is there a way to prevent Do Not Disturb from interfering with the app uninstallation process on an iPhone?
Yes, to prevent Do Not Disturb from interfering with the app uninstallation process on an iPhone, you need to either disable Do Not Disturb temporarily or adjust its settings.
To disable Do Not Disturb:
1. Open the Control Center by swiping down from the top-right corner of the screen.
2. Tap the crescent moon icon to turn off Do Not Disturb.
To adjust Do Not Disturb settings:
1. Go to Settings.
2. Scroll down and tap Do Not Disturb.
3. Toggle off the Scheduled option, or set the schedule so it doesn’t interfere with your app uninstallation process.
With Do Not Disturb disabled or properly adjusted, you can now proceed with the app uninstallation without any interruptions.
What are the necessary steps to turn off Do Not Disturb mode when removing apps from an iPhone?
To turn off Do Not Disturb mode when removing apps from an iPhone, follow these necessary steps:
1. Access the Control Center: Swipe down from the top-right corner of the screen if you’re using an iPhone X or later, or swipe up from the bottom of the screen if you have an iPhone 8 or earlier.
2. Locate the Do Not Disturb icon: Look for the crescent moon-shaped icon in the Control Center.
3. Turn off Do Not Disturb mode: Tap on the crescent moon icon to disable the Do Not Disturb mode. When the icon is grayed out, it means the mode is turned off.
4. Uninstall apps: Once the Do Not Disturb mode is turned off, you can proceed to remove apps. To do this, press and hold the app icon until a menu appears. Choose “Remove App” and confirm by tapping “Delete App.”
Alternatively, you can tap the minus (-) icon in the top-left corner of the app after pressing and holding the app icon, then tap “Delete” to remove it. This will uninstall the app without any interruptions due to incoming notifications.