
7 Steps to Install a PowerShell Module Offline: A Comprehensive Guide
There is a hidden challenge that many system administrators face when trying to perform their duties away from the Internet. In those seemingly rare offline moments, they might encounter a roadblock when trying to install a PowerShell module. As an expert engineer in software programming, I’ve experienced the same problem, and I know the struggle. That’s why I decided to write this step-by-step guide on how to install a PowerShell module offline.
In this article, you’ll discover all there is to know about installing PowerShell modules offline. We will discuss the necessary steps and tools, while also providing clear examples to make the process as smooth as possible for you.
Steer through these sections with confidence, knowing that by the end of this journey, you’ll have acquired the knowledge and skills to effectively install PowerShell modules offline.
1. *Preparing for Offline Installation*
2. *Downloading the Required PowerShell Module*
3. *Preparing the Destination Server*
4. *Copying Modules to the Offline Server*
5. *Installing the PowerShell Module on the Offline Server*
6. *Testing and Verifying the Installed Module*
7. *Troubleshooting Common Issues*
# Step 1: Preparing for Offline Installation
Before diving into the offline installation process, it’s vital to ensure that you have all the required tools and components. To get started, download the following:
– PowerShellGet: This is the default package manager for PowerShell, providing cmdlets to discover, install, update, and publish PowerShell modules. Download PowerShellGet from the [official PowerShell Gallery page](https://www.powershellgallery.com/packages/PowerShellGet/).
– PackageManagement: This component, known as OneGet, is a Package Manager aggregator that provides a consistent user interface across multiple package managers. Download PackageManagement from the [official PowerShell Gallery page](https://www.powershellgallery.com/packages/PackageManagement/).
# Step 2: Downloading the Required PowerShell Module
On an Internet-connected machine, open a PowerShell terminal with administrator privileges by right-clicking on the PowerShell icon and selecting “Run as administrator.”
Next, execute the following command to install PackageManagement and PowerShellGet modules:
“`
Install-PackageProvider -Name NuGet –MinimumVersion 2.8.5.201 -Force
“`
Now that you have the necessary package providers, run the following cmdlet to save the required PowerShell module in a local folder:
“`
Save-Module -Name -Path
“`
Replace “ with the name of the desired module and “ with the path where you want to save the module.
For example, let’s say you want to download the PSReadLine module and save it in “C:PowerShellModules”:
“`
Save-Module -Name PSReadLine -Path C:PowerShellModules
“`
# Step 3: Preparing the Destination Server
On the offline server, you should verify if you have PowerShell 5.0 or higher installed. You can check the installed version by running the following command:
“`
$PSVersionTable.PSVersion
“`
If your version is below 5.0, follow the instructions in the [official PowerShell GitHub repository](https://github.com/PowerShell/PowerShell) to upgrade PowerShell to a newer version.
# Step 4: Copying Modules to the Offline Server
Copy the folder containing the downloaded module (e.g., “C:PowerShellModules”) from your Internet-connected machine to the offline server using any method you prefer (USB drive, shared folder, etc.).
# Step 5: Installing the PowerShell Module on the Offline Server
To install the PowerShell module from the folder copied to the offline server, open a PowerShell terminal with administrator privileges and execute the following command:
“`
Install-Module -Name -Repository
“`
Replace “ with the exact name of the module folder and “ with the path where you copied the module folder.
Here’s an example using PSReadLine:
“`
Install-Module -Name PSReadLine -Repository “C:PowerShellModulesPSReadLine”
“`
# Step 6: Testing and Verifying the Installed Module
To verify that the installation was successful, run the following command:
“`
Get-Module -ListAvailable -Name
“`
Replace “ with the name of the installed module. This command will list information about the installed module, including its version and path.
Additionally, you can test the newly installed module by running its cmdlets in the PowerShell terminal.
# Step 7: Troubleshooting Common Issues
If you encounter issues during the installation process, check for common problems such as incorrect module names or paths, missing dependencies, or compatibility issues with your PowerShell version.
In conclusion, while installing PowerShell modules offline may initially seem daunting, following these seven steps will simplify the process and provide you with the expertise to seamlessly install modules without an active Internet connection. Armed with this guide, you’re now better prepared for those uncommon yet critical offline situations as a system administrator. Keep exploring new horizons and expanding your PowerShell knowledge.
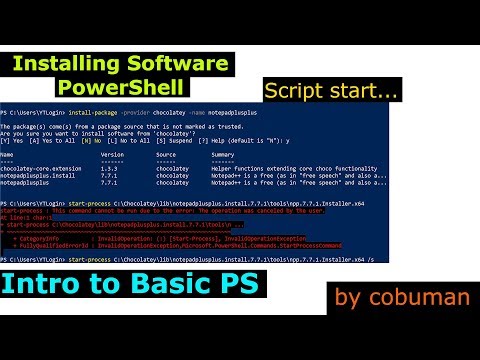
Installing Software through Power Shell, Intro to powershell scripts
Install Chrome using PowerShell in Windows 10
What is the method for installing PowerShell modules offline?
To install PowerShell modules offline, you need to follow these steps:
1. Download the module from the PowerShell Gallery or the source website on a computer with internet access. You can use the `Save-Module` command for this purpose.
“`powershell
Save-Module -Name ModuleName -Path PathToDownload
“`
Replace `ModuleName` with the name of the module you want to download and `PathToDownload` with the local directory where you want to save the module.
2. Transfer the downloaded module to the target computer (the one without internet access) using a USB drive or any other transfer method.
3. On the target computer, open a PowerShell session with administrative privileges.
4. Import the module into your PowerShell session using the `Import-Module` command. You will need to provide the path to the module folder that you transferred in step 2.
“`powershell
Import-Module -Name PathToDownloadedModule
“`
Replace `PathToDownloadedModule` with the local directory where you saved the transferred module.
5. Once the module is imported, you can use the exported functions and cmdlets by simply calling them in your PowerShell session. Remember that importing a module is temporary and only lasts for the current session. To make it permanent, you need to install the module. For that, copy the module folder into one of the following locations:
For current user only:
“`
$homeDocumentsWindowsPowerShellModules
“`
For all users:
“`
C:Program FilesWindowsPowerShellModules
“`
Now you have successfully installed a PowerShell module offline.
How can I manually install a PowerShell module?
To manually install a PowerShell module, you can follow these steps:
1. Download the module: First, you need to download the PowerShell module you want to install. This can be done by visiting the module’s official website or GitHub repository and downloading the module as a zip file.
2. Extract the module: After downloading the module, extract the contents of the zip file to a folder of your choice.
3. Open PowerShell: Open a PowerShell console with administrator privileges. To do this, right-click on the PowerShell icon and select “Run as administrator.”
4. Change Execution Policy (if necessary): PowerShell may block scripts that are not digitally signed by default. To allow the execution of such scripts, you can change the execution policy by running this command:
“`
Set-ExecutionPolicy RemoteSigned
“`
Confirm the change by typing ‘Y’ when prompted.
5. Find Modules folder: Identify the location where PowerShell modules should be installed. The default paths for user-specific and system-wide modules are:
– User-specific: `C:UsersDocumentsWindowsPowerShellModules`
– System-wide: `C:Program FilesWindowsPowerShellModules`
You can choose either of these locations based on your preference.
6. Copy the module: Copy the extracted module folder to the chosen location (“). Make sure the module’s `.psd1` and `.psm1` files are directly under the module folder, not in a subfolder.
7. Import the module: In the PowerShell console, run the following command to import the module:
“`
Import-Module
“`
Replace “ with the actual name of the module.
8. Verify installation: To verify that the module has been installed and is available, run this command:
“`
Get-Module -ListAvailable
“`
You should see your module listed among the available modules.
Now, you have successfully manually installed a PowerShell module, and it can be used in your PowerShell scripts and command-line operations.
How can I import a downloaded PowerShell module into my system?
To import a downloaded PowerShell module into your system, follow these steps:
1. Locate the module: Find the downloaded module folder (usually in the form of a ZIP file) and extract its contents to a directory.
2. Open PowerShell: Press the Windows key, type “PowerShell” in the search bar, and click on “Windows PowerShell” or “PowerShell 7” if you have it installed.
3. Check the module path: Run the following command to check where PowerShell is looking for modules: `$env:PSModulePath`. This should return a list of paths separated by semicolons (;). You can either use one of these paths for the next step, or you can create a custom folder and add it to the `$env:PSModulePath`.
4. Place the module: Copy the extracted module folder to one of the paths in `$env:PSModulePath` or your custom folder (e.g., C:UsersusernameDocumentsWindowsPowerShellModules).
5. Import the module: In PowerShell, use the `Import-Module` command followed by the name of the module or the full path to the module folder. For example:
“`powershell
Import-Module MyDownloadedModule
“`
Or:
“`powershell
Import-Module C:UsersusernameDocumentsWindowsPowerShellModulesMyDownloadedModule
“`
6. Verify the module is imported: After importing the module, run the following command to verify that it was successfully added:
“`powershell
Get-Module -ListAvailable
“`
You should see your newly imported module in the list. Now, you can use the cmdlets and functions provided by the module in your PowerShell sessions.
How can one install a PowerShell module without administrative privileges?
In PowerShell command-line, you can install a PowerShell module without administrative privileges by using the Install-Module cmdlet and specifying the -Scope CurrentUser parameter. This installs the module in your personal user profile, which doesn’t require administrator rights.
Here’s an example of how to install a module called “ModuleName” for the current user:
“`powershell
Install-Module -Name ModuleName -Scope CurrentUser
“`
Before installing, don’t forget to use the Set-ExecutionPolicy cmdlet, if necessary, to allow the execution of scripts under your account:
“`powershell
Set-ExecutionPolicy -ExecutionPolicy RemoteSigned -Scope CurrentUser
“`
This will set the execution policy to “RemoteSigned” for the current user, allowing you to run scripts and install modules without administrative privileges.
What are the necessary steps to install a PowerShell module offline, and how can I manage its dependencies?
To install a PowerShell module offline, you’ll need to follow these steps:
Step 1: Download the module
First, download the module and its dependencies from the PowerShell Gallery or any other sources. You can use the `Save-Module` command for this:
“`powershell
Save-Module -Name -Path
“`
Replace “ with the desired module’s name and “ with the path where you want to save the module.
Step 2: Transfer the module to the offline system
Copy the downloaded module folder to a storage device (like a USB drive) and transfer it to your target (offline) system.
Step 3: Install the module
On the offline system, copy the module folder to one of the following directories:
– For all users: `%ProgramFiles%WindowsPowerShellModules`
– For the current user: `%UserProfile%DocumentsWindowsPowerShellModules`
Step 4: Import the module
Once the module is installed, open PowerShell and import the module using the `Import-Module` command:
“`powershell
Import-Module -Name
“`
Replace “ with the installed module’s name.
To manage the module’s dependencies, consider the following tips:
1. Use `Save-Module` with `-IncludeDependencies`: When downloading the module, use the `-IncludeDependencies` switch to ensure you’re getting all required dependencies:
“`powershell
Save-Module -Name -Path -IncludeDependencies
“`
2. Install dependencies manually: If the module has a list of dependent modules, download each dependency separately and follow the same offline installation process described earlier.
3. Check dependencies in the module manifest: If you’re unsure about a module’s dependencies, inspect its `.psd1` file (module manifest). Look for the `RequiredModules` key to see a list of required modules:
“`powershell
Get-Content -Path | Select-String -Pattern “RequiredModules”
“`
Replace “ with the path to the module’s `.psd1` file.
How can I troubleshoot common issues when installing an offline PowerShell module in the command-line interface?
Troubleshooting common issues when installing an offline PowerShell module in the command-line interface requires careful attention to factors like module location, version requirements, and administrator privileges. Below are some key steps to address these issues:
1. Verify the module path: Ensure that the offline module you are trying to install is located in the correct folder. You can use the `Test-Path` cmdlet to verify if the module’s path is correct. For example:
“`powershell
Test-Path -Path “C:pathtoyourmodule”
“`
2. Check for administrator privileges: Some modules require administrator privileges to be installed. Make sure you are running PowerShell as an administrator by right-clicking on the PowerShell icon and selecting “Run as Administrator”.
3. Allow script execution: The system might prevent executing scripts due to security policies. To allow script execution, run the following command as an administrator:
“`powershell
Set-ExecutionPolicy RemoteSigned
“`
4. Verify the module requirements: Ensure your system meets the minimum requirements for the module you’re attempting to install, such as the PowerShell version or other dependencies.
5. Install the module using the Install-Module cmdlet: Use the `Install-Module` cmdlet with the `-Name` parameter, specifying the path to the offline module. You may also need to use the `-Scope` parameter to set the installation scope (CurrentUser or AllUsers). For example:
“`powershell
Install-Module -Name “C:pathtoyourmodule” -Scope CurrentUser
“`
6. Check the installed module: After installation, verify if the module has been installed correctly using the `Get-Module` cmdlet:
“`powershell
Get-Module -Name YourModuleName -ListAvailable
“`
By following these steps, you can troubleshoot common issues and successfully install offline PowerShell modules in the command-line interface.
What are the key differences between installing a PowerShell module online compared to offline, and are there any limitations while working with an offline module?
In the context of PowerShell command-line, installing a PowerShell module can be done both online and offline. The key differences between online and offline installation are as follows:
Online Installation:
1. An active internet connection is required to download and install the module from a repository like the PowerShell Gallery.
2. You can install a module using the `Install-Module` cmdlet. For example: `Install-Module -Name ModuleName`
3. The module is automatically downloaded and installed from the repository.
4. You can easily update the module by simply running `Update-Module -Name ModuleName`
Offline Installation:
1. No active internet connection is required during the installation process, but you need to have previously downloaded the module files or package.
2. You can install a module by copying the module folder to one of the module paths. Generally, it’s recommended to copy it to `%USERPROFILE%DocumentsWindowsPowerShellModules`.
3. Alternatively, if you have a .nupkg file, you can install it using the `Install-Package` cmdlet by providing the path to the .nupkg file. For example: `Install-Package -Path C:DownloadsModuleName.nupkg`
4. Updating the module requires manually downloading an updated version and replacing the old module folder or .nupkg file.
As for limitations while working with an offline module:
1. Updating and maintaining: There’s no built-in mechanism to check for updates, so you must manually download and install updates.
2. Dependency management: If the offline module has dependencies on other modules, you need to download and install them manually before you can use the main module.
3. Compatibility concerns: When working with offline modules, you may have to ensure that the module version is compatible with your PowerShell version and environment.
