
Opening the Vault: How to Download Photos from the Cloud
Capturing moments in digital form and preserving them in the cloud has become as natural as breathing. Yet, there comes a time when we wish to download these precious memories to our devices. Here’s a comprehensive guide on how to download photos from the cloud effectively and securely.
Understanding the Basics
Before we dive in, it’s crucial to understand what ‘the cloud’ means. Simply put, the cloud is an intangible storage space where data is stored on remote servers that can be accessed via the internet. The term ‘downloading photos from the cloud’ translates to retrieving your saved photos back to your device.
Decoding the Process: Steps to Downloading Photos from the Cloud
The process of downloading photos from the cloud depends on the service provider you utilize. Here’s a general sketch of what the steps usually entail:
Step 1: Access your cloud storage account.
Step 2: Navigate to the ‘photos’ or ‘files’ section, depending on your cloud service.
Step 3: Select the photos you wish to download.
Step 4: Click the ‘download’ or ‘save’ button to transfer the photos to your device.
As an Engineer of Software, I urge users to be mindful of the security procedures involved in the downloading process. Always use secured networks while performing such actions to prevent unauthorized access.
A Closer Look at Popular Cloud Services
Here’s how you could download photos from popular cloud services like Google Drive, Dropbox, and iCloud.
Google Drive:
Navigate to ‘My Drive’, select the photos, right-click and choose ‘Download’.
Dropbox:
Go to ‘Files’, click on ‘Photos’, select the pictures, and choose ‘Download’.
iCloud:
Open ‘Photos’, select the images, click on the download icon.
Parallel Concepts: Uploading and Syncing
These two processes often go hand-in-hand with downloading. Uploading is the act of transferring data from your device to the cloud, while syncing ensures that your data is up-to-date across all your devices.
It’s exactly like solving a complex mathematical equation. The cloud (solution) is the result of carefully planned uploads (equations) and syncs (algorithms), with downloads representing the decoding of this solution back into simple terms.
An Exercise for Reinforcement
Let’s consider a hypothetical scenario. You’ve been working on an algorithmic problem that required you to upload multiple diagrams and graphs to the cloud. Now, you are preparing for a presentation and need to download them. Apply the steps we’ve discussed to successfully retrieve your files.
Remember, practice makes perfect. Do this exercise a few times to fully familiarize yourself with the process.
Deep Dive into Technicalities
Understanding the underlying engineering principles behind downloading can provide an added layer of comprehension and control.
When you download a file, you’re essentially recreating a copy of the data on your device. This approach utilizes bandwidth, and the speed of the action will depend on your network’s capability. A good Engineer of Software always takes note of these details, optimizing them to ensure smooth operation.
To sum it up, how to download photos from the cloud is an amalgamation of basic understanding, careful procedure following, and technical comprehension. As Mathematicians and Statisticians, the use of logic and precision comes naturally to us, making the task at hand both feasible and interesting. Harness your skills, proceed methodically, and keep practicing to master the process.
Copy Your iPhone Photos & Videos IN SECONDS (Without iCloud or iTunes)

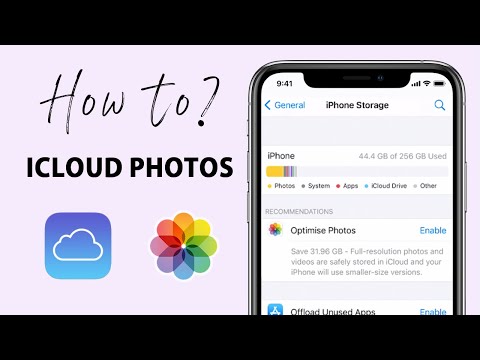
How To Free Up Space On Your iPhone Using iCloud Photos? ☁️
How to Download Photos from iCloud to iPhone – Recover Permanently Deleted Photos EASILY

How do I get my photos from the cloud?
Retrieving photos from a cloud depends on the particular cloud service you are using. But, I will illustrate two of the most commonly used services: Google Photos and iCloud.
Google Photos:
1. Navigate to https://photos.google.com/ on your web browser.
2. Click on the “Go to Google Photos” button.
3. Log in with your Google account credentials that you used to backup your photos.
4. Here, you can view all your backed up photos.
5. To download a photo, simply open the photo and click on the “Download” button (three vertical dots at the top right corner of the screen and then “Download”).
iCloud:
1. Navigate to https://www.icloud.com/ on your web browser.
2. Log in with your Apple ID.
3. Click on the “Photos” icon.
4. Here, you can view all your photos. To download one, simply select it and click on the “Download” button located at the top right corner of the screen (a cloud icon with an arrow pointing downwards).
Remember that different cloud services may have different processes, so you should refer to your cloud service’s specific help or support resources if these instructions don’t apply.
Can you download photos directly from iCloud?
Yes, you can download photos directly from iCloud. Here are the steps you need to follow:
1. Open your web browser and navigate to www.icloud.com.
2. Enter your Apple ID and password then click the arrow to log in.
3. After logging in, click on “Photos.”
4. You will see all your photos stored on iCloud. Select the photos you want to download.
5. Once you’ve selected your photos, click the download icon at the top right corner of the screen.
6. Your photos will now start downloading and will be saved in your default downloads folder unless you specify a different location.
Note: If you’ve enabled iCloud Photo Library on your iOS device, your photos and videos are automatically uploaded and stored in iCloud. Therefore, ensure that you have enough space in iCloud to accommodate all your photos and videos.
How do I download more than 1000 photos from iCloud?
Sure! Here is some step-by-step advice:
1. Open iCloud.com: The first step to downloading a large number of photos from iCloud is to open www.icloud.com in your web browser.
2. Log in: Enter your Apple ID and password to log in.
3. Selecting Photos: After you are logged in, click on “Photos”.
4. Select All the Photos: Unfortunately, iCloud currently does not allow users to download more than 1000 photos at a time. Therefore, you will need to select no more than 1000 photos at a time for download. You do this by holding down the Shift key, clicking on the first photo, and then clicking on the last photo that you want to download.
5. Download: After selecting the photos, click on the “Download selected items” icon located at the top right corner of the screen.
6. Repeat: Repeat steps 4 and 5 to download batches of photos until you have downloaded all the photos you need.
If you have a large number of photos to download, you might want to consider using the iCloud app, which allows you to automatically sync photos to your device rather than manually downloading them in batches. Regardless of the method you choose, remember to always back up your photos in more than one place to avoid losing your precious memories.
How do I download files from iCloud?
Downloading files from iCloud is a simple process you can accomplish in just a few steps. Here’s how to do it:
1. Access iCloud online: Open your web browser and go to www.icloud.com.
2. Sign in to iCloud: Enter your Apple ID and password.
3. Select ‘iCloud Drive’: Once you have signed in, click on the ‘iCloud Drive’ icon from the main menu.
4. Choose the file to download: In iCloud Drive, look for the file or files you want to download. You can select multiple files by holding down the ‘Ctrl’ (or ‘Command’ on Mac) key while clicking.
5. Download the file: After selecting your files, click the download button, which looks like a cloud with an arrow pointing downwards. The files will be downloaded to the default download location on your computer.
Make sure that the device you’re using to download your files has the latest version of iOS, iPadOS, or macOS or, if you’re using a Windows PC, that you’ve installed iCloud for Windows.
What are the steps to download photos from my cloud account?
Downloading photos from your cloud account can vary depending on the cloud service provider you are using. However, I’ll give a general guide that applies to most of the services like Google Photos, iCloud, and Dropbox.
Step 1:
Firstly, you need to navigate to your cloud service provider’s website on a browser. For instance, if you are using Google Photos, open a browser and type in https://photos.google.com/ in the address bar.
Step 2:
Enter your login credentials – username and password – to sign into your account. In case your account is already signed in, you will be able to see your photos right away.
Step 3:
Once you are inside your account, you should see all your photos stored in the cloud. Depending on the cloud service, you may have different views (like grid view or list view) but you should be able to see all the photos.
Step 4:
Now, select the photos you want to download. You can usually click on each photo to select it. Some cloud services even allow you to select multiple photos at once by clicking and dragging your mouse cursor around the photos.
Step 5:
After selecting the photos, look for the ‘Download’ button. This is usually situated somewhere on the top right or bottom of the screen. Clicking on this button will initiate the download process.
Step 6:
The selected photos will get downloaded to the default downloads folder of your browser. You can then move these photos to any folder you want on your local storage.
Remember, the steps might slightly differ based on the cloud service provider. Always make sure to securely log out of your cloud account after downloading your photos, especially if you’re using a public or shared computer.
Does downloading pictures from the cloud require any specific software?
Downloading pictures from the cloud does not generally require any specific software. Most cloud services, such as Google Drive, Dropbox, or Microsoft OneDrive, can be accessed through a web browser. However, these services also offer desktop and mobile apps that can streamline the process of downloading files, including pictures.
To download pictures from the cloud, you would typically need to log in to your account on the cloud service, navigate to the folder where your pictures are stored, select the ones you want to download, and then click the download option. The pictures will then be downloaded to your device’s default download location.
If you’re using a mobile device, the process is somewhat similar. You would need to install the cloud service’s app (if available and if you haven’t already), log in to your account, locate and select your pictures, and then use the download or export option to save them to your device.
Keep in mind, the exact steps may vary somewhat depending on the specific cloud service you’re using.
How can I ensure the quality of my photos remains intact when I download them from the cloud?
To ensure the quality of your photos remains intact when downloading them from the cloud, you should keep the following steps in mind:
1. Original Quality: Always make sure that you upload your photos in their original quality to the cloud. Some cloud services automatically compress files to save space, make sure to turn off this feature.
2. Download Settings: Check your download settings. The cloud service provider may have options that allow you to choose the quality or size of the file when you’re downloading it. Choose the highest quality available.
3. File Type: Ensure that you are downloading the photos in the same file type as they were uploaded. Converting the file type can sometimes lower the quality.
4. Use Reliable Software: Make sure the software or app you’re using to download the photos is reliable and doesn’t compromise on the quality of downloads.
5. Internet Connection: A stable and strong internet connection is important. Interruptions in the connection can result in an incomplete download, which might impact the quality of the image.
6. Backup: Keep a backup of your original images somewhere safe. By doing this, even if the quality of the image is compromised during the download, you still have the original file to return to.
By following these steps, you should be able to maintain the quality of your photos while downloading them from the cloud.
Can I download all my photos at once from the cloud, or do I have to do it individually?
Yes, you can absolutely download all your photos at once from the cloud. This process depends on your cloud service provider, but most of them offer a bulk download option. For instance, on Google Photos, you can select all your photos and click on the “Download” option to download all photos in a compressed file. Similarly, iCloud users can log into their account on a computer, select the entire photo library, and click on the “Download” button.
However, remember that downloading a large number of pictures may take some time and might affect the performance of your device during the download. It is also likely that the downloaded photos will be in a zip file, so you’ll need appropriate software on your device to unzip the folder and access the photos.
Also note that you’ll need sufficient storage space on your device where you’re downloading the photos.
Remember to always keep a backup of your photos either in the cloud or external storage devices to avoid accidental data loss.
Is there a way to automate the process of downloading my photos from the cloud?
Yes, there is a way to automate the process of downloading photos from the cloud. This can be done either through the use of built-in tools within your cloud service or through using third-party software.
The most common cloud services like Google Drive, Dropbox, or iCloud have an “auto-download” or “sync” feature. This allows the user to automatically download any files added to these cloud platforms to a specific folder on their computer.
To activate this feature, you will typically need to:
1. Download and install the desktop application of your respective cloud service.
2. Log in to your cloud account.
3. In application settings, choose the folders you want to auto-download or sync.
4. Select the location on your computer where you want these files to be downloaded.
This way, every time you upload a photo to the cloud, it will automatically be downloaded to your chosen folder.
Furthermore, third-party software programs such as IFTTT (If This Then That) can also automate this process for you. With IFTTT, you can create an applet that triggers whenever a new file is uploaded to your cloud. This leads to the immediate download of that file onto a specific folder on your computer.
One important reminder while handling automatic downloads, always take into consideration the storage limits on your local device as continuous downloads may lead to its depletion.


