¡Hola! Bienvenidos a nuestro blog donde ayudamos a desinstalar aplicaciones. Hoy discutiremos cómo deshabilitar completamente Windows Defender, para que puedas disfrutar de una experiencia de usuario personalizada. ¡Acompáñanos en este proceso paso a paso!
Fully Disabling Windows Defender: A Comprehensive Guide for Uninstalling Built-in Apps
Fully Disabling Windows Defender: When it comes to uninstalling built-in apps, one of the most common requests is how to fully disable or uninstall Windows Defender. This comprehensive guide will walk you through the necessary steps to achieve this.
Step 1: Turn off Windows Defender Antivirus
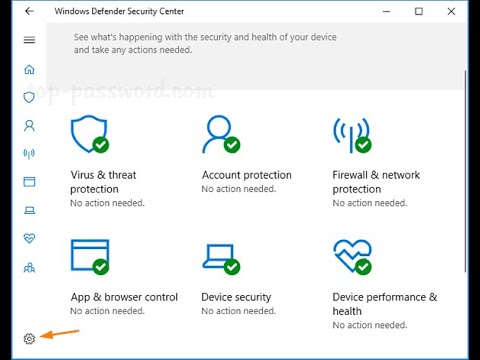
Go to the Start menu, click on Settings (the gear icon), and choose ‘Update & Security.’ Under the ‘Windows Security’ tab, click on ‘Virus & threat protection.’ Click on ‘Manage settings’ under ‘Virus & threat protection settings,’ then turn off the ‘Real-time protection’ toggle switch.
Step 2: Disable Windows Defender Firewall
Navigate to ‘Control Panel’ and click on ‘System and Security.’ Next, click on ‘Windows Defender Firewall’ and select ‘Turn Windows Defender Firewall on or off’ from the left-hand menu. Choose ‘Turn off Windows Defender Firewall’ for both private and public network settings.
Step 3: Disable Windows Defender using Group Policy
Press the ‘Windows Key + R’ to open the Run dialog box. Type ‘gpedit.msc’ and press Enter. In the ‘Local Group Policy Editor,’ navigate to ‘Computer Configuration’ > ‘Administrative Templates’ > ‘Windows Components’ > ‘Windows Defender Antivirus.’ Find the ‘Turn off Windows Defender Antivirus’ setting, double-click it, and choose ‘Enabled.’ Click ‘Apply’ and then ‘OK.’
Step 4: Disable Windows Defender using Registry Editor
Open the Run dialog box again by pressing ‘Windows Key + R.’ Type ‘regedit’ and press Enter. Navigate to ‘HKEY_LOCAL_MACHINE’ > ‘SOFTWARE’ > ‘Policies’ > ‘Microsoft’ > ‘Windows Defender.’ Right-click on ‘Windows Defender,’ select ‘New,’ and choose ‘DWORD (32-bit) Value.’ Name this value ‘DisableAntiSpyware,’ double-click it, and set its value data to ‘1.’
Note: Editing the registry can be risky, so create a backup before making any changes.
After completing these steps, Windows Defender should be fully disabled. However, keep in mind that doing so will leave your computer vulnerable to threats. It is highly recommended that you install a reliable third-party antivirus software to protect your system.
How to turn Off | Turn On “Virus & Threat Protection” in Windows 10
Fix All Windows Update Error Problems in Windows 11/10 (2023)

How do I completely disable Windows Defender?
To completely disable Windows Defender in the context of uninstalling apps, follow these steps:
Method 1: Turn off Windows Defender using Settings
1. Open the Start menu and click on the Settings (gear icon).
2. Click on Privacy & security.
3. Click on Windows Security in the left pane.
4. Click on Virus & threat protection.
5. Click on Manage settings under “Virus & threat protection settings.”
6. Toggle the switch for Real-time protection to “Off.”
Note: This method only temporarily disables Windows Defender. It may turn back on automatically after a short time or after a system restart.
Method 2: Disable Windows Defender using Group Policy Editor (For Windows 10 Pro Users)
1. Press Win + R to open the Run dialog box.
2. Type gpedit.msc and press Enter to open the Group Policy Editor.
3. Navigate to Computer Configuration > Administrative Templates > Windows Components > Microsoft Defender Antivirus.
4. Double-click on Turn off Microsoft Defender Antivirus policy.
5. Choose Enabled and click Apply, then OK.
6. Restart your computer for the changes to take effect.
Note: This method permanently disables Windows Defender. However, it is recommended to have a reliable third-party antivirus installed before doing this.
Keep in mind that disabling Windows Defender could expose your computer to potential security threats, so ensure you have an alternative security solution installed before doing so.
How to permanently disable Windows Defender using CMD?
If you want to permanently disable Windows Defender using Command Prompt (CMD) in the context of uninstalling apps, follow the steps below. It’s important to note that disabling Windows Defender can leave your system vulnerable to threats if you don’t have other antivirus software in place. Proceed with caution.
1. Open the Command Prompt as an administrator: Press the Windows key + X and select “Command Prompt (Admin)” or “Windows PowerShell (Admin)” from the menu.
2. Type the following command to disable the Windows Defender Antivirus permanently:
“`
REG ADD “HKLMSOFTWAREPoliciesMicrosoftWindows Defender” /v DisableAntiSpyware /t REG_DWORD /d 1 /f
“`
3. Press Enter: This command will modify the Windows Registry, disabling Windows Defender Antivirus.
4. Restart your computer: To apply the changes, restart your system.
Keep in mind that if you want to enable Windows Defender Antivirus again, you can follow the same steps but change the command to:
“`
REG DELETE “HKLMSOFTWAREPoliciesMicrosoftWindows Defender” /v DisableAntiSpyware /f
“`
This will delete the previously added registry value, allowing Windows Defender to operate as usual. Remember to restart your computer after applying the changes.
How to permanently disable Windows Defender Firewall in Windows 10?
In the context of uninstalling apps, disabling Windows Defender Firewall can be crucial for removing certain software or troubleshooting issues. Here’s a step-by-step guide on how to permanently disable Windows Defender Firewall in Windows 10:
Step 1: Open Services
Press the Windows Key + R to open the Run dialog box. Type in services.msc and hit Enter. This will launch the Services window.
Step 2: Locate Windows Defender Firewall
In the Services window, scroll down the list to find Windows Defender Firewall. Double click on it to open its properties.
Step 3: Disable the Service
In the Windows Defender Firewall Properties window, change the Startup type to Disabled using the dropdown menu. Then, click on the Stop button (if available) to stop the service. Lastly, click Apply and then OK to save the changes.
Note: Disabling Windows Defender Firewall will leave your system vulnerable to security threats. It’s recommended to have an alternative firewall solution installed if you choose to disable Windows Defender Firewall permanently.
Remember that this process is focused on disabling the Windows Defender Firewall rather than uninstalling it, as it’s an integrated component of the Windows operating system and cannot be uninstalled by default.
Why I can’t turn off the Windows Defender?
There are several reasons why you might not be able to turn off Windows Defender in the context of uninstalling apps. Windows Defender is an integral part of the Windows operating system, and Microsoft designed it to provide real-time protection against various malware, viruses, and other security threats.
Some possible reasons for not being able to turn off Windows Defender include:
1. Administrator privileges: You may not have administrative privileges on your account, which would prevent you from making changes to the system settings, including disabling Windows Defender.
2. Group Policy restrictions: If you’re using a device controlled by a network administrator or organization, they might have configured a group policy that prevents users from turning off Windows Defender. In this case, you would need to contact your network administrator for assistance.
3. Conflict with other antivirus software: Some antivirus programs can coexist with Windows Defender, while others require it to be disabled. If you have another antivirus program installed, it might be preventing you from disabling Windows Defender.
4. Malicious software or virus infection: It’s possible that malicious software or a virus has infected your system and is preventing changes to your security settings, including turning off Windows Defender.
To disable Windows Defender temporarily, follow these steps:
1. Press Windows key + I to open the Settings app.
2. Click on Update & Security.
3. Select Windows Security from the left pane.
4. Click on Virus & threat protection.
5. Under the Virus & threat protection settings section, click on Manage settings.
6. Turn off the Real-time protection toggle switch.
It’s essential to remember that turning off Windows Defender might leave your system vulnerable to security threats. Always ensure you have alternative protection or turn it back on once you’ve completed the task requiring its temporary disablement.
How can I completely uninstall or disable Windows Defender to prevent it from interfering with my other security apps?
To completely uninstall or disable Windows Defender and prevent it from interfering with your other security apps, follow these steps:
Method 1: Disable Windows Defender through Settings
1. Click the Start button and open Settings (the gear icon).
2. Select Update & Security.
3. Click on Windows Security in the left pane.
4. Select Virus & threat protection in the main window.
5. Under the Virus & threat protection settings, click on Manage settings.
6. Toggle off the Real-time protection switch to disable Windows Defender.
Keep in mind that disabling Windows Defender through Settings is temporary, as it will turn back on automatically after a short period or when you restart your computer.
Method 2: Disable Windows Defender through Group Policy
1. Press Win + R keys, type gpedit.msc and hit Enter to open the Local Group Policy Editor.
2. Navigate to Computer Configuration > Administrative Templates > Windows Components > Microsoft Defender Antivirus.
3. Double-click on the Turn off Microsoft Defender Antivirus policy.
4. Choose Enabled and click OK to save the changes.
5. Close the Local Group Policy Editor and restart your computer.
This method will permanently disable Windows Defender until you enable it again through the same process.
Note: The Local Group Policy Editor is only available in Windows 10 Pro, Enterprise, and Education editions.
Before completely uninstalling or disabling Windows Defender, make sure you have another reliable security app installed on your system to avoid leaving your computer vulnerable to threats.
What are the most effective methods to ensure Windows Defender is fully disabled or uninstalled on my computer?
When it comes to uninstalling or disabling Windows Defender, there are a few effective methods you can follow. It is important to note that completely uninstalling Windows Defender is not recommended, as it serves as your primary antivirus software. However, if you choose to install a third-party antivirus program, Windows Defender should automatically disable itself.
Method 1: Disable Windows Defender through settings
1. Press Windows key + I to open the Settings app.
2. Click on Privacy & Security.
3. In the left pane, click on Windows Security.
4. Click on Virus & threat protection.
5. Under Virus & threat protection settings, click on Manage settings.
6. Toggle off the Real-time protection switch.
Method 2: Disable Windows Defender using Group Policy Editor (Only available in Windows 10 Pro and higher)
1. Press Windows key + R to open the Run dialog box.
2. Type “gpedit.msc” and press Enter to open the Local Group Policy Editor.
3. Navigate to Computer Configuration > Administrative Templates > Windows Components > Windows Defender Antivirus.
4. Double-click on Turn off Windows Defender Antivirus.
5. Select Enabled and click OK to save the changes.
Method 3: Disable Windows Defender using Registry Editor
1. Press Windows key + R to open the Run dialog box.
2. Type “regedit” and press Enter to open the Registry Editor.
3. Navigate to HKEY_LOCAL_MACHINESOFTWAREPoliciesMicrosoftWindows Defender.
4. Right-click on the Windows Defender key, select New > DWORD (32-bit) Value, and name it “DisableAntiSpyware”.
5. Double-click on DisableAntiSpyware and set its value data to 1.
6. Click OK to save the changes and close the Registry Editor.
Remember to restart your computer after implementing any of these methods to ensure that the changes take effect. Additionally, if you choose to disable Windows Defender, make sure you have another reliable antivirus program installed to protect your system from potential threats.
Can I permanently uninstall Windows Defender, and will this affect the functionality of other apps on my system?
It is not recommended to permanently uninstall Windows Defender as it serves as the built-in antivirus program for Windows and provides essential protection against malware and other threats. Disabling or uninstalling it can leave your system vulnerable to attacks.
However, if you have a third-party antivirus installed on your system, Windows Defender will automatically disable itself in favor of that program. You can also manually disable Windows Defender, but it will still be present on your system, allowing you to re-enable it if necessary.
Permanently uninstalling Windows Defender is not officially supported and can only be done through unofficial methods, which is not advised. It may cause issues with updates and other system functionalities. Additionally, since Windows Defender is deeply integrated into the system, permanently removing it can potentially affect the functionality of other apps and the overall stability of your system.