
Have you ever wondered, “can I have multiple SSH keys?” This question might have crossed your mind as you juggle various projects or collaborate with different teams using different repositories. The answer is yes, you can have multiple SSH keys. In this article, we’ll delve into the reasons behind the need for multiple SSH keys, the steps to create and manage them, and some real-world examples.
Why use multiple SSH keys?
Using multiple SSH keys provides numerous benefits, including:
1. Enhanced security: By assigning unique keys per project or organization, the risk of unauthorized access is reduced because a compromise in one area won’t affect others.
2. Improved organization: Having separate SSH keys for different repositories and servers helps maintain a clear distinction between projects and their respective access levels.
3. Simplified key rotation: Changing individual SSH keys for specific projects is easier than updating a single key used across all operations.
To fully understand what it means to have multiple SSH keys and how to manage them efficiently, let’s first recap some essential concepts.
SSH keys explained
Secure Shell (SSH) is a cryptographic network protocol used for secure data communication, remote command execution, and server authentication. SSH uses public and private key pairs for authentication, where the public key is placed on the server, and the private key remains with the user.
When a user attempts to connect to a server, the server verifies the authenticity by comparing the public key on the server with the private key on the user’s local machine. If the keys match, the connection is established.
It is crucial to keep the private key secret, as its exposure can lead to unauthorized access to servers. Therefore, utilizing multiple SSH keys for different services and accounts minimizes the potential damage in case one of the private keys becomes compromised.
Setting up multiple SSH keys
To create multiple SSH keys, follow these steps:
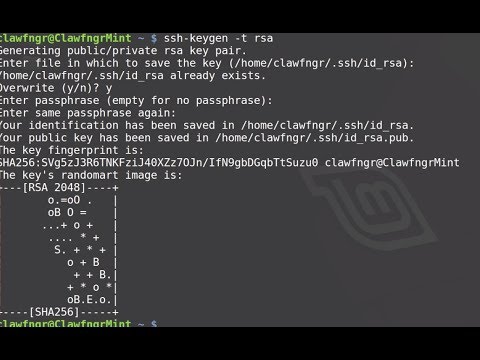
1. Create a new SSH key pair: Use the `ssh-keygen` command to generate a new key pair. Provide a unique filename for the private key to distinguish it from others:
“`
$ ssh-keygen -t rsa -b 4096 -C “[email protected]” -f ~/.ssh/unique_key_name
“`
2. Add the SSH key to the ssh-agent: Ensure the ssh-agent is running and then add your new private key to it:
“`
$ eval “$(ssh-agent -s)”
$ ssh-add ~/.ssh/unique_key_name
“`
3. Upload the public key to the server or service: For each server or service, you need to upload the respective public key (`unique_key_name.pub`) to the appropriate location or settings.
Once you’ve set up multiple SSH keys, you’ll want to manage and configure them effectively.
Managing multiple SSH keys
To streamline the process of using multiple SSH keys, you can create an SSH configuration file. This file enables you to define custom aliases and configurations for different hosts, simplifying the connection process. Here’s how to create and manage the SSH configuration file:
1. Create the configuration file: In your `~/.ssh/` directory, create a file named `config`:
“`
$ touch ~/.ssh/config
“`
2. Define host aliases and configurations: Edit the `config` file and add the following entries for each host or service:
“`
Host alias
HostName example.com
User your_username
IdentityFile ~/.ssh/unique_key_name
IdentitiesOnly yes
“`
Replace “alias” with a custom identifier for the host, “example.com” with the actual domain, “your_username” with your real username, and “unique_key_name” with the appropriate private key filename.
The `IdentitiesOnly yes` option ensures that only the specified `IdentityFile` will be used for authentication, avoiding any conflicts or issues.
3. Connect using aliases: With the SSH configuration file in place, you can now use the defined alias to connect to your hosts:
“`
$ ssh alias
“`
This command will automatically use the correct SSH key and user information for the specified host.
Real-world examples
Imagine you are working on two separate projects: Project A and Project B. For security reasons, you decide to use different SSH keys for each project. First, generate unique key pairs for both projects:
“`
$ ssh-keygen -t rsa -b 4096 -C “[email protected]” -f ~/.ssh/project_a_key
$ ssh-keygen -t rsa -b 4096 -C “[email protected]” -f ~/.ssh/project_b_key
“`
Next, configure the SSH config file to define the host aliases and configurations for both projects:
“`
Host project_a_alias
HostName project-a.example.com
User your_username
IdentityFile ~/.ssh/project_a_key
IdentitiesOnly yes
Host project_b_alias
HostName project-b.example.com
User your_username
IdentityFile ~/.ssh/project_b_key
IdentitiesOnly yes
“`
Now, you can easily connect to both projects using their respective aliases:
“`
$ ssh project_a_alias
$ ssh project_b_alias
“`
By following these guidelines and managing multiple SSH keys effectively, you’ll improve the organization and security of your workflows.
Bye Bye Ubiquiti, Hello Alta Labs!

How to Generate SSH Keys
SSH Keys | Adding an SSH key to a Raspberry Pi

Can I have multiple SSH keys for different remote servers in the context of server management?
Yes, you can have multiple SSH keys for different remote servers in the context of server management. Each key pair can be uniquely associated with a specific remote server or user account. This approach helps enhance the security by using different keys for each server and allows you to easily manage access to multiple servers.
To achieve this, follow these steps:
1. Create a new SSH key pair using the `ssh-keygen` command, specifying a unique file name for each key pair:
“`
$ ssh-keygen -t rsa -b 4096 -f ~/.ssh/unique_server_key
“`
Replace ‘unique_server_key’ with a descriptive name for your specific server.
2. Configure an SSH config file to associate each key pair with its respective server. Create or edit the file `~/.ssh/config`, adding an entry for each server:
“`
Host server1
Hostname server1.example.com
User yourusername
IdentityFile ~/.ssh/unique_server1_key
Host server2
Hostname server2.example.com
User yourusername
IdentityFile ~/.ssh/unique_server2_key
“`
This configuration tells SSH to use the specified identity file for each host when connecting.
3. Deploy the public keys to their corresponding remote servers using the `ssh-copy-id` command:
“`
$ ssh-copy-id -i ~/.ssh/unique_server_key.pub [email protected]
“`
With this setup, you can now easily manage and connect to multiple remote servers using their respective SSH keys.
How do I manage and use multiple SSH keys while working with various repositories in the context of Git and version control?
In order to manage and use multiple SSH keys while working with various repositories in the context of Git and version control, you should follow these steps:
Step 1: Create separate SSH keys for each repository
Start by creating a new SSH key for each repository you want to work with. You can generate a new SSH key using the following command:
“`
$ ssh-keygen -t ed25519 -C “[email protected]” -f ~/.ssh/id_repo_name_ed25519
“`
Replace `[email protected]` with your email address and `repo_name` with the name of the repository. This will create a new SSH key in the `~/.ssh` directory with the specified name. Make sure to add this newly generated key to the respective Git hosting service (like GitHub, GitLab, or Bitbucket) for each repository.
Step 2: Create or modify the SSH config file
Next, you need to create a configuration file for SSH to recognize and use the different keys. If you don’t already have an SSH config file, create one in your `~/.ssh` directory:
“`
$ touch ~/.ssh/config
“`
Open the config file using your preferred text editor, and add a new entry for each repository, specifying the corresponding SSH key:
“`
# Repository 1
Host git.example1.com
HostName git.example1.com
User git
IdentityFile ~/.ssh/id_repo1_ed25519
# Repository 2
Host git.example2.com
HostName git.example2.com
User git
IdentityFile ~/.ssh/id_repo2_ed25519
“`
Replace `git.example1.com` and `git.example2.com` with the domain names of your Git hosting services and update the `IdentityFile` path according to the names you used when generating the SSH keys.
Step 3: Test the SSH connections
To verify if everything is set up correctly, test the SSH connection for each repository by running:
“`
$ ssh -T [email protected]
$ ssh -T [email protected]
“`
You should see a message confirming successful authentication for each repository.
Now, you can manage and use multiple SSH keys while working with different repositories in the context of Git and version control. Git will automatically use the correct key for each repository based on the SSH config file.
Are there any security concerns or best practices to follow when utilizing multiple SSH keys in the context of securing remote access?
There are indeed several security concerns and best practices to follow when utilizing multiple SSH keys in the context of securing remote access. Some of the most important points to consider are:
1. Key Management: Properly managing your SSH keys is crucial for maintaining a secure environment. Make sure to keep track of all your SSH keys, remove any unused keys, and rotate keys regularly.
2. Key Strength: Use strong cryptographic algorithms to generate your SSH keys. Ensure that you are using at least RSA 2048-bit or, preferably, ed25519 keys for optimal security.
3. Passphrase Protection: Always protect your private SSH keys with strong passphrases. This adds an extra layer of security in case your private key is ever compromised.
4. Minimal Access: Grant the minimum necessary privileges to each key. Avoid using the same key for multiple users or different purposes; create separate keys for each user and purpose instead.
5. Audit and Monitoring: Regularly review SSH logs and monitor user activity. This can help identify any unauthorized access attempts or potential attacks.
6. Disable Root Login: For added security, disable direct root login via SSH and use a non-privileged user with sudo access instead.
7. Use SSH Agent: Utilize ssh-agent to manage your private keys securely and avoid storing them on disk, reducing the risk of theft or exposure.
8. Two-Factor Authentication (2FA): Implement two-factor authentication to add an extra layer of security when accessing your remote systems.
By following these best practices, you can significantly reduce the risks associated with using multiple SSH keys and ensure a more secure remote access environment.
How can I configure my local SSH agent to handle multiple SSH keys and switch between them in the context of authentication and user experience?
To configure your local SSH agent to handle multiple SSH keys and switch between them, follow these steps:
Step 1: Generate multiple SSH key pairs
First, you need to generate multiple SSH key pairs. In your terminal, run the following command for each key pair (replacing “[email protected]” with your email address and “key_name” with a unique name for each key):
“`
ssh-keygen -t rsa -b 4096 -C “[email protected]” -f ~/.ssh/key_name
“`
This will create an RSA key pair with a 4096-bit length in the specified file.
Step 2: Add the generated keys to the SSH agent
Next, add the generated keys to the SSH agent. To do this, first ensure that the SSH agent is running by executing:
“`
eval “$(ssh-agent -s)”
“`
Now, add each of your generated keys to the SSH agent using the `ssh-add` command:
“`
ssh-add ~/.ssh/key_name
“`
Step 3: Create or modify the SSH config file
Create a new file (if it doesn’t exist) or open the existing SSH config file located at `~/.ssh/config`. Configure the file with different hosts and their associated key pairs as follows:
“`
#Host configuration for example1.com
Host example1
HostName example1.com
User your_username
IdentityFile ~/.ssh/key_name1
#Host configuration for example2.com
Host example2
HostName example2.com
User your_username
IdentityFile ~/.ssh/key_name2
“`
Make sure to replace values for `HostName`, `User`, and `IdentityFile` with your specific values.
Step 4: Test your SSH connections
Now you can test each SSH connection using the specified host names from your config file:
“`
ssh example1
“`
This command will use the settings and key associated with “example1” from your SSH config file.
You have now successfully configured your local SSH agent to handle multiple SSH keys and switch between them in the context of authentication and user experience. Remember that you need to add the public keys to their respective remote servers’ `authorized_keys` files to enable access.
Is it possible to set up multiple SSH keys for a single user account on a remote system in the context of user management and access control?
Yes, it is possible to set up multiple SSH keys for a single user account on a remote system in the context of user management and access control. This can be helpful when multiple users need to access the same account, or when a single user utilizes different devices with separate SSH keys.
To achieve this, you can follow these steps:
1. Generate respective SSH key pairs on the client systems.
2. Combine the public keys from all the client systems into a single file. Make sure each public key is on a separate line.
3. Transfer the combined public keys file to the remote server.
4. On the remote server, navigate to the user’s home directory and locate the .ssh folder.
5. Create or edit the authorized_keys file inside the .ssh folder and append the content of the combined public keys file. This file should contain all public keys, each on a separate line.
6. Set appropriate permissions for the authorized_keys file and .ssh folder:
“`
chmod 700 ~/.ssh
chmod 600 ~/.ssh/authorized_keys
“`
By following these steps, multiple users or devices with different SSH keys can access the single user account on the remote server. Remember to keep the private keys secure on the client systems, as they will grant access to the remote server.
