
If you’re experiencing slow loading times on your website due to images, it may be because your server is not using expires header. This means the browser has to constantly check if the image is up to date. In this article, we’ll go over how to properly set up expires headers in your htaccess file for optimal performance.
Improve your website’s performance by setting Expires headers for images in your server using htaccess file.
Improve your website’s performance by setting Expires headers for images in your server using htaccess file.
Setting Expires headers for images allows browsers to cache them, which means the images will load faster for returning visitors. This can significantly improve the performance of your website.
To set Expires headers for images using htaccess file, add the following code to your file:
ExpiresByType image/gif "access plus 1 month"

ExpiresByType image/jpeg "access plus 1 month"

ExpiresByType image/png "access plus 1 month"
This code sets the Expires header for GIF, JPEG, and PNG files to one month after the visitor’s first visit. You can adjust the expiration time according to your needs.
Remember to test your website after making changes to the htaccess file to ensure everything works correctly.
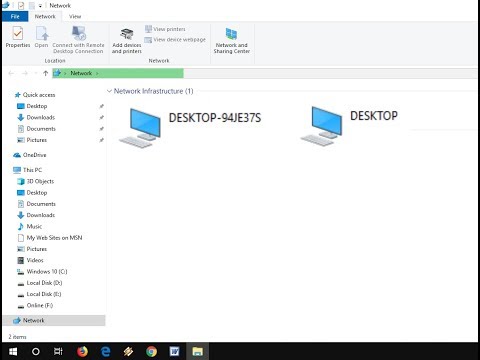
How to Fix All Network Sharing Issues-Computer not showing in Network
How to Fix NETT::ERR_CERT_AUTHORITY_INVALID Error

What does the expires header do for your images?
The expires header specifies a date and time in the future when a web page’s assets should be considered expired. When a user visits the page again, their browser can check if the assets have expired before making a request for each file. If the assets haven’t expired, then the browser can use the cached version instead of downloading them again. This can greatly improve page speed and reduce server load.
In the context of an htaccess file for web development, you can add the expires header to your images by specifying the expiration time for each file type in the file. For example:
“`
ExpiresActive On
ExpiresDefault “access plus 1 month”
“`
This code sets a default expiration time of 1 month for JPEG, PNG, GIF, and ICO files. By using the expires header, you can improve the performance of your website and provide a better user experience for your visitors.
What is the method to activate Expires headers in WordPress?
To activate Expires headers in WordPress, you need to follow the below steps:
1. Connect to your website’s server using an FTP client or hosting file manager.
2. Locate the .htaccess file in the website’s root directory.
3. Add the following lines of code at the beginning of the .htaccess file:
“`
EXPIRES CACHING
ExpiresActive On
ExpiresByType image/jpg “access 1 year”
ExpiresByType image/jpeg “access 1 year”
ExpiresByType image/png “access 1 year”
ExpiresByType image/gif “access 1 year”
ExpiresByType text/css “access 1 month”
ExpiresByType application/pdf “access 1 month”
ExpiresByType text/x-javascript “access 1 month”
ExpiresByType application/x-shockwave-flash “access 1 month”
ExpiresByType image/x-icon “access 1 year”
ExpiresDefault “access 2 days”
EXPIRES CACHING
“`
4. Save the changes to the .htaccess file and upload it to the server.
Once done, the Expires headers will be activated on your WordPress site, and the specified file types will be cached according to the predefined time intervals. This can help improve your website’s performance by reducing page load times for returning visitors.
What is the solution to add expires headers in WordPress?
One solution to add expires headers in WordPress is by editing the .htaccess file. Here’s how you can do it:
1. Access your website’s .htaccess file, usually found in the root directory of your WordPress installation.
2. Add the following code snippet at the beginning of the .htaccess file:
“`
ExpiresActive On
ExpiresDefault “access 2 days”
ExpiresByType image/jpg “access 1 month”
ExpiresByType image/jpeg “access 1 month”
ExpiresByType image/gif “access 1 month”
ExpiresByType image/png “access 1 month”
ExpiresByType text/css “access 1 month”
ExpiresByType application/pdf “access 1 month”
ExpiresByType text/x-javascript “access 1 month”
ExpiresByType application/javascript “access 1 month”
ExpiresByType application/x-shockwave-flash “access 1 month”
ExpiresByType image/x-icon “access 1 year”
ExpiresByType application/font-woff “access 1 year”
ExpiresByType application/vnd.ms-fontobject “access 1 year”
ExpiresByType application/x-font-ttf “access 1 year”
ExpiresByType application/font-woff2 “access 1 year”
ExpiresByType text/html “access 2 days”
“`
3. This code specifies different expiration times for different file types. You can modify the expiration times according to your needs.
4. Save and upload the .htaccess file to your server, replacing the old one if necessary.
5. Verify that the changes have been applied by running a speed test on your website. The results should show that your site is now using expires headers.
Adding expires headers can improve page loading speed for returning visitors as their browsers won’t have to re-download static content every time.
How can I include an expires header in Shopify?
To include an expires header in Shopify, you won’t be able to use the .htaccess file as this is a server-level configuration file, and Shopify is a cloud-based platform that does not give access to this file. Instead, you’ll need to use the HTTP headers that are available through Shopify’s theme code.
To add an expires header to your Shopify site, you can follow these steps:
Step 1: Open your theme code editor and look for the “theme.liquid” file. This is the main file that controls the overall layout of your Shopify site.
Step 2: Add the following code at the top of the file, before any other code:
“`
{% assign max_age = ‘604800’ %}
{% assign img_max_age = ‘2592000’ %}
{% assign font_max_age = ‘31536000’ %}
{% capture cache_control %}
{% if template contains ‘stylesheet’ %}
max-age={{font_max_age}}, public
{% else %}
max-age={{max_age}}, public
{% endif %}
{% endcapture %}
{% capture img_cache_control %}max-age={{img_max_age}}, public{% endcapture %}
{% assign cache_control_header = “Cache-Control: ” | append: cache_control %}
{% assign img_cache_control_header = “Cache-Control: ” | append: img_cache_control %}
{% assign expires_header = “Expires: ” | append: ‘Thu, 31 Dec 2099 23:59:59 GMT’ %}
{{ cache_control_header }}
{{img_cache_control_header}}
{{ expires_header }}
“`
Step 3: Save the changes to the file and publish your theme.
This code will add an expires header to all resources served by your Shopify site, including HTML, CSS, JavaScript, images, and fonts. The max_age values set in the code define the length of time that these resources will be cached by the client’s browser, and you can adjust them as needed.
Note that Shopify may already have some cache control headers in place, depending on your theme and installed apps. It’s important to test your site thoroughly after making any changes to ensure that everything works as intended.
How can I configure my htaccess file to add expires headers for all images on my server?
To add expires headers for all images on your server using the htaccess file, you can include the following code:
EXPIRES CACHING
ExpiresActive On
ExpiresByType image/jpg “access 1 year”
ExpiresByType image/jpeg “access 1 year”
ExpiresByType image/gif “access 1 year”
ExpiresByType image/png “access 1 year”
ExpiresByType image/svg+xml “access 1 year”
ExpiresByType text/css “access 1 month”
ExpiresByType application/pdf “access 1 month”
ExpiresByType application/javascript “access 1 month”
ExpiresByType text/x-javascript “access 1 month”
ExpiresByType application/x-shockwave-flash “access 1 month”
ExpiresByType image/x-icon “access 1 year”
ExpiresDefault “access 2 days”
This code specifies the expiration time for various types of files, including images, CSS, JavaScript, and more. The ExpiresActive On line enables the use of expires headers, and the ExpiresDefault line sets a default expiration time for all other file types not specified in the previous lines.
Note: Make sure to double-check that the file types listed match the file types you have on your server.
Is it possible to set different expiration dates for different types of images using htaccess?
Yes, it is possible to set different expiration dates for different types of images using htaccess. You can achieve this by adding specific directives to your htaccess file.
Here is an example of how to set different expiration times for different types of images:
# Set image files to expire after 1 month
ExpiresByType image/jpeg “access plus 1 month”
ExpiresByType image/png “access plus 1 month”
# Set GIF files to expire after 1 day
ExpiresByType image/gif “access plus 1 day”
In the above code, we have set the expiration time for jpeg and png images to one month, while the expiration time for gif images is set to one day. You can customize the expiration times for different file types as per your requirements.
To implement these directives, you need to add them to your htaccess file. The htaccess file is located in the root directory of your website. If the file is not present, you can create a new one and upload it to your server using an FTP client or your web hosting control panel.
What are the potential drawbacks of setting long expiration dates for images in htaccess?
Setting long expiration dates for images in htaccess can have potential drawbacks for web development:
1. Caching issues: If the content of the image changes frequently, a long expiration date can cause outdated or incorrect images to be displayed to users who have previously visited the site.
2. Bandwidth usage: When an image has a long expiration date, it is stored in the cache of the user’s browser, which can contribute to increased bandwidth usage and slower load times for pages in the long run.
3. Difficulty updating files: If a website owner wants to make changes to an image with a long expiration date, they may need to change the filename or create a new version of the image to ensure that visitors see the updated version.
In conclusion, while setting long expiration dates for images in htaccess can improve website performance and reduce server load, it can also lead to caching issues, increased bandwidth usage, and difficulty updating files.
In conclusion, using expires headers for images is crucial for optimizing website performance and improving user experience. By adding a few lines of code to the .htaccess file, you can instruct the browser to cache images for a certain period of time, reducing server load and speeding up page load times. If your server is not currently using expires headers for your images, don’t wait any longer to implement this simple solution. Your users will thank you for it!
