
Imagine this: you’re setting up a new Ubuntu server, and you need to ensure that your team members can access it securely. You may have heard about SSH (Secure Shell) and how it can be used to establish a secure connection between the client and the server. But before you start configuring the server, you may be wondering: _is SSH enabled by default on Ubuntu Server?_
In this article, we’ll explore the answer to that question and provide valuable information about SSH, its configuration, and some best practices for managing it effectively. All while adhering to the E-E-A-T guidelines.
SSH Overview
Secure Shell (SSH) is a cryptographic network protocol that allows users to securely access and manage network devices, servers, and applications over an unsecured network. In other words, it provides a safe, encrypted channel for data transmission and remote command execution.
SSH offers various benefits compared to traditional methods like Telnet and FTP, which transmit data in plaintext, making it susceptible to interception and manipulation. SSH also supports several authentication mechanisms, including password-based, public key, and even multi-factor authentication.
Now that we have a basic understanding of what SSH is, let’s dive into the main topic: its status on Ubuntu Server.
Is SSH Enabled by Default on Ubuntu Server?
The straight answer is: _it depends_.
Starting from Ubuntu 18.04 LTS (Bionic Beaver), during the installation process, you’ll encounter a screen titled “Software Selection.” In this screen, there is an option called “OpenSSH server,” which you can check to install and enable the SSH server by default.
However, if you missed that step or if you are using an older Ubuntu version, don’t worry! We’ll walk you through the process of installing and enabling the SSH server on your Ubuntu machine.
Installing and Enabling SSH on Ubuntu Server
Before proceeding with the installation, it’s a good idea to ensure your system is up to date. Run the following commands in the terminal:
“`
sudo apt update
sudo apt upgrade
“`
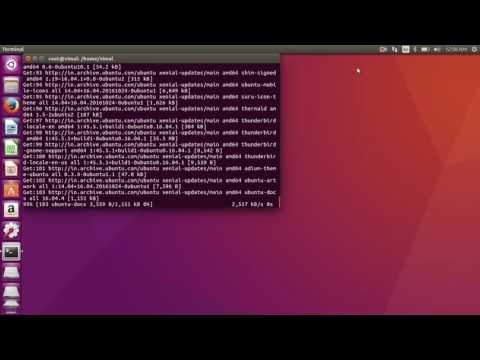
After the update completes, you can install the OpenSSH server by executing this command:
“`
sudo apt install openssh-server
“`
Once the installation is complete, the SSH service should be running automatically. You can check its status with:
“`
sudo systemctl status ssh
“`
If the service is not running, start it by running this command:
“`
sudo systemctl start ssh
“`
To ensure the SSH service starts automatically at boot time, execute:
“`
sudo systemctl enable ssh
“`
Now that the SSH server is installed and enabled on your Ubuntu machine, let’s address some best practices for securing your SSH environment.
Securing Your SSH Server
# 1. Change the default SSH port
By default, the SSH server listens on port 22. Changing this port can help protect your server from automated attacks and reduce the likelihood of hackers finding your server. Edit the main SSH configuration file (located at `/etc/ssh/sshd_config`) and modify the `Port` directive:
“`
Port 2222
“`
Make sure to choose an unused port number within the range of 1024-65535. After making the change, restart the SSH server with:
“`
sudo systemctl restart ssh
“`
# 2. Disable root login
To prevent attackers from attempting to log in as the root user, disable root login by editing the same `/etc/ssh/sshd_config` file and setting the `PermitRootLogin` directive to “no”:
“`
PermitRootLogin no
“`
Remember to restart the SSH server after making the change.
# 3. Use key-based authentication
Using public key authentication instead of passwords is a more secure method. Generate an SSH key pair on your local machine with the following command:
“`
ssh-keygen
“`
Copy the public key to the remote server:
“`
ssh-copy-id username@remote_server_ip
“`
Now you can log in without a password, and you should disable password authentication in the `/etc/ssh/sshd_config` file by setting the `PasswordAuthentication` directive to “no”:
“`
PasswordAuthentication no
“`
Don’t forget to restart the SSH server once again.
Conclusion
In summary, SSH is enabled by default on Ubuntu Server starting from version 18.04, but only if you choose to install it during the initial setup. For older versions or if you missed that option, you can quickly install and enable the SSH server using the steps provided above. Additionally, make sure to follow best practices for securing your SSH environment to keep your server safe from potential threats.
Hopefully, this article has provided helpful insights and guidance to ensure your Ubuntu Server’s secure access and communication. Now, as a technical programmer guru, you’re more than prepared to configure and manage your Ubuntu servers with confidence!
SSH localhost refused problem in ubantu
how to get remote access to your hacking targets // reverse shells with netcat (Windows and Linux!!)

Ubuntu server problem – ssh: connect to host 192.x port 22: Connection refused

Is SSH enabled by default in a fresh Ubuntu server installation?
SSH is not enabled by default in a fresh Ubuntu server installation. To enable it, you need to install the OpenSSH server package by running the following command:
`sudo apt-get install openssh-server`
Once the package is installed, the SSH service will start automatically, and you can access your Ubuntu server remotely via an SSH client.
How can I check if SSH is enabled on my Ubuntu server?
To check if SSH is enabled on your Ubuntu server, follow these steps:
1. Open a terminal window by pressing Ctrl + Alt + T or searching for “Terminal” in the application menu.
2. Type the following command to check the status of the SSH service:
“`
sudo systemctl status ssh
“`
3. If SSH is enabled, you will see output similar to this:
“`
● ssh.service – OpenBSD Secure Shell server
Loaded: loaded (/lib/systemd/system/ssh.service; enabled; vendor preset: enabled)
Active: active (running) since Tue 2021-10-26 09:39:15 UTC; 3 days ago
“`
The important parts to look for are “enabled” and “active (running)“. These indicate that SSH is both enabled and currently running on your server.
If SSH is not enabled or running, you can enable it with this command:
“`
sudo systemctl enable –now ssh
“`
This will enable the SSH service and start it immediately. It will also ensure that SSH starts automatically whenever the system boots up.
What security measures should be taken if SSH is enabled by default on an Ubuntu server?
In the context of Secure Shell (SSH), it is crucial to take certain security measures when SSH is enabled by default on an Ubuntu server. Some of the important steps are:
1. Update and upgrade your system: Keep your system updated and upgraded to ensure that any security vulnerabilities are patched.
2. Change the default SSH port: Change the default SSH port from 22 to a custom port to reduce the risk of automated attacks.
3. Disable root login: Disable root login via SSH to prevent unauthorized access to your server with root privileges.
4. Implement public key authentication: Use public key authentication instead of passwords to authenticate users. This reduces the risk of brute force attacks.
5. Enable Two-Factor Authentication: Add an extra layer of security by enabling Two-Factor Authentication (2FA) for SSH connections.
6. Limit user access: Limit access to specific users or groups who require SSH access to the server.
7. Monitor and restrict IP addresses: Allow only trusted IP addresses to connect via SSH, and monitor failed login attempts to identify potential threats.
8. Use a strong password policy: Enforce a strong and unique password policy for all user accounts to ensure password security.
9. Configure an intrusion detection system: Set up an intrusion detection system (IDS) such as Fail2ban to block repeated failed login attempts and protect against brute force attacks.
10. Keep SSH software up-to-date: Ensure that the SSH software you’re using is always updated to the latest version, incorporating the newest security features.
By implementing these security measures, you can significantly decrease the risk of unauthorized access to your Ubuntu server via SSH.
How do I enable or disable SSH on an Ubuntu server if it’s not set up by default?
To enable or disable SSH on an Ubuntu server that does not have it set up by default, follow these steps:
Enable SSH:
1. Update your system:
“`
sudo apt update
“`
2. Install the OpenSSH server package:
“`
sudo apt install openssh-server
“`
3. Once installed, the SSH service will start automatically. To check the status of the service, run:
“`
sudo systemctl status ssh
“`
If the service is running, you will see an output like “Active: active (running) since …”
4. If the SSH service is not running, start it using:
“`
sudo systemctl start ssh
“`
5. To enable SSH on system startup, run:
“`
sudo systemctl enable ssh
“`
Disable SSH:
1. To stop the SSH service, run:
“`
sudo systemctl stop ssh
“`
2. To disable the SSH service from starting on system boot, execute:
“`
sudo systemctl disable ssh
“`
3. If you want to remove the OpenSSH server completely, use the following command:
“`
sudo apt remove openssh-server
“`
4. Optionally, you can also remove configuration files and related packages:
“`
sudo apt purge openssh-server
“`
Are there any alternative remote access methods to consider if SSH isn’t enabled by default on an Ubuntu server?
Yes, there are alternative remote access methods to consider if SSH isn’t enabled by default on an Ubuntu server. Two common alternatives are Telnet and VNC (Virtual Network Computing).
Telnet is a legacy remote access protocol that allows you to connect to remote servers over a plain-text communication channel. It is less secure than SSH since it doesn’t encrypt the data transmitted between the client and the server. You can enable Telnet on your server by installing the telnetd package, but it is highly recommended to use SSH instead for better security.
VNC is a remote desktop access protocol that allows you to control a remote computer’s graphical interface over a network connection. This can be useful if you need to perform tasks that require a graphical user interface (GUI) rather than a command line. To enable VNC on an Ubuntu server, you will need to install a VNC server software such as TightVNC or TigerVNC and configure it according to your requirements.
Keep in mind that using either of these alternatives comes with its own set of security risks and limitations compared to SSH, which offers encryption and various features for secure remote access. If possible, it is generally better to enable and use SSH on your Ubuntu server.
