
Introduction: The Mystery of SSH on Raspberry Pi
Picture this: you’ve just set up your shiny new Raspberry Pi, eager to dive into the world of programming and tinkering. But there’s something nagging at the back of your mind – is SSH enabled by default on Raspberry Pi? It seems like such a simple question, but finding a clear answer online can be an adventure in itself.
Fear not, fellow programmer! In this article, we will not only answer that burning question but also delve into the fascinating realm of SSH and Raspberry Pi. We’ll cover everything from enabling SSH to securing your connection. This is the ultimate guide for SSH enthusiasts seeking to unlock the full potential of their Raspberry Pi devices.
Is SSH Enabled by Default on Raspberry Pi?
To answer the main query: no, SSH is not enabled by default on Raspberry Pi. In recent versions of Raspberry Pi OS, the developers have made the conscious decision to disable SSH by default. The rationale behind this choice revolves around security concerns, as leaving SSH enabled could expose your Raspberry Pi to potential security breaches.
But worry not, enabling SSH on your Raspberry Pi is a relatively simple task. In the following sections, we’ll guide you through the process and provide tips for optimizing security.
Enabling SSH on Raspberry Pi
There are a few methods available for enabling SSH on your Raspberry Pi. We’ll outline two popular approaches below:
Method 1: Using raspi-config
1. Power up your Raspberry Pi and ensure it’s connected to the internet via Ethernet or Wi-Fi.
2. Open the terminal window and enter the following command:
“`
sudo raspi-config
“`
3. In the configuration menu, navigate to Interfacing Options > SSH, then select ‘Yes’ to enable SSH.
4. Reboot your Raspberry Pi for the changes to take effect.
Method 2: Creating an SSH File
This method is particularly useful if you’re running Raspberry Pi OS Lite or when you don’t have access to a monitor or keyboard.
1. Using a computer, create an empty file named `ssh` (with no file extension) on the root directory of the boot partition of your Raspberry Pi’s SD card.
2. Safely eject the SD card from your computer and insert it into your Raspberry Pi.
3. Power up your Raspberry Pi – SSH will be enabled automatically as it boots up.
Now that you’ve enabled SSH on your Raspberry Pi, it’s essential to secure your connection to prevent unauthorized access.
Securing Your SSH Connection
While enabling SSH opens up a world of possibilities for Raspberry Pi enthusiasts, it’s crucial not to overlook security. To maximize protection, follow these best practices:
Change the Default Raspberry Pi Password
By default, the Raspberry Pi username is ‘pi’, and the password is ‘raspberry’. These credentials are well-known, creating a potential security risk. Change your password by entering the following command in the terminal:
“`
passwd
“`
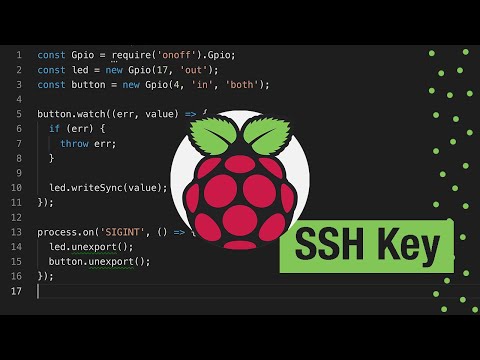
Disable Password Authentication and Use SSH Key Pairs
To further enhance security, disable password authentication for SSH and use SSH key pairs instead. This approach requires a private key on your computer and a public key on the Raspberry Pi. Follow these steps:
1. On your computer, generate an SSH key pair with the command:
“`
ssh-keygen
“`
2. Copy the public key to your Raspberry Pi using this command, replacing ‘raspberrypi’ with the IP address of your device:
“`
ssh-copy-id pi@raspberrypi
“`
3. Verify that you can log in to your Raspberry Pi using the key pair by entering:
“`
ssh pi@raspberrypi
“`
4. To disable password authentication, edit the `/etc/ssh/sshd_config` file on your Raspberry Pi:
“`
sudo nano /etc/ssh/sshd_config
“`
5. Modify the following lines:
“`
ChallengeResponseAuthentication no
PasswordAuthentication no
UsePAM no
“`
6. Save and exit the file, then restart the SSH service:
“`
sudo systemctl restart ssh
“`
Conclusion
In this comprehensive guide, we’ve unraveled the mystery of whether SSH is enabled by default on Raspberry Pi and explored how to enable and secure SSH connections. With this knowledge in hand, you can now enjoy the full potential of your Raspberry Pi device while maintaining a robust security posture.
With the world of SSH and Raspberry Pi now open to you, the only limit is your imagination. So go forth, valiant programmer, and create masterpieces in the realm of code! And remember, never stop asking questions – for curiosity is the fuel that drives innovation.
Raspberry Pi SSH Tutorial

Raspberry Pi: SSH aktivieren

SSH Keys | Adding an SSH key to a Raspberry Pi
Is SSH activated on the Raspberry Pi?
By default, SSH is not activated on the Raspberry Pi. However, you can easily enable it by following these steps:
1. Insert the microSD card containing the Raspberry Pi OS into your computer.
2. Navigate to the root directory of the microSD card, also known as the “boot” partition.
3. Create an empty file named ssh (without any file extension) in the root directory of the boot partition.
4. Safely eject the microSD card and insert it back into your Raspberry Pi.
5. Power on the Raspberry Pi.
After completing these steps, SSH will be enabled on your Raspberry Pi, allowing you to access it remotely over a network using an SSH client.
How can I determine if SSH is enabled on Raspbian?
To determine if SSH is enabled on Raspbian, follow these steps:
1. Open the terminal on your Raspberry Pi or connect to it via SSH.
2. Check for the presence of the SSH service by running the following command:
“`
sudo systemctl status ssh
“`
3. Look for the Active status in the output. If it says “active (running),” then SSH is currently enabled and running on your Raspbian system.
Example output:
“`
● ssh.service – OpenBSD Secure Shell server
Loaded: loaded (/lib/systemd/system/ssh.service; enabled; vendor preset: enabled)
Active: active (running) since Thu 2020-10-01 12:21:39 UTC; 64 days 8h ago
“`
4. If SSH is not enabled, you can enable it by running the following command:
“`
sudo systemctl enable ssh
“`
5. After enabling SSH, start the service with this command:
“`
sudo systemctl start ssh
“`
Now, SSH should be enabled and running on your Raspbian system.
Is SSH deactivated by default?
In the context of Secure Shell (SSH), it is not universally true that SSH is deactivated by default. The default configuration largely depends on the operating system and the specific installation options chosen.
For instance, many Linux distributions have SSH installed but may require you to enable and start the SSH service manually. On the other hand, some cloud providers automatically configure an SSH server for remote access during the provisioning of a virtual machine.
It is essential to check your system’s settings and take necessary actions to enable or disable SSH according to your requirements and security best practices.
How can I permanently enable SSH on my Raspberry Pi?
To permanently enable SSH on your Raspberry Pi, follow these steps:
1. Enable SSH: By default, SSH is disabled on a Raspberry Pi for security reasons. To enable it, insert your microSD card into your computer and locate the boot partition. Create an empty file named “ssh” (without any file extension) in the boot partition. This will enable the SSH server when the Raspberry Pi boots up.
2. Insert the microSD card: Insert the microSD card with the ssh file back into your Raspberry Pi.
3. Power on the Raspberry Pi: Connect the power supply to your Raspberry Pi and boot it up.
4. Find the Raspberry Pi IP address: You need the IP address of your Raspberry Pi to connect to it using SSH. You can find the IP address by logging into your router’s administration page or by using nmap, a network scanning tool, on your computer.
5. Connect to the Raspberry Pi via SSH: Open a terminal window on your computer and use the following command to connect to your Raspberry Pi:
“`
ssh pi@
“`
Replace “ with your Raspberry Pi’s actual IP address. The default username is “pi”, and the default password is “raspberry”.
6. Update and upgrade the Raspberry Pi: Once connected, update the package list and upgrade the installed packages by running the following commands:
“`
sudo apt-get update
sudo apt-get upgrade
“`
7. Configure SSH to start on boot: Although SSH should now be enabled and started, it’s a good idea to ensure that it starts every time the Raspberry Pi boots. Run the following command:
“`
sudo systemctl enable ssh
“`
8. Reboot the Raspberry Pi: To finalize the changes and make sure SSH starts on boot, reboot the Raspberry Pi with the following command:
“`
sudo reboot
“`
Now, you have successfully permanently enabled SSH on your Raspberry Pi, and it will start each time the device boots up.
Is SSH enabled by default when setting up a new Raspberry Pi for the first time?
No, SSH is not enabled by default when setting up a new Raspberry Pi for the first time. In order to enable SSH on your Raspberry Pi, you need to place a file named ssh (with no extension) in the /boot directory of your Pi’s SD card before booting it up. This will signal the system to enable the SSH service on startup.
How can one enable SSH on a Raspberry Pi if it is not enabled by default?
To enable SSH on a Raspberry Pi if it is not enabled by default, follow these steps:
1. Insert SD card: First, insert your Raspberry Pi’s SD card into your computer.
2. Navigate to the boot partition: Open the file explorer and navigate to the boot partition of the SD card.
3. Create an SSH file: In this partition, create a new empty file named ssh (without any extension). This will enable SSH access by default when the Raspberry Pi boots up.
4. Unmount and insert SD card: Safely unmount/eject the SD card from your computer and insert it back into your Raspberry Pi.
5. Power on the Raspberry Pi: Connect the power supply and other peripherals to your Raspberry Pi, then switch it on.
6. Find the Raspberry Pi’s IP address: To connect to the Raspberry Pi via SSH, you’ll need its IP address. You can find it by logging into your router’s admin interface or using a network scanning tool like nmap or Advanced IP Scanner.
7. Connect via SSH: Use an SSH client (such as PuTTY for Windows or the Terminal for macOS/Linux) to connect to your Raspberry Pi. The default login credentials are usually:
– Username: pi
– Password: raspberry
8. Change the default password: To ensure your Raspberry Pi’s security, change the default password using the command `passwd` and following the prompts.
Once you’ve successfully connected to your Raspberry Pi via SSH, you can remotely manage and configure it as needed. Remember to keep your Pi’s software and security settings up-to-date to protect against potential threats.
What security measures should be taken into consideration when enabling SSH on a Raspberry Pi?
When enabling SSH on a Raspberry Pi, it’s essential to implement some security measures to maintain the integrity and safety of your system. Here are some key aspects to consider:
1. Change the default password: Upon setting up a Raspberry Pi, it’s crucial to change the default password for the user ‘pi’ to a strong, unique password that is difficult to guess.
2. Keep the system updated: Regularly update your Raspberry Pi to ensure you’re running the latest security patches and software versions. You can do this by running `sudo apt-get update && sudo apt-get upgrade`.
3. Disable SSH root login: To minimize the risk of unauthorized access, disable the ability to log in as the root user via SSH. Modify the `/etc/ssh/sshd_config` file and set the `PermitRootLogin` directive to `no`.
4. Use SSH keys: Implement public key authentication instead of using passwords. Generate an SSH key pair (`ssh-keygen -b 4096`) and transfer the public key to your Raspberry Pi. This method ensures an additional level of security compared to traditional password authentication.
5. Enable a firewall: Set up a firewall using tools like `ufw` (Uncomplicated Firewall) to control incoming and outgoing network traffic. Make sure to allow SSH connections through the firewall.
6. Limit users: Grant SSH access only to specific users who require remote access. Update the `AllowUsers` directive in the `/etc/ssh/sshd_config` file with the list of allowed users.
7. Change the default SSH port: Alter the default SSH port (22) to another unused port to reduce the likelihood of automated attacks. Modify the `/etc/ssh/sshd_config` file and set the `Port` directive to your chosen port number.
8. Implement fail2ban: Install and configure `fail2ban` to protect against brute-force attacks by temporarily banning IP addresses that have too many failed login attempts.
By following these security measures, you can significantly enhance the protection of your Raspberry Pi when enabling SSH access.
Are there any specific versions or distributions of Raspberry Pi OS where SSH is enabled by default?
In most recent releases of Raspberry Pi OS (formerly known as Raspbian), SSH is disabled by default for security reasons. To enable SSH on your Raspberry Pi, you need to create an empty file named “ssh” (without any file extension) on the boot partition of the SD card.
However, there are some older versions of the Raspberry Pi OS where SSH was enabled by default. For example, the Raspbian Jessie release had SSH enabled by default. But, it is highly recommended to use the latest version of Raspberry Pi OS and follow the proper steps to enable SSH manually for better security.
What are the main benefits and potential risks associated with having SSH enabled on a Raspberry Pi?
The Secure Shell (SSH) protocol is a powerful tool for remotely accessing and managing devices, including the Raspberry Pi. While SSH brings numerous benefits, it also poses potential risks if not properly secured. Here are the main benefits and potential risks associated with having SSH enabled on a Raspberry Pi:
Benefits:
1. Remote access: SSH enables you to remotely access and control your Raspberry Pi from anywhere with an internet connection, allowing you to manage its configurations, run commands, and perform updates without needing physical access to the device.
2. File transfer: Using the secure file transfer protocols such as SCP or SFTP, you can transfer files between your Raspberry Pi and other devices securely over SSH, making tasks such as updating software or managing data more convenient.
3. Security: SSH uses encryption to secure all communications between the Raspberry Pi and the connecting device, protecting sensitive data from potential eavesdroppers.
Potential Risks:
1. Unauthorized access: If your SSH service is exposed to the internet and secured with weak credentials, attackers may attempt to gain unauthorized access to your Raspberry Pi by guessing your password or exploiting vulnerabilities.
2. Brute force attacks: An attacker might attempt to gain access to your Raspberry Pi through SSH by systematically trying various username and password combinations. This can lead to unauthorized access if proper security measures are not in place.
3. Denial of Service (DoS) attacks: Malicious actors could target your Raspberry Pi’s SSH server with excessive connection requests, consuming system resources and potentially causing a service disruption.
To mitigate these risks, it is vital to secure your Raspberry Pi’s SSH service using best practices such as strong passwords, public key authentication, and implementing rate limiting or fail2ban to protect against brute force attacks.
