Title: A Comprehensive Guide to Acquiring CDN URLs: Top 5 Strategies for Experts
Introduction: The Importance of CDN URL in Ensuring Optimal Content Delivery
In the world of networking and content delivery, acquiring the right Content Delivery Network (CDN) URL can make or break the speed and efficiency with which your web assets are distributed globally. As an expert engineer of networks, I’ve witnessed firsthand the significant improvements a properly configured CDN can have on a site’s performance. This in-depth article will provide you with a clear understanding of how to get CDN URLs, review various options, and offer practical examples to help you make an informed decision. To make sure you don’t miss any valuable information, I’ll be revealing a secret strategy towards the end. So, let’s dive in!
1. Understanding CDN URL Structure and Components
Before diving into obtaining a CDN URL, it’s crucial to comprehend its structure and components. A CDN URL comprises three main elements:
– Scheme: Indicates whether the URL uses HTTP or HTTPS
– Domain: Corresponds to the chosen CDN provider
– Path: Leads to your specific file or resource on the CDN
To get the most out of your CDN, consider customizing your domain for better branding and utilizing HTTPS for enhanced security.
2. Registering with a CDN Provider
The first step to acquire a CDN URL is selecting and registering with a CDN provider. There are numerous providers in the market, each offering different features, coverage, and pricing. Some top players include:
– Akamai: A pioneer in CDN technology with a strong global network
– Cloudflare: A popular choice known for its DDoS protection and web application firewall
– Amazon CloudFront: A part of the Amazon Web Services (AWS) ecosystem providing tight integration with other AWS products
3. Configuring Your Origin Server and CDN Distribution
After registration, configure your origin server with the CDN provider to serve as the source of your content. Add your website’s domain, select the desired security settings, and enable any additional optimizations, such as compression or caching rules. Next, set up a CDN distribution to generate a unique CDN URL for your content.
Remember, each provider’s interface and configuration process will differ, so consult their documentation for detailed guidance.
4. Implementing Your CDN URL on Your Website
Now that you have acquired your unique CDN URL, it’s time to integrate it into your website. Replace the original URLs of your images, videos, CSS, and JavaScript files with the new CDN URLs. This substitution can be done manually or through automated scripts, plugins, or CMS extensions. Don’t forget to test your site thoroughly to ensure everything is functioning correctly after implementation.
5. Advanced Strategies: Enhancing Performance and Security
For those seeking optimal performance and security, consider exploring these advanced strategies:
– HTTP/2 and QUIC protocols: Enable these modern protocols in your CDN configuration to accelerate content delivery
– Image optimization: Leverage the CDN’s built-in image optimization features to reduce file sizes without sacrificing quality
– Subresource Integrity (SRI): Include SRI hashes in your HTML code to ensure the integrity of your assets and prevent tampering by third parties
Now, as promised, here’s the secret strategy I mentioned earlier: Utilize multiple CDN providers simultaneously to create a multi-CDN setup. By employing more than one provider, you can ensure better redundancy, load balancing, and improved global coverage. This approach not only helps you get the most out of your CDN investment but also ensures the best possible user experience for your visitors.
Conclusion: Acquiring a CDN URL for Enhanced Content Delivery Success
Achieving blazing-fast content delivery requires careful selection, configuration, and integration of CDN URLs. In this comprehensive guide, I’ve outlined the essential steps for obtaining and implementing CDN URLs, along with advanced strategies for improving performance and security. By following these guidelines, you will soon be well on your way to creating a seamless and efficient content delivery network that will delight your users and deliver a competitive edge for your website.
I Set Up MY OWN PERSONAL CDN using AWS S3 and Cloudflare to serve STATIC FILES

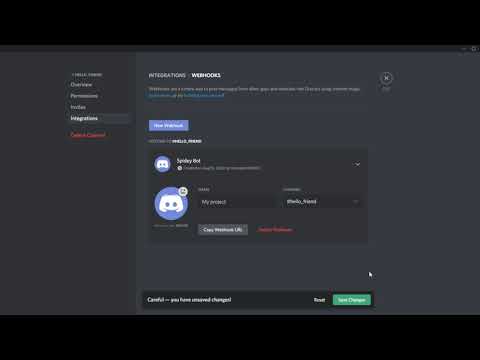
How to get a Webhook URL on Discord
How do I find my CDN URL?
To find your CDN URL in the context of a Content Delivery Network, follow these steps:
1. Log in to your CDN provider’s account or control panel. If you don’t have an account, you need to sign up for a content delivery network service.
2. Once logged in, look for the CDN section or navigate to the page where you can manage your resources or domains.
3. In most cases, the CDN URL will be provided on this page, either as a unique URL assigned by the provider or as a custom domain that you can configure. The CDN URL usually looks like “http://yourcdnprovider.com/yourusername” or “http://cdn.yourdomain.com”.
4. If you cannot find your CDN URL, consult your provider’s documentation or contact their support team for assistance.
Remember to replace all instances of your original domain within your website’s source code with the new CDN URL to ensure that your content is properly served through the content delivery network.
What is the URL of CDN?
In the context of a Content Delivery Network (CDN), the URL of CDN refers to the web address that points to the CDN’s servers, where static resources like images, stylesheets, and JavaScript files are stored and served. These URLs are used to accelerate the delivery of content by caching and distributing it across multiple locations.
For example, if your website’s main URL is “https://www.example.com”, the CDN URL might be “https://cdn.example.com”. When a user requests a file, instead of contacting the main server, they will fetch the file from one of the CDN’s edge servers, reducing latency and page load time.
How do I get a Cloudflare CDN URL?
In order to get a Cloudflare CDN URL for your website, you will need to follow a few simple steps. Sign up for an account, configure your site’s DNS settings, and optimize your site with Cloudflare CDN features. Here’s the step-by-step process:
1. Create a Cloudflare account: Visit the Cloudflare website (www.cloudflare.com) and sign up for a free account. This will give you access to their content delivery network services.
2. Add your website: Once you have an account, you’ll be prompted to add your website’s domain name. Enter your domain and click on “Add Site.” Cloudflare will then proceed to scan your domain’s DNS records.
3. Review your DNS records: After scanning, Cloudflare will display a list of your existing DNS records. Review these records carefully and make sure they match your current website configuration. You may need to consult your web host or domain registrar if you’re unsure about any of the settings.
4. Configure your CDN settings: Next, you’ll be asked to choose a plan (free or paid) and configure various CDN settings, such as caching, SSL/TLS, and performance optimizations. Make sure to enable the features that are most relevant to your site’s needs.
5. Update your nameservers: Finally, Cloudflare will provide you with new nameserver settings. Update your domain’s nameservers to the ones provided by Cloudflare. This change may take up to 24 hours to fully propagate.
Once you’ve completed these steps, your website should be using Cloudflare CDN, and all of your site’s assets (images, stylesheets, scripts, etc.) will be served through Cloudflare’s global network of servers. To get your Cloudflare CDN URL for a particular resource, simply prepend your domain name with ‘cdn’ (e.g., cdn.yourdomain.com/your-image-file.jpg) or use your website’s existing URL structure and check if the resource is being served by the CDN.
Keep in mind that as a content delivery network, Cloudflare automatically optimizes the delivery of your content, so there isn’t a specific “CDN URL” like some other services. Instead, your website’s URLs will remain the same, but the content will be distributed through Cloudflare’s global network for faster and more efficient delivery.
What is the difference between URL and CDN URL?
In the context of a content delivery network (CDN), it is essential to understand the difference between a URL and a CDN URL.
A URL (Uniform Resource Locator) is the web address of a specific resource on the internet, such as a webpage or an image. It typically consists of a protocol (e.g., HTTP, HTTPS), domain name, and a path to the resource.
On the other hand, a CDN URL is the web address that points to a resource hosted on a content delivery network. CDNs are distributed networks of servers designed to cache and deliver content, such as websites, images, videos, and other files, to users more efficiently and quickly. This is achieved by serving the requested content from the server that is geographically closest to the user.
The main differences between a regular URL and a CDN URL are:
1. Resource location: A regular URL points to a single server where the resource is hosted, while a CDN URL points to multiple servers distributed across various locations.
2. Performance: Resources accessed through a CDN URL are served faster due to the reduced latency resulting from proximity to the user. This is not necessarily the case with regular URLs.
3. Scalability: CDNs can handle a higher volume of traffic and requests without compromising performance, as they distribute the load across their network of servers. Regular URLs may experience slowdowns or crashes under heavy traffic.
In summary, a CDN URL is used to provide faster and more reliable access to resources hosted on a content delivery network, while a URL is a more general term referring to any web address directing users to a specific online resource.
How can I efficiently retrieve my site’s CDN URL for seamless integration with a Content Delivery Network?
In order to efficiently retrieve your site’s CDN URL for seamless integration with a Content Delivery Network (CDN), follow these steps:
1. Choose a CDN provider: Research and select a suitable CDN provider that best fits your website’s needs in terms of speed, reliability, and cost-efficiency.
2. Create an account: Sign up for an account with your chosen CDN provider, and set up your website’s information within their platform.
3. Configure your website: Follow the instructions provided by your CDN provider to configure your website for CDN integration. This may involve updating your website’s code, DNS settings, or other configurations.
4. Retrieve the CDN URL: Once you have properly configured your website for CDN integration, your CDN provider should generate a unique CDN URL for your site. This URL will point to the CDN’s servers, which will serve your site’s static content such as images, CSS files, and JavaScript files.
5. Replace your site’s static URLs: Update your website’s code to replace any static URLs with the newly generated CDN URL. You can use relative paths, absolute paths, or a combination of both, as long as they point to the correct CDN URL.
6. Test your site’s functionality: Thoroughly test your website after implementing the CDN to ensure that all content is being delivered correctly and efficiently.
By following these steps, you can seamlessly integrate your website with a Content Delivery Network, improving its performance, speed, and overall user experience.
What steps should I follow to successfully obtain a CDN URL for optimal content distribution in a Content Delivery Network?
To successfully obtain a CDN URL for optimal content distribution in a Content Delivery Network, follow these steps:
1. Choose a CDN provider: Research and select a reliable CDN provider that suits your needs and budget. Popular CDN providers include Cloudflare, Amazon CloudFront, and Akamai.
2. Sign up for an account: Create an account with your chosen CDN provider and provide the necessary information, such as website URL and contact details.
3. Configure your CDN: Set up your CDN by configuring the required settings, such as cache rules, security features, and geographic locations of edge servers.
4. Create a CDN zone or distribution: After configuring your CDN, create a new CDN distribution or zone, which is a unique URL that points to your content on the CDN network. This URL is typically generated by the CDN provider.
5. Upload your content: Upload your files, such as images, videos, and other static assets, to the CDN. This can usually be done through the provider’s dashboard, API, or using popular file transfer methods like FTP or SFTP.
6. Integrate the CDN with your website: Replace existing URLs of your static assets with the new CDN URLs. For example, if you have an image with the URL “https://www.example.com/images/my-image.jpg”, replace it with the CDN URL “https://cdn.example.com/images/my-image.jpg”.
7. Test and optimize: Test your website’s performance and make any necessary optimizations. Use tools such as Google PageSpeed Insights or WebPageTest to ensure that your content is being delivered efficiently through the CDN.
8. Monitor and maintain: Continuously monitor the performance of your CDN and make adjustments as necessary. Keep track of your CDN usage and costs to ensure you are getting the most from your investment.
By following these steps, you can successfully obtain a CDN URL for optimal content distribution in a Content Delivery Network.
Can you provide guidance on the process of acquiring a CDN URL to ensure effective content delivery using a Content Delivery Network?
Acquiring a CDN (Content Delivery Network) URL is an essential step to ensure effective content delivery and optimization of your website performance. Below is a step-by-step guide on the process of obtaining a CDN URL:
1. Choose a CDN provider: The first step is to evaluate and select a suitable CDN provider based on your requirements, budget, and target audience location. Various CDN providers offer different features, pricing, and level of service.
2. Create an account: Once you’ve chosen a CDN provider, sign up for an account. Some CDN providers also offer free trials for evaluation before making any financial commitment.
3. Configure your origin server: Before integrating with a CDN, make sure your origin server (where your content is initially hosted) is properly configured. This may involve setting up proper caching headers, cache-control policies, and optimizing your content.
4. Set up the CDN: After your origin server is ready, configure your CDN by creating a new distribution or resource. Provide the required information, such as your origin server’s URL, caching settings, and security options (e.g., SSL/TLS).
5. Obtain your CDN URL: Once your CDN configuration is completed, the CDN provider will generate a unique CDN URL. This URL will be used to access your content through the Content Delivery Network, instead of directly requesting it from your origin server.
6. Update your website: Replace the URLs of your static assets (images, CSS, JavaScript files, etc.) with the newly acquired CDN URL. This can be done manually or using plugins/tools provided by some CDN providers for popular content management systems (like WordPress).
7. Test and verify: After updating your website, test the loading speed and verify that the CDN is working correctly. Check if the content is being served from the appropriate CDN edge server, which should be geographically closer to your users for better performance.
By following these steps, you can successfully acquire a CDN URL and ensure effective content delivery using a Content Delivery Network. Remember to monitor and fine-tune your CDN settings regularly for optimal performance and user experience.