
Welcome to our blog! Today, we’re diving into the topic of how to download bank statements to QuickBooks. This step-by-step guide will demystify the process and make your financial tracking smoother. Stay tuned for savvy solutions and time-saving strategies.
Step-by-Step Guide: How to Download and Import Bank Statements into QuickBooks
Before downloading and importing bank statements into QuickBooks, it is important to know that you should have your online banking enabled and you should be using one of the supported browsers: Internet Explorer 10 or higher, Firefox, Chrome or Safari 6.1 or higher.
Step 1: Download Bank Statements
The first step is to download your bank statement. Log into your bank’s website, navigate to the section where you can view your statements and select the period for which you want to download the statement. The statement should be downloaded in .QBO format as this format is supported by QuickBooks.
Step 2: Open QuickBooks
Now open your QuickBooks software. Ensure you have the latest version, as older versions may not support .QBO files.
Step 3: Import Bank Statements
In QuickBooks, navigate to the ‘File’ menu at the top and choose ‘Utilities’ > ‘Import’ > ‘Web Connect Files’. A browse window will pop up for you to select the .QBO file that you downloaded from your bank’s website.
Step 4: Map accounts
Once you have selected the file to import, QuickBooks will ask you to link the bank account to a QuickBooks account. If you have not set up this account yet, you can do so by selecting “Create a new account.”
Step 5: Review imported transactions
After mapping accounts, your transactions will be imported into the Banking Feeds Center in QuickBooks. Here, you can review, categorize, and accept all the imported transactions.
Note: Always make sure to take a backup of your QuickBooks data before importing any data to ensure your financial data is secure.
And that’s it! You’ve successfully downloaded and imported your bank statement into QuickBooks. Following these steps will ensure an organized and accurate representation of your financial data within the software.
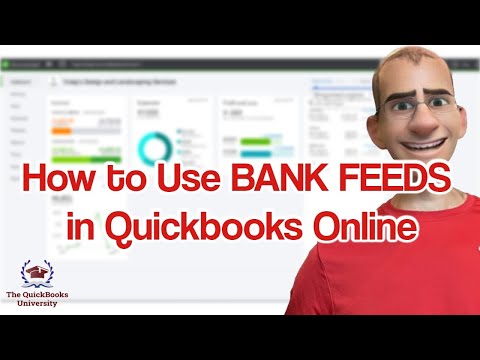
How to Use Bank Feeds in Quickbooks Online
QuickBooks Online 2-hour Tutorial: Setup, Chart of Accounts, and Banking

How To Import Transactions Connection To Your Bank With QuickBooks Online

How can I import my bank statements into QuickBooks?
Importing your bank statements into QuickBooks can greatly simplify the process of managing your business finances. Here are the steps you can follow:
1. Open your QuickBooks software: The first step is to open your QuickBooks software. Make sure you have an Internet connection as you’ll need it to connect to your bank.
2. Go to the ‘Banking’ Tab: On the left-hand side of the QuickBooks dashboard, you’ll find various options. Click on the ‘Banking’ tab to proceed with the statement importation.
3. Connect your Bank Account: Upon clicking the ‘Banking’ tab, it will take you to a window where you can connect your bank account. Enter your bank’s name in the search bar and then input the necessary credentials to link your bank account to QuickBooks.
4. Locate and Download your Bank Statements: Login into your online banking portal to download your bank statements. Most banks allow customers to download statements in .CSV, .QBO, or .OFX formats, all of which QuickBooks supports.
5. Upload the Statements: After successfully downloading your bank statement, go back to QuickBooks, in the ‘Banking’ tab, select the ‘File upload’ option. It will prompt you to upload the document from your computer. Navigate to the location of your downloaded bank statement and click ‘Open’.
6. Review the Transactions: After uploading your bank statement, QuickBooks will automatically input these transactions. However, it is good practice to review the transactions to ensure that everything is accurate.
7. Categorize and Accept the Transactions: QuickBooks will try to categorize the transactions based on common ones already in your system. If everything is correctly categorized, click on ‘Accept’.
Now, your bank statements have been successfully imported into QuickBooks! This procedure makes it easier to keep track of income and expenses, minimizing errors, and enhancing overall efficiency.
How can I import a PDF bank statement into QuickBooks?
Importing PDF bank statements into QuickBooks can seem complex at first, but it becomes hassle-free once you understand the process. Here is a step-by-step guide to do that.
Step 1: Convert PDF to .CSV
QuickBooks cannot directly import PDF files, so you have to convert your PDF bank statement to CSV format first. You can use various PDF to CSV converters available online or opt for a dedicated software like Adobe Acrobat DC or Able2Extract Professional.
Step 2: Import CSV to QuickBooks
Once you have your CSV file ready:
1. Open QuickBooks, go to the ‘File’ menu and select ‘Utilities’
2. From the drop-down list, choose ‘Import‘ and then select ‘CSV/Excel‘
3. A dialog box will pop up. Click ‘Browse‘, select the CSV file you just converted and click ‘Open‘
4. Next, match the QuickBooks Banking fields with the columns in your CSV file and hit ‘Continue‘
5. Review everything and finally press ‘Import‘
6. Your PDF bank statement data will now be enlisted in your QuickBooks account.
Please note that depending on the version of QuickBooks you are using, options and steps might slightly vary. But the overall import process remains similar. Always remember to backup your files before initiating any import process.
What is the method to load bank statements into QuickBooks desktop?
The process of loading bank statements into QuickBooks Desktop involves several steps:
1. Prepare your Bank Statement: Before you begin, make sure your bank statement is in a .CSV, .QBO, .QFX, or .OFX file format which are compatible with QuickBooks.
2. Open QuickBooks: Start QuickBooks Desktop.
3. Go to the “File” menu, select “Utilities” then “Import” and finally choose “Web Connect Files”. This initiates the process for upload.
4. Select the File: The system will ask you to navigate to where you have saved the downloaded bank statement file. Select the file and click “Open”.
5. Link your Bank Account: A dialog box called “Select Bank Account” will appear. Here you have the option to either link to an existing account or create a new one. Make sure the account links to the correct existing account in QuickBooks.
6. Complete Import: Click “Continue” and after the import is successful, click “OK”.
7. Review Transactions: Finally, review the transactions to ensure they’ve been imported accurately. Go to the “Banking” menu, select “Bank Feeds”, then “Bank Feeds Center”.
Remember, it’s important to always back up your QuickBooks Company File before importing your bank statement to avoid loss of data.
Does QuickBooks Online have an automatic feature for downloading bank transactions?
Yes, QuickBooks Online does have a feature that allows the automatic downloading of bank transactions. This is one of its most useful features, as it enables businesses to save significant amounts of time in manual data entry.
To use this feature, you need to connect your bank account to QuickBooks Online. Once connected, the software will automatically download your transactions. Please note that QuickBooks can only download transactions that your bank has cleared. It usually takes 24-48 hours for transactions to appear in QuickBooks after they are cleared by your bank.
Automatic transaction downloading helps keep your financial records accurate and up to date, thereby aiding in better financial management. You can even categorize these transactions after they’re downloaded, which simplifies tax preparation and expense tracking.
Remember, each bank has different procedures for connecting an account to QuickBooks Online, so it’s advisable to check with your bank if you encounter any issues.
“What are the steps to download bank statements into QuickBooks?”
Downloading bank statements into QuickBooks can be a simple process if done correctly. Here’s a step-by-step guide:
Step 1: Log into your Online Banking account
Before you can download your bank statements into QuickBooks, you must first have the bank statements saved on your computer. Access your online banking and download the necessary statements, ensuring they are in a compatible format such as .CSV, .QBO, .QFX, or .OFX.
Step 2: Open QuickBooks
Launch the QuickBooks application on your computer. If you haven’t already done so, backup your company file to protect your data.
Step 3: Go to the banking menu
Once QuickBooks is open, navigate to the “Banking” tab located at the top of the homepage.
Step 4: Choose the “Bank Feeds”
From the dropdown menu, click on the “Bank Feeds” option and then select “Set up Bank Feed for an Account”.
Step 5: Locate your bank
Search for your bank by typing it into the search bar. Click on your bank’s name when it populates below the search bar.
Step 6: Enter your Bank details
You may need to input your username and password for your online banking. This allows QuickBooks to connect to your bank’s server and download transactions.
Step 7: Link the correct Bank account
In the “Link your Accounts” page, use the drop-down menu to link your Bank Account to the correct existing account, then click “Connect”.
Step 8: Import the downloaded Bank statement
Go back to the “Banking” tab and select the “File Upload” option. From here, browse your files and select the bank statement file you previously downloaded.
Step 9: Match and categorize transactions
Once uploaded, QuickBooks will display a list of transactions, match them with what it finds in its records, and allow you to add or ignore each one.
Remember, the downloading process can vary slightly depending on your bank and the version of QuickBooks you’re using.
“How to resolve issues when downloading bank statements into QuickBooks?”
Downloading bank statements into QuickBooks is a crucial step for many businesses in managing their finances. However, sometimes issues can arise. Here are the steps to resolve common problems:
1. Make sure you’re using the most recent version of QuickBooks
Outdated software can often cause issues with downloading and importing bank statements.
2. Check your internet connection
A weak or unstable internet connection can interrupt the download process. If possible, try to use a wired connection instead of Wi-Fi to ensure stability.
3. Confirm your bank’s services
Not all banks support direct connections to QuickBooks. Confirm that your bank offers this service. If not, you may need to manually import your bank statements.
4. Verify your login credentials
Incorrect login credentials can prevent you from downloading bank statements. Be sure to double-check your username and password.
5. Check for QuickBooks updates
If you’re sure that your bank supports direct connections and your internet connection is stable, it may be a problem with QuickBooks itself. Ensure you have the latest updates installed.
6. Manually upload bank statements
If all else fails, you can always upload your bank statements manually. Go to the “File” menu, select “Utilities,” then select “Import,” and choose “Web Connect Files”. Then follow the prompts to upload your file.
7. Contact QuickBooks Support
Sometimes, the issue could be on their end or too complex to be solved with general troubleshooting. In such cases, don’t hesitate to contact QuickBooks Support for further assistance.
By following these steps, you should be able to resolve any issues you encounter when downloading bank statements into QuickBooks.
“Which file formats are supported when importing bank statements to QuickBooks?”
QuickBooks supports several file formats when importing bank statements. The most commonly used are:
1. Comma-Separated Values (CSV): CSV files can be created from Excel and are generally used for importing and exporting large data sets that do not require special formatting or formulas.
2. Quicken (QFX): QFX is a proprietary file format of Quicken, a personal finance management software. QuickBooks uses this format to directly import data from your bank’s website.
3. QuickBooks Online (QBO): Similar to QFX, QBO is another proprietary format used by QuickBooks. However, it’s specific to the online version of the software.
4. Microsoft Money (OFX): Microsoft Money is another personal finance management software like Quicken. Its OFX file format can also be used to import data into QuickBooks.
Remember, your bank needs to support these formats in order for you to download your statements in any of them. Not all banks will provide all formats, so you need to check with your financial institution for what’s available to you.
“How to match and categorize download bank transactions in Quickbooks?”
Matching and categorizing your bank transactions with QuickBooks is a crucial aspect of managing your financial books. Here’s a step-by-step guide to help you along the way:
1. Connect your bank account to QuickBooks.
Go to the ‘Banking’ menu on your QuickBooks software and add your bank account. If your bank isn’t listed, click on “Other Bank” and input your bank’s URL.
2. Download transactions from your bank.
Once your bank account is linked, your transactions will automatically download into QuickBooks. For manual updates, select “Update” in the Banking menu.
3. Categorize your transactions.
Under the “For Review” tab, you’ll find your most recent transactions. Click on each transaction to categorize them based on what they represent in your business (e.g., utilities, payroll, etc.).
4. Match transactions.
If a given transaction corresponds to a record already in QuickBooks, the program will suggest ‘matches’. Verify these suggestions for accuracy. If a match is correct, simply click “Match”.
5. Batch actions.
To save time, you can categorize or accept multiple transactions at once under “Batch actions”.
6. Reconcile your accounts.
After categorizing and matching your transactions, reconcile your accounts. Go to the “Reconcile” tab in the “Accounting” menu, select your account and the statement date, then check that the statement ending balance matches your bank statement.
By following these steps, you’ll establish an efficient and accurate system for managing your business finances within QuickBooks.
“Can I download bank statements from any bank to QuickBooks?”
Yes, you can indeed download bank statements from any bank to QuickBooks. Almost all banks allow for this functionality. Here are the steps on how you can do it:
1. Open your QuickBooks software and click on the “Banking” tab.
2. Choose the “Banking” option again from the drop-down menu.
3. Select the “Add Account” button in the top-right corner of the screen.
4. Enter your bank’s name in the search bar and select it from the list of options that appear.
5. Input your bank login credentials and click “Continue.”
6. Follow the prompts to link your bank account to QuickBooks.
7. Once linked, click on the “Update” button in the top-right corner of the screen to download your bank statements into QuickBooks.
Please note some banks may have slightly different steps or requirements and the availability of certain features may vary by country.
“How does QuickBooks handle duplicate transactions when downloading bank statements?”
QuickBooks has a sophisticated feature to manage duplicate transactions when downloading bank statements. It uses a unique transaction matching algorithm that helps prevent the same transaction from being entered more than once.
When you download transactions from your bank, QuickBooks checks if it’s already recorded in your register. The software looks for matches based on several factors including the transaction amount, date, and payee. If QuickBooks finds an exact match, it assumes the downloaded transaction is already recorded and doesn’t enter it again.
However, if there are slight differences like a variation in the date or transaction amount, QuickBooks adds it as a new transaction. In such cases, where duplicates may occur, you’re given a chance to review and manually match these transactions. This ensures that no duplicate entries are made in your account register.
It’s crucial to review these downloaded transactions regularly in the “For Review” tab in the banking page of QuickBooks. If any duplicates are found, you can easily exclude and delete them.
Remember to always back up your QuickBooks company file before downloading transactions. This way, if duplicates are created, you have a safety net to fall back on.
“What precautions should be taken when downloading bank statements for QuickBooks?”
When downloading bank statements for QuickBooks, several precautions should be taken.
1. Use a Secure Network: Always make sure you’re connected to a secure, reliable Wi-Fi network. Public networks are generally less secure and make it easier for hackers to intercept your personal data.
2. Check the URL: Before you download any information or enter any personal data, verify that you’re on the correct website. The URL should begin with ‘https://’ – the ‘s’ stands for secure.
3. Install Anti-virus Software: Have a trusted, up-to-date anti-virus software installed on your system. This aids in detecting and eliminating potential threats.
4. Update Your Software Regularly: QuickBooks, like any other software, needs regular updates for better functionality and security. An older version could have security flaws that could expose your personal information.
5. Double Check Bank Statement Files: Be cautious when downloading the bank statement files. Make sure they come from a reliable source and are in the correct format (.qbo) before importing to QuickBooks.
6. Regularly Monitor Your Account: Regularly reviewing your account activities can help you detect any suspicious or unauthorized activity early.
Remember, data security relies not only on the software but also on user behavior.


