
Introduction: The Conundrum of the Infamous Puzzle
Picture this for a moment: you’re a Mathematician. A statistics whiz. You’ve been toying with complex problems and variables since you could count, and you love it. However, one fine day, you come across an intriguing puzzle that leaves you stumped. It’s not a complex theorem or an intricate equation. It’s something relatively simple but surprisingly elusive. It’s the question: “How to download a scanned document?”
Just like any good equation, we’re going to break this problem down and offer a comprehensive solution using our software engineering expertise.
Understanding the Basics
Before delving deeper, let’s first understand the essence of what downloading a scanned document is. Fundamentally, when we talk about downloading a scanned document, we are referring to the process of accessing and transferring data from a remote system, often a server, to your local system.
The Process: How to Download a Scanned Document
Assuming the document has already been scanned and is available on a server or a cloud space, here is the process you’d follow:
1. Locate the Document: This involves accessing the server where your scanned document is stored.
2. Initiate the Download: Once located, you can download the document by typically clicking on a button or link that prompts the document to be downloaded.
3. Save the Document: After initiating the download, a dialog box will usually open asking you where you’d like to save the document on your local system. Choose a location and save the file.
Let’s delve deeper into each step:
Locating the Document
To locate the document, you need to know where it’s stored. This could be a File Transfer Protocol (FTP) server, a web server, a cloud storage service like Dropbox or Google Drive, or even an email attachment.
Initiating the Download
Downloading the document is typically done by clicking on a specific button, link, or icon associated with the file. This sends a request to the server that hosts the file, instructing it to transfer a copy of the data to your system.
Saving the Document
Once the transfer process begins, you will usually be prompted to select a location on your local system to save the document. Ensure you choose a location where the document is easily retrievable for future use.
Handling Different Formats and Software
Scanned documents often come in various formats such as JPEG, PNG, or the universally accepted PDF format. Depending on the format, different software may be needed to open and view the document.
For example, Adobe Acrobat Reader is widely used to open PDF files, while JPEG and PNG files can be viewed using built-in applications like Microsoft Photos.
Advanced Tips for Downloading a Scanned Document
Now that we’ve covered the basics, let’s go beyond and explore some advanced techniques:
1. Bulk Downloads: For downloading multiple files at once, consider using a download manager. This software can increase download speed, pause and resume downloads, and handle the download of multiple files concurrently.
2. Secure Downloading: Concerned about security? Make sure the server uses HTTPS for secure transfers. Look for the padlock symbol in your web browser’s address bar.
3. Checking File Integrity: After downloading, you might want to check the integrity of your file, especially for larger downloads. This can be done using built-in tools in your operating system that calculate the file’s checksum.
Final Remarks
So, there you have it, mathematicians and statisticians! We’ve unraveled the mystery surrounding how to download a scanned document. Remember, just like with complex mathematical problems, the key is understanding the basics and then applying that knowledge to solve more advanced issues.
As a final exercise, why not put these lessons into action? Locate a scanned document and try downloading it following the steps and tips we’ve outlined. As always, keep exploring, keep learning, and remember that every problem, no matter how daunting, has a solution.
How To Download PDF instead of opening in browser Chrome | How To Download PDF File Without Opening

How to edit document and certificate in Photoshop || Edit Your Certificate

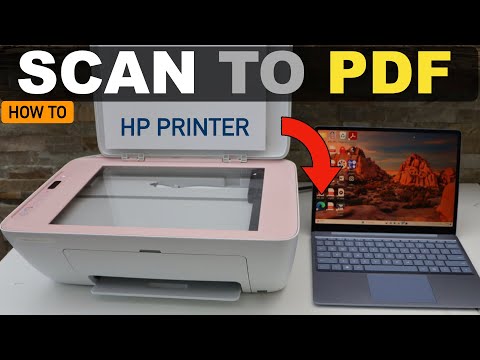
HP Printer Scan Document To PDF !
How do I download a scan document to my computer?
Downloading a scanned document to your computer generally follow the same steps, regardless of the brand or type of scanner you’re using. Here’s a simple guide:
1. Make Sure Your Scanner is Connected: Before you start, ensure that your scanner is properly connected to your computer. This could be through a USB cable, wireless network, or directly into your computer.
2. Open The Scanning Software: Each scanner comes with its own scanning software. You need to open this – it might be called something like HP Scan, Epson Scan, Canon My Image Garden, etc.
3. Place the Document in The Scanner: Open the lid of your scanner and place the document that you want to scan onto the glass surface. Ensure the document is positioned correctly.
4. Preview Your Scan: Once your document is properly placed, click “Preview” or “Scan” on your scanning software. This will give you a preliminary view of how the scanned document will look.
5. Adjust Settings: If necessary, adjust the scan settings. You can usually change the resolution, file type, and destination folder within the scanning software.
6. Scan the Document: Once your settings are correct, hit the “Scan” button. The scanner should begin working, and your computer will download the scanned document.
7. Save the Document: After scanning, remember to save the document in your desired location on your computer. Some scanning software will do this automatically, while others will require you to manually save the file.
These instructions should apply to most scanner models, but if you have difficulty, consult the user manual of your device or contact customer support.
How do I scan a document and save it as a PDF?
Scanning a document and saving it as a PDF can be done in a few simple steps. This process may vary slightly depending on the printer/scanner and software you’re using. Here are the basic steps:
STEP 1: Place your document in the scanner and make sure it’s correctly positioned.
STEP 2: Open the scanning software on your computer. If you’re using Windows, this might be Windows Fax and Scan. If you’re on a Mac, you can use the pre-installed Image Capture app.
STEP 3: Within the software, select the option to scan a new document. This will usually open a new window with various settings.
STEP 4: Adjust your preferences for the scanned document. You’ll likely have options to change the color, resolution, and other settings. For a typical document, you might select “Black and White” or “Document” and a lower resolution to save file space.
STEP 5: Choose the option to save as a PDF. If you don’t see this option, try looking in the advanced settings or preferences.
STEP 6: Click the button to start the scan. The scanner should begin processing the document, and the software on your computer should show a progress indicator.
STEP 7: Once the scan is complete, you should have the option to preview the document. Make sure everything looks correct. If necessary, adjust your settings and rescan the document.
STEP 8: Save the scanned document to your desired location. Ensure you’ve selected the PDF file type before clicking “Save”.
And there you go! You should now have a digitized version of your document in PDF format.
How do I retrieve my scanned documents?
Retrieving your scanned documents largely depends on the software you are using. However, here is a generic guide that may be applicable across most scanner software:
1. Open the scanner software: First off, you have to open the specific scanner software that you used to scan the document. This could be anything from Adobe Acrobat to the default scanner app on your computer.
2. Go to the output folder: Each scanner software will have an output folder where it automatically saves all the scanned documents. Locate this folder within the software settings or preferences.
3. Search for your document: Depending upon when you scanned the document, you may need to sift through the files in the output folder. The documents are generally saved with the date and time of the scan, so you can use that as a reference point to locate your document.
4. Double click to open: Once you’ve found your document, you can open it by double-clicking on the file.
Remember, different software may have slightly different steps, but the basic process remains largely the same. If you cannot locate your files in the assigned output folder, check your software settings to ensure the output path has not been changed.
How do I scan and download a document on my iPhone?
Scanning and downloading a document on your iPhone can be done easily through the built-in Notes app, or with third-party applications like Adobe Scan or CamScanner. Below is a step-by-step guide using the native Notes app:
1. Open the Notes app on your iPhone.
2. Create a new note by tapping the icon in the bottom right corner.
3. In the note, tap the camera icon and select Scan Documents.
4. Position the document in view of the camera. The Notes app will automatically capture the scan, but you can also manually capture it by pressing the shutter button.
5. After the scan has been captured, you can adjust the corners of the document by dragging the points to fit the document correctly. Tap Keep Scan once you’re satisfied with the cropping.
6. If you need to add more scans to the document, repeat the process. When you’ve scanned all the pages, select Save.
The scanned document will be saved in the specific note within the Notes app. You can share or move this file to other applications for further actions.
For downloading a document, you can typically do that through a web browser or an applicable app. Here’s a common way to do it:
1. Locate the document in your browser or app and tap on it.
2. Select Download or Save to Files.
3. Choose the location where you’d like to save it and confirm.
Remember, the exact steps might slightly vary depending on the specific software you’re using.
“What are the steps to download a scanned document on a {topic} software?”
Sure, here you go:
Downloading a scanned document using a certain software involves the following steps:
1. Open the software: The first step to downloading a scanned document is to open the {topic} software on your computer.
2. Navigate to the scan section: Once the software is open, navigate to the section that allows you to scan documents. This is usually found under the ‘File’ or ‘Tools’ tab in most software applications.
3. Scan your document: Place the document you wish to scan in your scanner and click on the ‘Scan’ button in the {topic} software.
4. Save your scanned document: After scanning the document, it’s time to save it onto your computer. Click on ‘Save’ or ‘Download’ and choose a location where you want the file to be stored.
5. Check your document: Finally, navigate to the location where you saved the document and open it to ensure it has been properly scanned and downloaded.
Remember to always save your work frequently to prevent any loss of data.
“How to quickly download a scanned document in the {topic} system?”
Downloading a scanned document in a software system usually involves a few simple steps. Here’s a quick guide:
1. Login to the Software System: Enter your username and password required to access the system.
2. Navigate to the Document Section: Once you are logged in, find the document section in the menu. This is usually found in the main dashboard or under a specific tab like ‘Files’ or ‘Documents’.
3. Search for your Scanned Document: Use any search features available to locate your scanned document. This could be a search bar where you type in the document name, or a filter system where you can sort documents by date, name, or type.
4. Select Your Document: Once you’ve located your desired document, click on it. This action might open a preview of the document.
5. Download the Document: Look for a ‘Download’ button, usually represented by an arrow pointing downwards or the word ‘Download’. Clicking this should start the process of downloading your scanned document to your device.
6. Check your Downloads Folder: Depending on your settings, the document will typically be saved in your ‘Downloads’ folder. Make sure to move it to a more permanent location if necessary.
Remember, the exact steps may vary depending on the specific software system you’re using. Always refer to the system’s help or support resources if you run into any issues.
“What are some common problems faced while downloading scanned documents and their solutions in {topic}?”
Downloading scanned documents can be a hassle because of various issues that might occur. Here are some common problems and their solutions:
1. Slow Download Speed:
This is not necessarily an issue with the software but could be due to a slow internet connection. A simple solution would be to try downloading the document at a time when the internet usage is low or upgrading your internet plan.
2. File Corruption:
This usually happens if the download process was interrupted, leading to incomplete files. You could try downloading the document again. If the problem persists, it could be that the original file itself is corrupted.
3. Insufficient Storage Space:
If your device doesn’t have enough storage space, you won’t be able to download the document. Make sure to remove unnecessary files from your device to create space for the document.
4. Compatibility Issues:
The document might fail to download if the software isn’t compatible with the file format of the scanned document. Make sure the software you’re using supports the type of file you’re trying to download.
5. Outdated Software:
Sometimes, outdated software might cause problems in downloading scanned documents. Always ensure your software is up-to-date.
6. Server Problems:
If a lot of people are trying to download the same file from the server, it can cause the server to being overloaded and slow down the download speed. If possible, try to download the file at different times.
7. Security Settings:
Certain security settings on your computer like firewall and antivirus software can block downloads. You might have to adjust these settings to allow the download.
Remember it’s always important to have a good antivirus program installed on your computer when downloading files from the internet to protect your computer from potential threats.
“What precautions should one take while downloading a scanned document with {topic} software?”
When downloading a scanned document using {topic} software, it’s important to follow certain precautions to ensure the security of your computer and the integrity of the file. These precautions are common for any types of files downloaded from the internet, not only for scanned documents.
1. Source credibility: Always download scanned documents from trusted and credible sources. Many malicious entities use bogus documents to spread harmful software.
2. Antivirus software: Ensure your antivirus software is updated and running. This will help detect if the downloaded document contains any harmful components.
3. {Topic} software updates: Make sure your {topic} software is up-to-date. Using outdated software can make your system vulnerable to security threats.
4. File type: Check the file type of the scanned document. It should typically be a .pdf or .jpg for scanned documents. Be skeptical of file types that are executable files (.exe, .bat) as these can be dangerous.
5. Scan the document: Before opening, scan the downloaded document with your antivirus software just to be safe.
6. Read reviews: Before using any {topic} software, read user reviews and ratings. This may provide insights about any potential issues or red flags other users have encountered.
Remember, while these precautions can significantly reduce risk, they cannot eliminate it entirely. Always exercise due diligence when downloading and opening any files from the internet.
“What are the system requirements to download and view a scanned document in {topic}?”
The system requirements to download and view a scanned document in software generally depend on the specific software you are using. However, there are some general requirements that most software are likely to need:
Operating System: This will largely depend on the software. However, most document viewing software support Windows 7, 8, 10, macOS X, and various Linux distributions.
Processor: Most software will require at least a 1GHz processor, although 2GHz or faster is recommended for optimal performance.
RAM: The minimum RAM requirement is typically around 1GB, but 2GB or more is usually recommended.
Storage: The amount of storage needed will depend on the size of the documents you plan on downloading and viewing. However, you should have at least 1GB of free disk space available.
Internet Connection: A stable internet connection is necessary to download documents.
Software: You’ll need compatible software to view the scanned documents. This can be an image viewer for simple formats like .jpg or .png, or a PDF reader for .pdf files.
Screen Resolution: A minimum resolution of 1024 x 768 is recommended, but higher resolutions will provide a better viewing experience.
Please note, these are generalized requirements. For specific software, you should check the company’s official website or contact their support for accurate information.


