The htaccess file is a powerful tool for developers looking to optimize their WordPress website. One common issue that can be solved through the htaccess file is increasing the max_input_time. This technical setting determines the maximum amount of time a script can spend parsing input data, like form submissions. With a few simple modifications to the htaccess file, developers can increase the max_input_time and ensure their WordPress site is running smoothly.
Boosting WordPress Performance: Increase max_input_time with htaccess file
To boost WordPress performance, increasing max_input_time with htaccess file can help solve issues related to slow loading times or timeout errors when submitting forms.
The following code can be added to the .htaccess file:
php_value max_input_time 300
This code sets the max_input_time to 300 seconds, allowing for longer processing times and preventing timeouts. However, it’s important to note that increasing this value too much could also cause performance issues.
Overall, utilizing the htaccess file can be a powerful tool for web development, allowing for easy configuration of server settings and optimization of website performance.
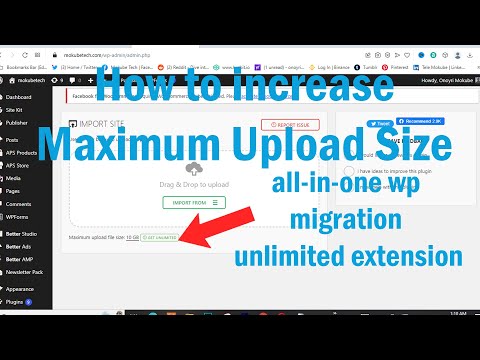
How to increase Maximum Upload Size | all-in-one wp migration unlimited extension
5 Free Wordpress Plugins to Speed Up Your Website with Caching & Image Optimization

How can I increase the Max_input_time in WordPress?
To increase the max_input_time in WordPress, you can add the following code to your htaccess file:
“`
php_value max_input_time 300
“`
This will set the max_input_time to 300 seconds (or 5 minutes). You can adjust this value to suit your needs.
It’s worth noting that some web hosts may not allow you to modify this setting via htaccess. In that case, you should contact your hosting provider for further assistance.
How can I modify the max_execution_time in WordPress?
To modify the max_execution_time in WordPress using htaccess file, follow these steps:
1. Login to your server by opening your preferred FTP client and enter your login credentials.
2. Navigate to the root directory of your WordPress website.
3. Locate and download the .htaccess file to your local machine.
4. Open the .htaccess file using a text editor.
5. Add the following line of code at the end of the file: php_value max_execution_time 300
6. Save the .htaccess file and upload it back to the root directory of your WordPress website.
7. Check if the modification was successful by viewing the PHP Info page.
That’s it! You have successfully modified the max_execution_time in WordPress using htaccess file. Remember to always make a backup of your files before making any modifications.
How can I increase the maximum execution time?
To increase the maximum execution time using the .htaccess file, you can add the following line of code:
php_value max_execution_time 300
This will set the maximum execution time to 300 seconds (5 minutes). You can adjust the value to suit your needs. Keep in mind that some web hosts may not allow you to change the maximum execution time, so check with your hosting provider before making any changes. Additionally, increasing the maximum execution time may not fix all issues with slow running scripts or processes, so it’s important to optimize your code and server settings as well.
What is the process to increase the maximum memory limit in WordPress?
To increase the maximum memory limit in WordPress using htaccess file, you need to follow these steps:
1. Connect to your website using an FTP client or use the file manager in cPanel.
2. Locate the .htaccess file in the root directory of your WordPress installation, and download a copy of it to your local computer as a backup.
3. Open the .htaccess file in a text editor.
4. Add the following code at the end of the file:
“`
php_value memory_limit 256M
“`
5. Save the changes to the file and re-upload it to your server.
With this code, you are setting the memory limit to 256 MB, which should be enough for most WordPress websites. However, you can adjust the value to your needs.
It’s important to note that not all web hosts allow you to change the memory limit using htaccess files. In that case, you’ll need to contact your web host support to ask them to make the change for you.
How can I increase max_input_time in WordPress through htaccess file?
You can increase the max_input_time in WordPress by adding the following line to your .htaccess file:
php_value max_input_time 300
This will set the maximum input time to 300 seconds (5 minutes). You can adjust the value to meet your needs. It’s important to note that not all web hosts allow you to change the max_input_time value in the .htaccess file, so you may need to contact your web host if this approach doesn’t work.
What is the recommended value for max_input_time in WordPress and how to set it via htaccess?
What is the recommended value for max_input_time in WordPress and how to set it via htaccess?
The recommended value for max_input_time in WordPress is at least 180. This is because most WordPress plugins and themes require a substantial amount of time to upload files or perform other operations.
To set the max_input_time value via .htaccess file, you can add the following code:
“`
php_value max_input_time 180
“`
This code will set the max_input_time value to 180 seconds. You can change this value to any other value that suits your needs.
Note that the above code will only work if you have mod_php installed on your server. If you are using FastCGI or CGI, you will need to use a different code snippet.
Are there any potential drawbacks of increasing max_input_time in WordPress using htaccess file?
Increasing max_input_time in WordPress using .htaccess file can potentially have drawbacks.
The max_input_time directive controls the maximum amount of time the PHP script will wait for input data such as POST, GET, and file uploads. Increasing this value can allow larger files to be uploaded or more complex forms to be submitted without timing out.
However, increasing the max_input_time value also means that PHP scripts will continue to run for a longer period, which can lead to increased server load and slower response times. This can negatively impact website performance, especially if the site is hosted on a shared server with limited resources.
Additionally, some hosting providers may have restrictions on the max_input_time value, so it’s important to check with your hosting provider before making any changes in the .htaccess file.
In summary, while increasing max_input_time can provide benefits, it is important to consider the potential drawbacks and consult with your hosting provider before making any changes to .htaccess file.
In conclusion, max_input_time is an essential setting for WordPress websites that deal with large amounts of data. Adjusting this parameter can significantly improve the performance and functionality of your website. By using the .htaccess file, you can easily increase the value of max_input_time without modifying the PHP configuration files. Implementing this tweak is a straightforward process that anyone can accomplish by following the steps outlined in this article. So if you’re experiencing slow loading times or other issues related to data processing in your WordPress site, consider increasing the max_input_time value and enjoy a faster, more efficient website.
