En this article, we’ll explore how to enable the htaccess file on Apache servers hosted on DigitalOcean. The htaccess file is a powerful tool that allows you to modify server configuration settings on a per-directory basis. With it, you can control access to certain parts of your website, create custom error pages, redirect URLs, and much more. Follow these simple steps to get started with htaccess on DigitalOcean.
Configure Apache to Enable .htaccess on DigitalOcean Server
To configure Apache to enable .htaccess on DigitalOcean Server in the context of htaccess file for web development, you need to follow these steps:
Step 1: SSH into your DigitalOcean server using the terminal or Putty.
Step 2: Open the Apache configuration file with the following command:
sudo nano /etc/apache2/apache2.conf
Step 3: Find the following section in the configuration file and change the AllowOverride setting from “None” to “All”:
Options Indexes FollowSymLinks
AllowOverride All
Require all granted
Step 4: Save the changes and exit the editor by pressing Ctrl + X, then Y, then Enter.
Step 5: Restart the Apache server with the following command:
sudo systemctl restart apache2
Step 6: Create a .htaccess file in the root directory of your website with the rules that you want to apply.
Now, Apache will allow .htaccess to override global settings and apply custom rules on a per-directory basis.
Note: Make sure to test your .htaccess rules and configurations before deploying them to production.
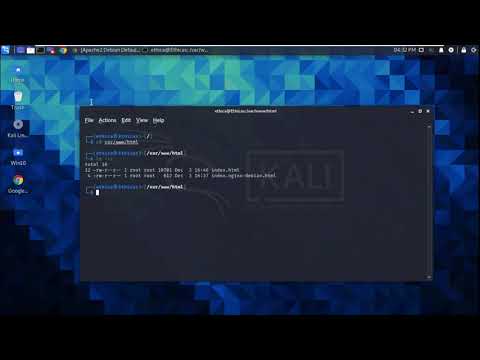
How to Access Apache Server using Kali Linux 2020.4 | Ethica
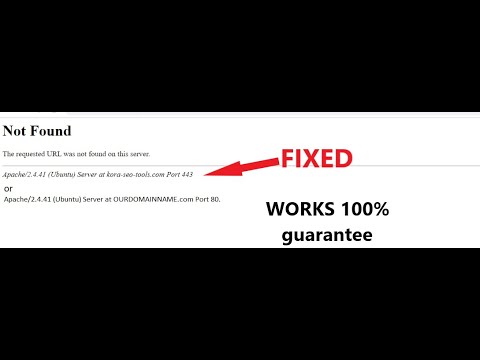
How to solve ‘The requested URL was not found on this server’ ? Problem solved !!!
What is the process for enabling htaccess in Apache configuration?
The process for enabling htaccess in Apache configuration involves several steps.
Firstly, you need to ensure that the Apache server has been configured to allow the use of htaccess files. This can be done by modifying the Apache configuration file (httpd.conf) and including the following line:
AllowOverride All
This line allows htaccess directives to override the main Apache configuration directives.
Once this line has been added, you need to ensure that the directory in which the htaccess file is located has the necessary permissions. The directory should have the Options directive set to Indexes FollowSymLinks or Indexes MultiViews FollowSymLinks.
Finally, you can create your htaccess file and include any necessary directives. These directives can be used to control access to directories or files, rewrite URLs, set environment variables, and more.
It’s important to note that not all hosting providers allow the use of htaccess files, so you should check with your provider before relying on this method for configuring your website.
What is the process of enabling URL rewrite in Apache?
Enabling URL rewrite in Apache involves the following steps:
1. Ensure that Apache’s mod_rewrite module is enabled. You can check this by running the following command in your terminal:
sudo a2enmod rewrite
2. Create an .htaccess file in the root directory of your website.
3. Open the .htaccess file and add the following code to enable URL rewriting:
RewriteEngine On
This line activates the rewriting engine in Apache.
4. Define the rewrite rules to map URLs to specific files or directories using the RewriteRule directive. For example, suppose you want to convert the URL http://example.com/articles.php?id=5 to http://example.com/articles/5/. You can achieve this using the following rule:
RewriteRule ^articles/([0-9]+)/?$ articles.php?id=$1 [NC,L]
This rule matches any URL that starts with “articles/”, followed by one or more digits, and an optional trailing slash. The “NC” flag makes the matching case-insensitive, while the “L” flag tells Apache to stop processing further rules if this one matches.
5. Test your rewrite rules by accessing your website using the rewritten URLs. If everything works as expected, you should see the content you intended to display. Otherwise, check your Apache error logs for any issues and adjust your rules accordingly.
By enabling URL rewriting, you can create cleaner, more user-friendly URLs that are easier to remember and share, and improve the overall user experience of your website.
In Apache, where can the .htaccess file be found?
The .htaccess file can be found in the root directory of your website or any subdirectory within it. It contains directives that configure Apache web server to enable/disable certain functionalities and settings for your website. This file allows you to override the global configuration settings of the Apache web server on a per-directory basis.
What is the process for enabling URL rewriting?
To enable URL rewriting using htaccess file, follow the steps below:
1. Create or open the .htaccess file in the root directory of your website.
2. Enable the RewriteEngine by adding the following code:
“`
RewriteEngine On
“`
3. Define the rules for URL rewriting using RewriteRule. This configuration varies depending on the specific needs of your website, but a simple example is:
“`
RewriteRule ^products/(.*)$ /shop.php?product=$1 [L]
“`
This rule takes any URL that begins with “products/” and captures everything after it as a parameter named “product“. It then rewrites the URL to “/shop.php?product=” followed by the captured parameter.
4. Save the .htaccess file and test the rewritten URLs to ensure they function correctly.
Note that some web hosts may not allow the use of .htaccess files or may have specific requirements for their use. It is recommended to consult your host’s documentation or support team before attempting to enable URL rewriting.
How do I enable htaccess in Apache on DigitalOcean?
To enable .htaccess on Apache server on DigitalOcean:
1. First, you need to ensure that mod_rewrite is enabled on your Apache server. You can do this by running the following command:
“`
sudo a2enmod rewrite
“`
2. Next, you need to set the appropriate permissions for your .htaccess file. Navigate to your website’s root directory by running the command:
“`
cd /var/www/your_domain
“`
3. Once in your site’s root directory, use the following command to create a new .htaccess file:
“`
sudo nano .htaccess
“`
4. In the .htaccess file, add the following code:
“`
RewriteEngine On
RewriteRule ^(.*)$ index.php/$1 [L]
“`
Note: Adjust the code according to your specific needs.
5. Save the changes to the .htaccess file by pressing Ctrl+X, followed by Y and Enter.
6. Finally, restart your Apache server by running the command:
“`
sudo systemctl restart apache2
“`
Congratulations! You have successfully enabled .htaccess on your Apache server on DigitalOcean.
What are the benefits of using htaccess files in web development?
htaccess files have several benefits in web development, such as:
1. Security: htaccess files allow developers to restrict access to certain parts of a website or directory by adding password protection, blocking specific IP addresses, or implementing SSL certificates.
2. SEO: By using htaccess files, developers can create redirects and rewrite URLs for better search engine optimization.
3. Error handling: Developers can use htaccess files to customize error pages and redirect users to an appropriate page when an error occurs.
4. Performance: Htaccess rules can be used to enable compression, caching, and minification of files, which can improve website performance.
5. Configuration: With htaccess files, developers can modify server configurations including PHP settings, file upload limits, and timeouts without requiring the server administrator’s access.
In summary, htaccess files provide developers with effective tools for enhancing website security, SEO, error handling, performance, and configuration.
Can I use htaccess to password protect a specific directory on my DigitalOcean server?
Yes, you can use the htaccess file to password protect a specific directory on your DigitalOcean server. Here are the steps to do so:
1. Create a .htpasswd file with the username and encrypted password using a tool like htpasswd generator.
2. Place the .htpasswd file outside of the directory you want to protect for security reasons.
3. Create or edit the .htaccess file inside the directory you want to protect and add the following lines:
“`
AuthType Basic
AuthName “Restricted Content”
AuthUserFile /path/to/.htpasswd
Require valid-user
“`
Replace “/path/to/.htpasswd” with the path to the .htpasswd file you created earlier.
4. Save the .htaccess file and test it by accessing the protected directory in a web browser. You should see a login prompt asking for the username and password specified in the .htpasswd file.
Note: Ensure that Apache’s mod_authn_file module is enabled and that your server configuration allows the use of .htaccess files.
In conclusion, enabling htaccess on your Apache server in DigitalOcean is a straightforward process that can greatly enhance the security and functionality of your website. By utilizing .htaccess files, you can easily configure settings such as password protection, URL redirects, and custom error pages. With the ability to fine-tune your website’s behavior, htaccess is an essential tool for any web developer. Implementing it on your DigitalOcean droplet is a wise decision that can immensely benefit your online presence.
